The new batch of plywood is BEAUTIFUL and kits are rolling off the CNC machine.
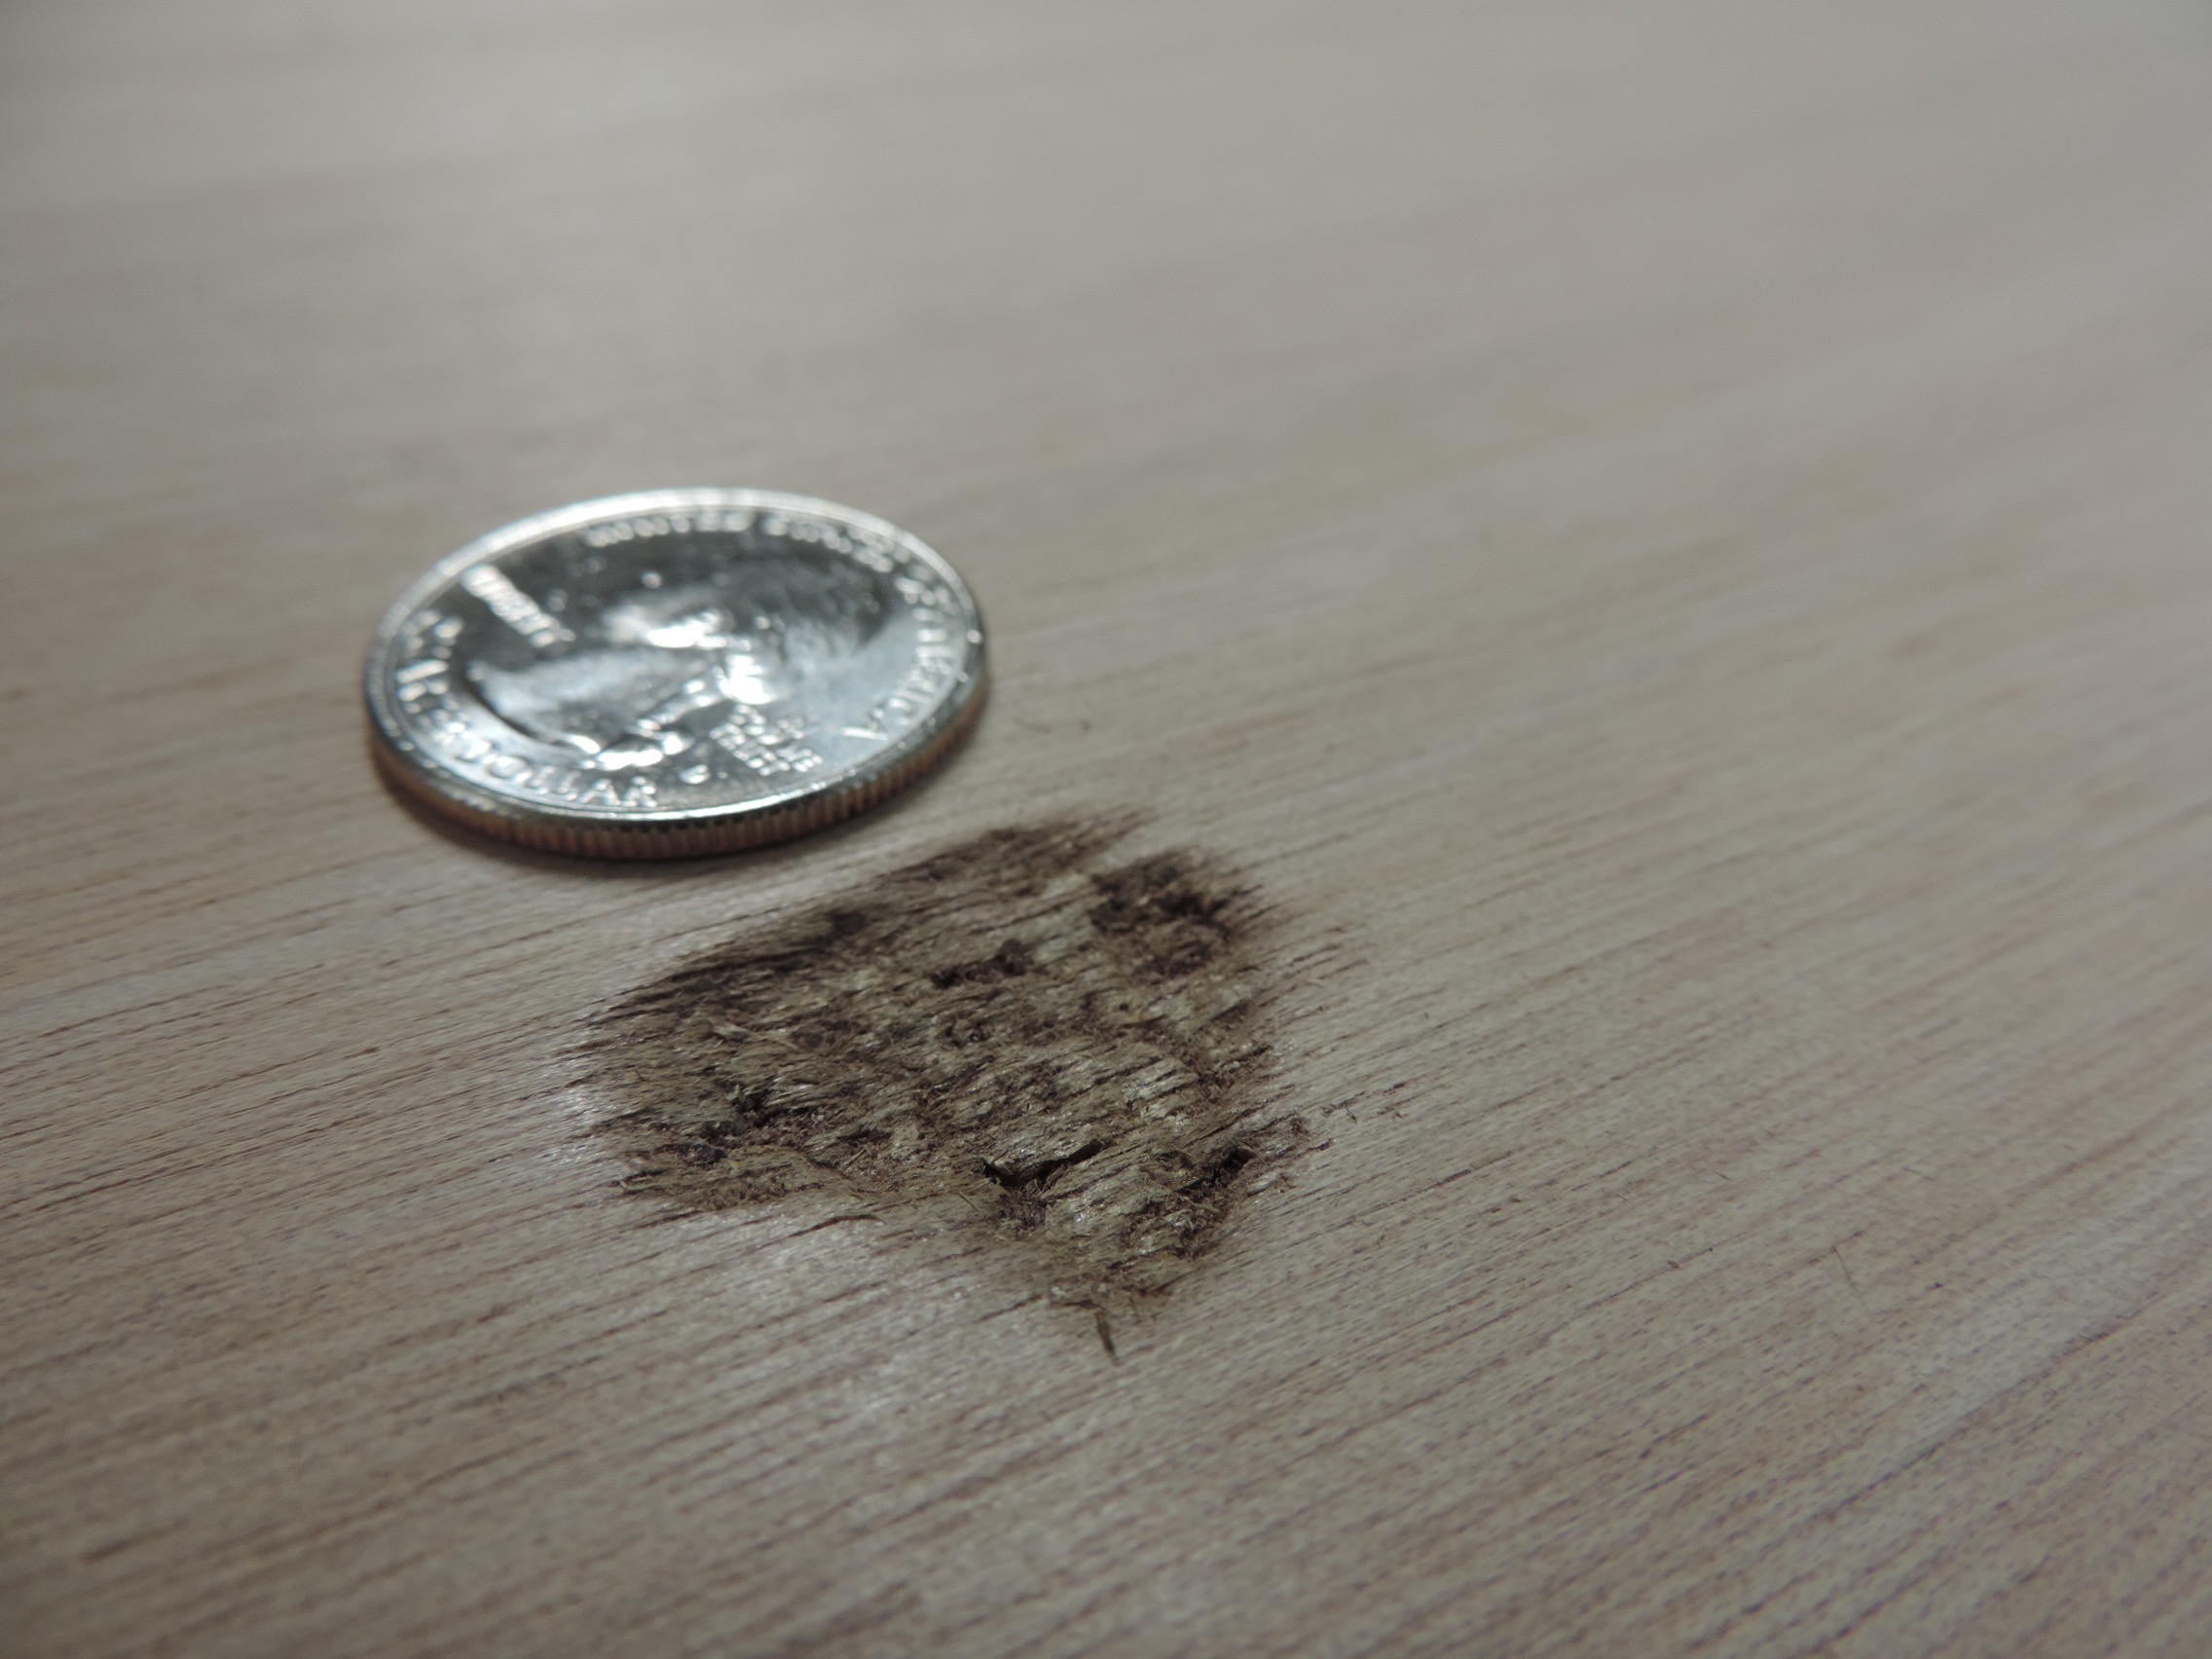
Out of this batch of PT11 ans PT Spear kits, everything is beautiful, except....one PT11 foredeck. As it is not cost efficient to cut just one new foredeck, we are offering this kit with a $50 discount. See the photo below to better understand this somewhat deep but pretty small flaw. (smaller that a quarter) Anyone want to try their hand at an inlay repair?
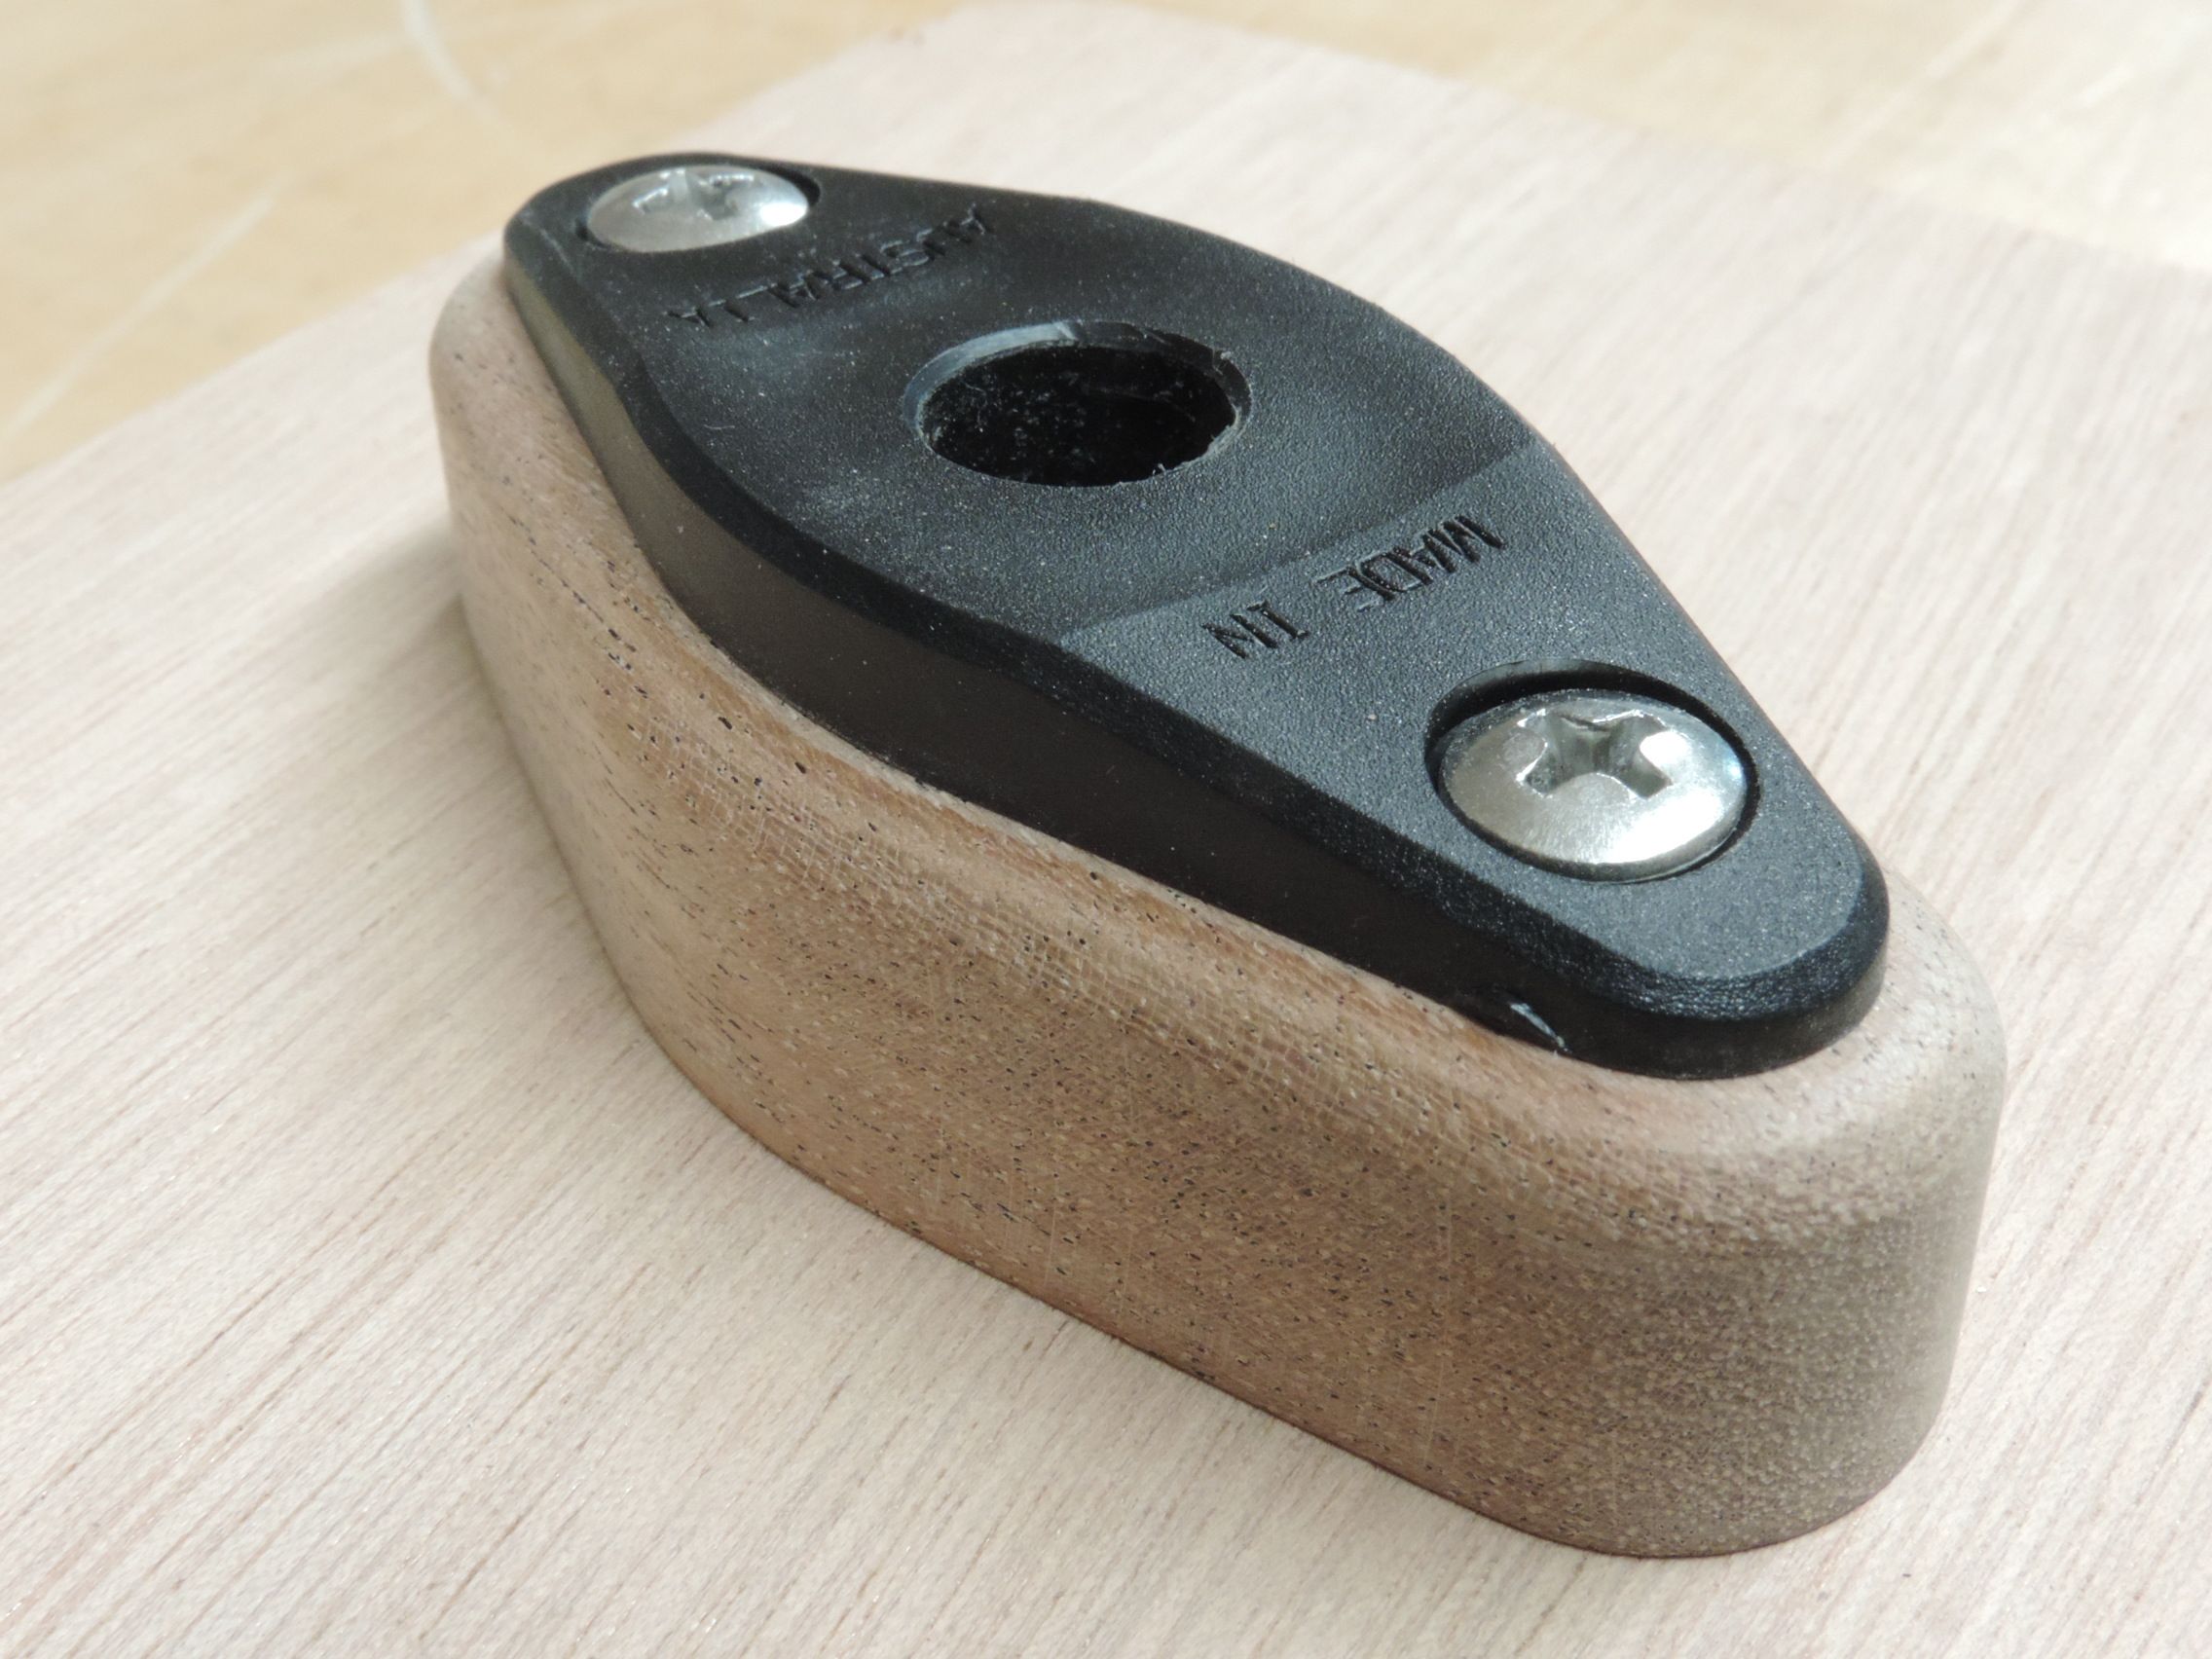
Our mahogany riser blocks of the past were beautiful complex shapes that performed a nicely functional duty; to give the oarlock socket more bearing and to offset the height of the seat relative to the height of the oarlocks. They were, however, rather beastly to make in the quantities we have been needing.
To improve production, Russell took the design to Turnpoint Design and figured out how, with minor changes, they could be machined on the CNC router. The remaining labor, (sanding out the tooling marks and rounding the upper edges ) is a great deal less time consuming than the previous version.
Comparison photo, new style left, previous version-right.
They are still made out of Sapele Mahogany. For those of you who wanted riser blocks this Fall when they were not available, this is our new product. Please let us know what you think. We have them IN STOCK! 😉 AEB
It’s time for us to admit it, our boats seem have a weakness. We may just be treating our boats poorly, but it’s more likely that there is an issue that PT 11 owners should be aware of.
Owners, please check your gunwales for cracks.
Beginning the repair...
Builders, there will soon be an added step in the building manual to prevent the problem. If you haven't glued your bumper on yet, the fix is easy. This printable PDF informs for both a fix or the added step in the build process.
We have seen this failure three times now. The first, when one of our boats got driven over (just the edge) by a truck. We thought that was unusual punishment, fixed the boat and forgot about it.
The second time was a boat that got beat up by solid water while lashed to a foredeck. We didn’t really know what happened there.
The third time it happened, it was our newest PT 11 (3 years old now) and again we don’t know exactly why, but here is our theory:
When the boat is upside down in the nested position and somebody walks on it (or a bunch of people sit on it), where does that weight go? It goes onto the very ends of the gunwales on the fwd hull half.
photo shows where the load goes, (the aft corners of the forward half).
The failures we have seen have always been in the plywood hull skin (right where you would expect it).
Fixing the break and the weakness that caused the break are both pretty easy and important. The first is done by injecting epoxy into a carefully drilled hole to fix the crack, the second by putting screws (with epoxy) into carefully drilled holes.
I admire those who take on the challenge of building a boat or an airplane. CNC technology on kits has done for creative people, what the GPS did for adventurous people. (Not that they might not be one and the same) Cruising is far more accessible to those without traditional navigational skills, and CNC routering has opened up a whole new avenue to those who want to create something that would otherwise have been beyond their skill level.
Pause on that thought while mentally revisiting a lot of fun sailing..... OK-back to the present.
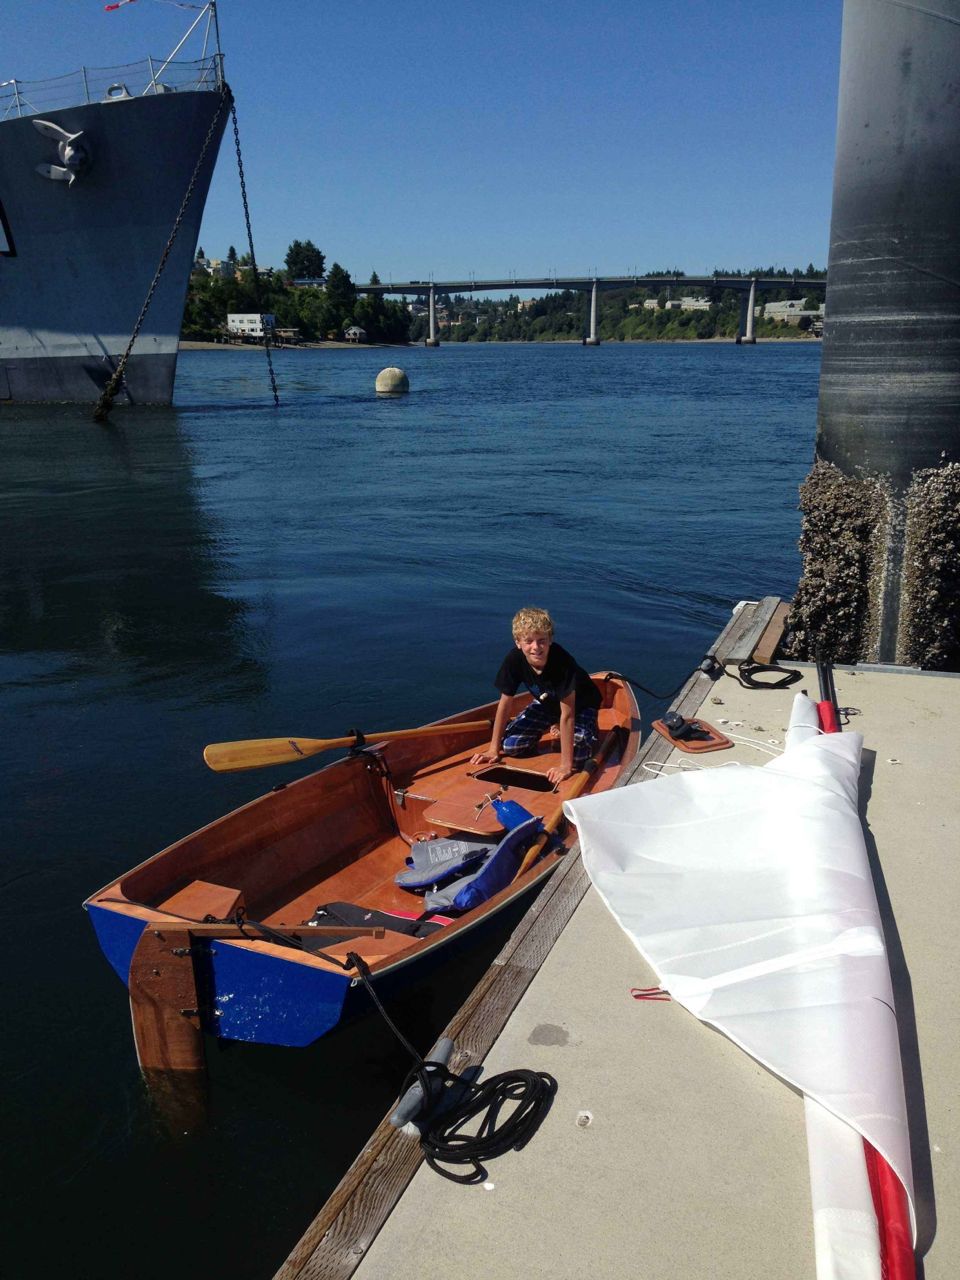
PT 11 nested in the truck. Photo;Randy KerrKim and Mark get the boat wet for the first time. Photo;Randy Kerr
Our customers come from many walks of life and a wide range of ages and skill levels. However; they never fail to impress me. While Russell can take credit for creating a beautiful design, kit and manual, our customers need the vision, passion, patience, and attention to detail for good results. To add the complexity of documenting their own efforts takes the same qualities and much more. I cannot, for example, count how many tens of thousands of photos Russell had to carefully set up, snap, choose, and edit to get a few hundred for the manual.
Hence, for this post, I would like to point the spotlight on the Kerr Family; Randy, Kim, son Alex, and good friend Mark. Not only did they complete their beautifully built PT 11, "Lil' Bear" in about 6 weeks, their documentation of the experience resulted in a wonderful
"Lil' Bear" named in honor of Kim's great uncle who was on the crew of the Coast Guard cutter "USS Bear" back in the late1800’s. Photo;Randy Kerr
and creative little video. The feedback from Kim and her family has been so meaningful to us and I feel puffed up with pride like a mother hen. With their permission I am sharing some of that feedback and the wonderful present of this video. Randy's videos are all beautifully created and fun to watch so explore and let them know what you think.
Kim goes for her first sail in her PT 11. Photo;Randy Kerr
From Kim, "It was your PT11 kit that made my dream of having a sailboat come true!!!!! Randy and I can’t quit talking about how grateful we are that you guys put so much heart and thought into such a beautiful and smart kit. She sails and rows like a dream! Highlight of our summer to build and sail that boat! So thankful for you and Russell."
https://vimeo.com/187076801
Yes, there are some crazy things happening in our country and in the world. I refuse, however, to let that overshadow all of the wonderful things and people that, through shear existence and positive attitudes, are in some way, making this world a better place, cherishing what is good and beautiful. Thank you to the Kerr family and all of our customers for your inspiration. AEB 😉
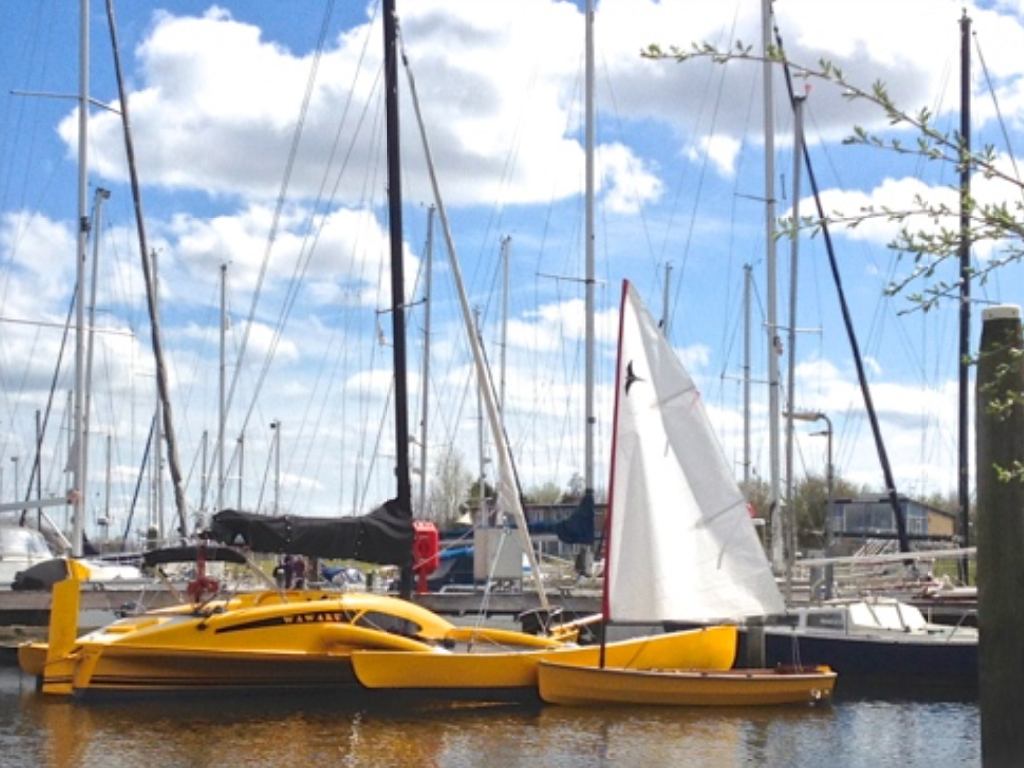
As beautiful as clear coated Okoume is, a couple of builder's have chosen to paint their dinghy interiors. They have also added non skid. I have to admit, I think these boats look super smart!
exterior paint job on Sadee Ann includes a nice racing stripe.Sadee Anne PT 11 nesting dinghy nestedSadee-Ann with painted interior and clear coated accents.A PT 11 in Holland with paint over non skid on the interiorThis PT 11 in Holland matches the 'mother ship'
we received a very special New Years gift from PT 11 builder Cassie McDermott. It was a really nice email and a pdf attachment from 10 year Milo, for whom she built the boat. She concluded her letter thus:
"I knew that your boat changed our lives, but I didn't realize just how much. I am overwhelmed and feeling completely blessed for what you and your boat has brought our family. In the end, it's not just a boat."
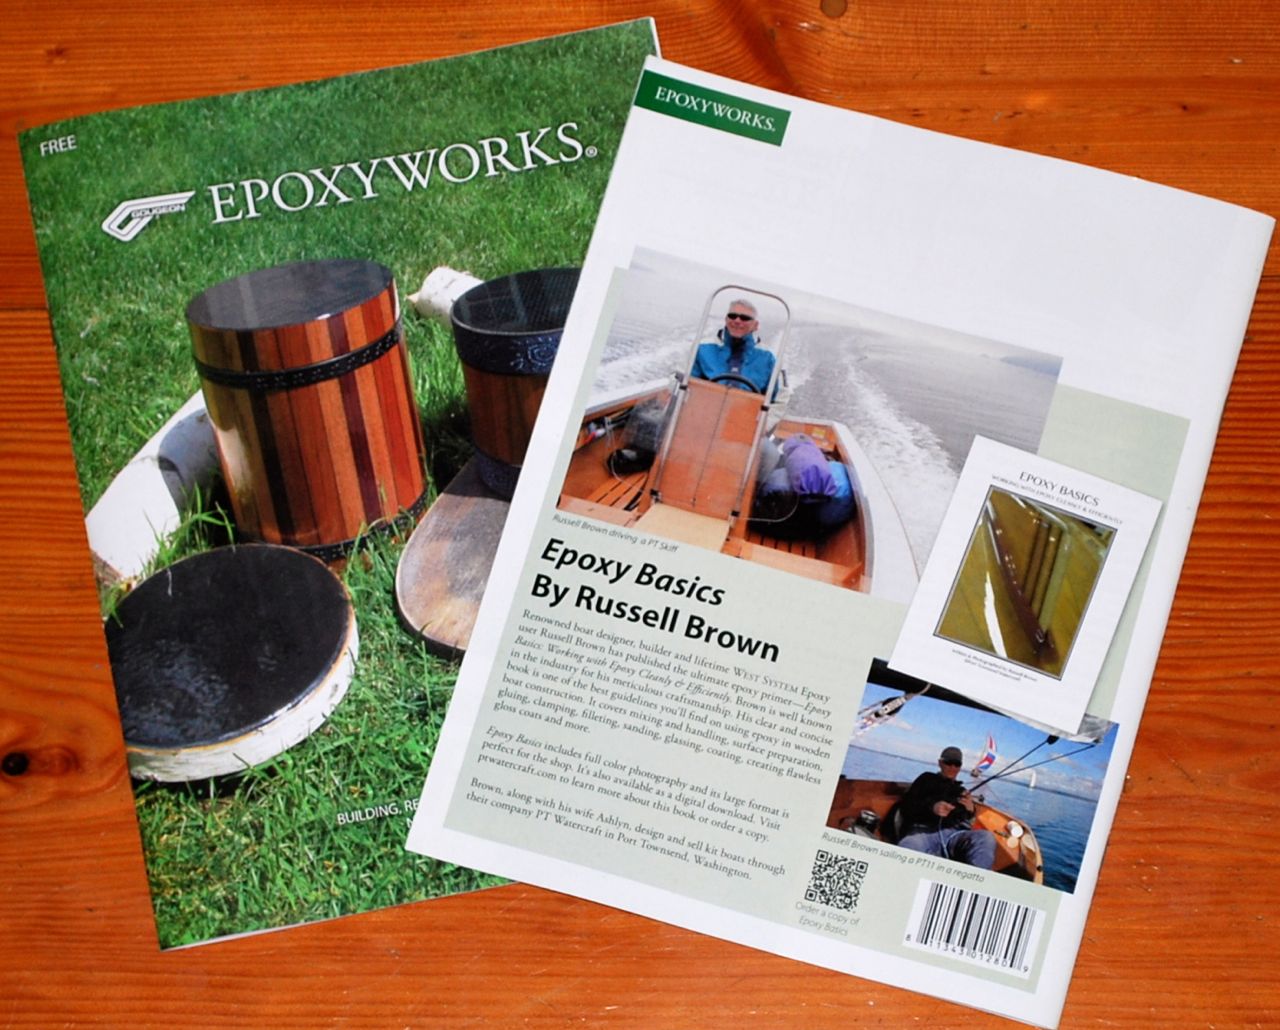
Many of you already know about EPOXY WORKS magazine, a FREE publication from Gougeon Brothers Inc, that is sent out twice a year. Issue #39 for this Fall of 2014 reviewed Russell’s EPOXY BASICS on the back cover!
Issue 39 of Epoxy Works
This is a huge bonus for us and many of you have proven that! We had such a run on books within days of the magazine landing in mailboxes, that I have been kept busy sending them out. I want to thank those of you who had to wait with faith and patience for your back ordered copies. THANK YOU!
So why did Gougeon Brothers do such a nice thing? All I can say is that we are thrilled. Our relationship with Gougeon Brothers/WEST SYSTEM, is based on our long history and trust of their products, through which a lasting friendship has emerged. Russell’s nearly constant work with epoxies over the last 40 years has given him many opportunities to try various brands. His livelihood has depended on very refined composite workmanship and building lightweight, tightly engineered parts and craft. Many experiments, challenges, and successful projects have lead him to trust in one epoxy in particular; WEST SYSTEM.
The Gougeon brothers have an fascinating history and the company maintains an expert team unafraid to ask questions of themselves and the products they represent. In the spirit of doing what is right, ( yes, they do carefully consider environmental impact), full time scientists continually test every imaginable epoxy related scenario and tweak their products to best serve their customers of many industries. Their loyal customer base depends not only on having the best physical properties and workability in their epoxy, but also on knowledgeable customer support. The full time tech support staff at WEST SYSTEM are, in that down-to-Earth, humble, mid-western way, generous with their knowledge. If they don't have an answer for you right away, they will find out, and get back to you, even if it takes lab testing. All this greatly benefits the casual epoxy user as well.
Calling the company during business hours (phone #1-866-937-8797) will not reach an automated phone system.... Nope, a real person will answer and politely direct your call... I know... hard to imagine these days.. Can you tell we like these folks? I hope so. We have the highest respect for the people in the company and the principles on which they base the production of excellent products; integrity being far more important to them than fancy marketing. Working with the folks at Gougeon Brothers/WEST SYSTEM, is always a pleasure. Such person to person relationships, with friends, customers, and business associates, rank high on my list of things that make life meaningful. For a well written article about the Gougeon brothers, see: GOUGEON. G-O-U-G-E-O-N GOUGEON by Dan Spurr in Professional Boatbuilder Magazine Issue #125, beginning on page 36. You can buy the issue HERE: Also, coming soon in WOODEN BOAT MAGAZINE ; an article by Jim Brown called, "Catching Up With Meade Gougeon".
Things have come a long way since we first started producing kits. We have put a lot of effort into making production more efficient and timely. The current kits contain parts that require less fitting and fiddling. We have refined the kit, and the manual.
One thing we have maintained is the stance that a really good nesting dinghy is a complex boat and the PT 11 is a really good nesting dinghy. In order to offer it as a kit that even an amateur can build, we have had to take the idea of ‘kit’ to a new level. Some have asked why our kits are more expensive than the average kit boat of comparable size. Others who have bought and built our kits have said that we do not charge nearly enough. Their praise has been high for the content, instructions, accuracy, attention to detail, and overall quality of the kit and resulting boat. While kits are not exactly flying out the door in mass quantities and we are not getting rich, we are not complaining. We stand by our custom products and personalized service, and we feel that we have a special family of PT11 and PT Skiff owners, who have expressed great pleasure in both building and using their boats.
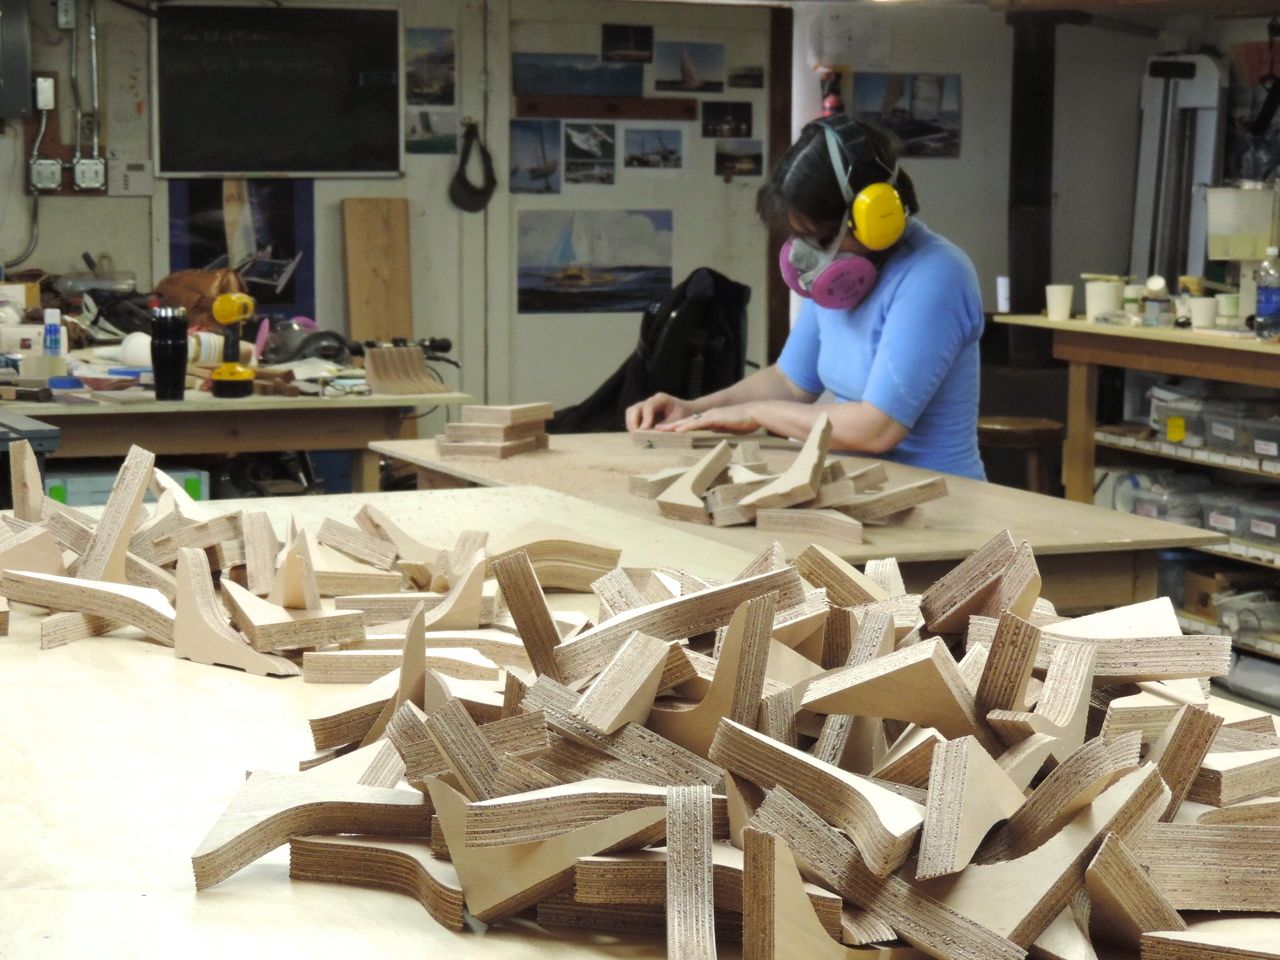
-cutting apart and pre-routering gussets for the PT 11
Not all feedback is praise....
...given the fact that we have forgotten to pack a part on occasion. This featured comment, in all it’s sarcastic humor, is a prime example...
"I found a small glitch in your packing. Nothing major: the installation of the dagger board cover calls for two washers (under the dogs, I think). Without them the dogs are too low with the gasket in place.... Through an outrageous and abject failure in your quality control, none were included. 😉 I know I can source nylon washers locally, even though that will put me far over budget. I thought I'd touch base and ask about specs: is there anything special other than serving as a spacer and friction control for these washers? Are any of the dimensions particularly important? Are you going to spank Russell? " J.W. June 2014.
On the flip side, builders take heed..
“man’s best friend” has been known to find kit parts to be yummy chew toys. Keeping parts in your crate with the lid on until needed keeps out both excess dust and curious ‘Fido’. I know it is nice to have company in the shop but there are lots of bite sized bits in our kits. We use a detailed packing list when filling the crates and if we checked it off, we put it in. (granted, sleep deprivation can interfere from time to time..) In most cases, we will replace lost pieces free of charge so do let us know if it just cannot be found..(along with a photo of your orderly shop space!...just kidding... 😉 Seriously though, there are a lot of small parts in our kits that need to be kept together in a safe container and we know of at least one 5 axis shaped inner stem that was definitely lost to the shop dog.
We recently finished our sixth (yes, sixth) PT 11 prototype. This was to incorporate a few design changes and re-write much of the manual in an effort to make the boat easier to build. Building this many boats can lead to some labor saving ideas and we felt that we needed to do our best to make this, “kind-of-high-tech” boat as easy to build as possible.
In the last related blog post we detailed some of the changes we have made to the boat. Everything worked well, the new manual is done, and kit parts are stacked to the ceiling and ready to fly out the door.
transom inwhale with bow notch allows for a more snugly nested package.
Relevant details even if you already have a PT11;
We have a few new details to share. Most are in the new manual but could be useful for people that already have PT 11’s.
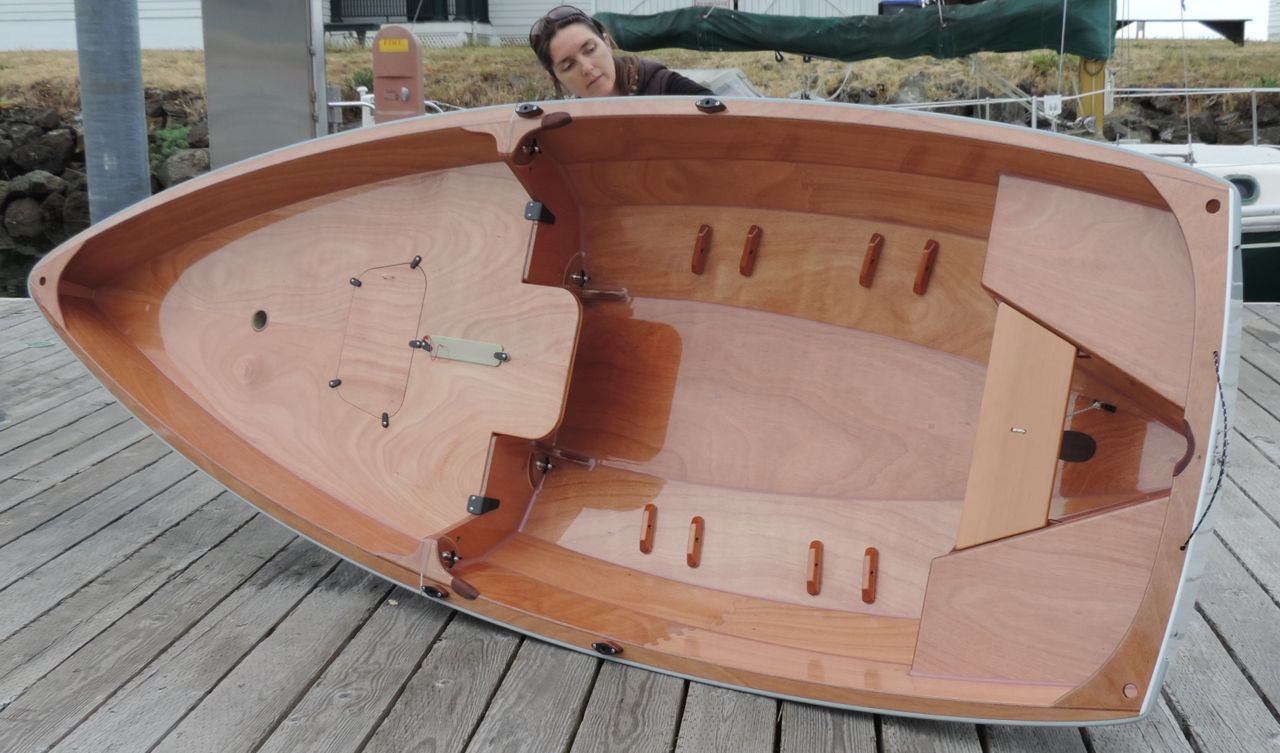
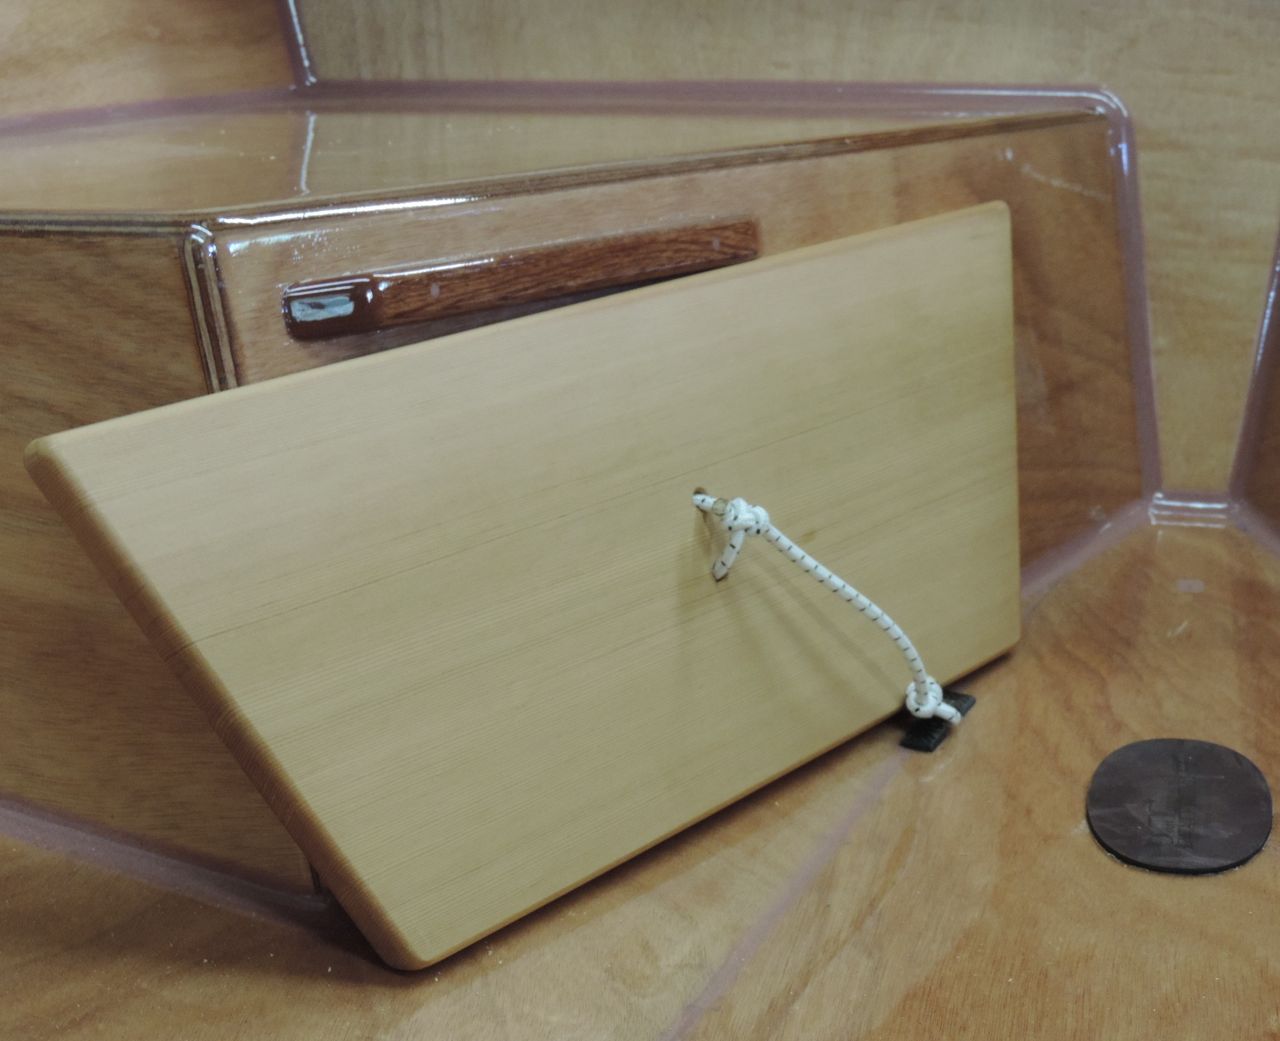
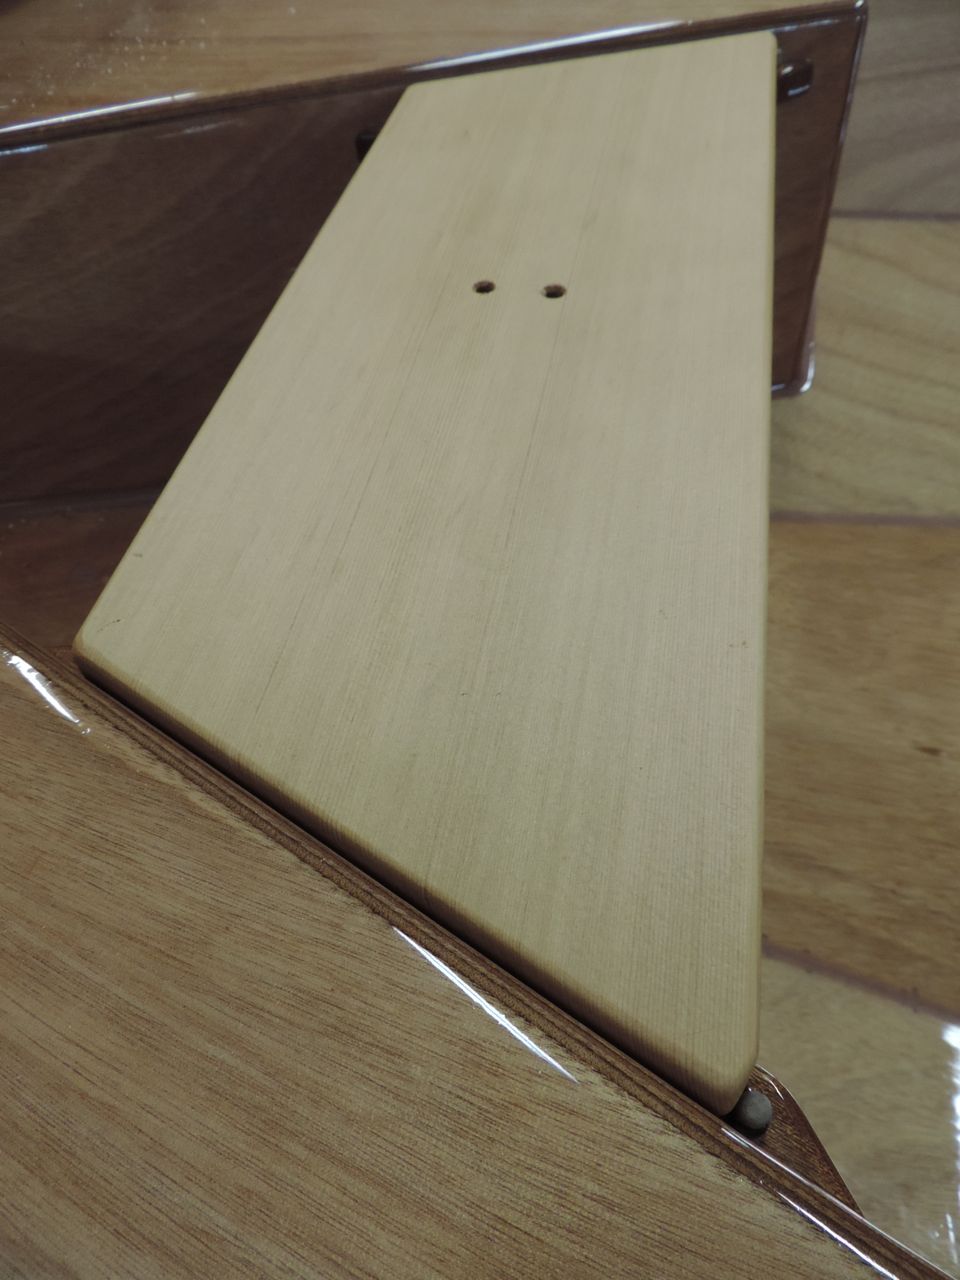
The back seat had two issues: One is that the seat needed a way to be held against the tank wall when nesting the boat. For some reason we never realized that if we trimmed 1/4” off of the aft edge of the seat (it’s now 7” wide), it could wedge between the cleat and the shock chord knot as shown below. It’s secure enough not to fall over when nesting the boat and that’s all it needs.
seat wedges neatly when ready to store the boat nested.
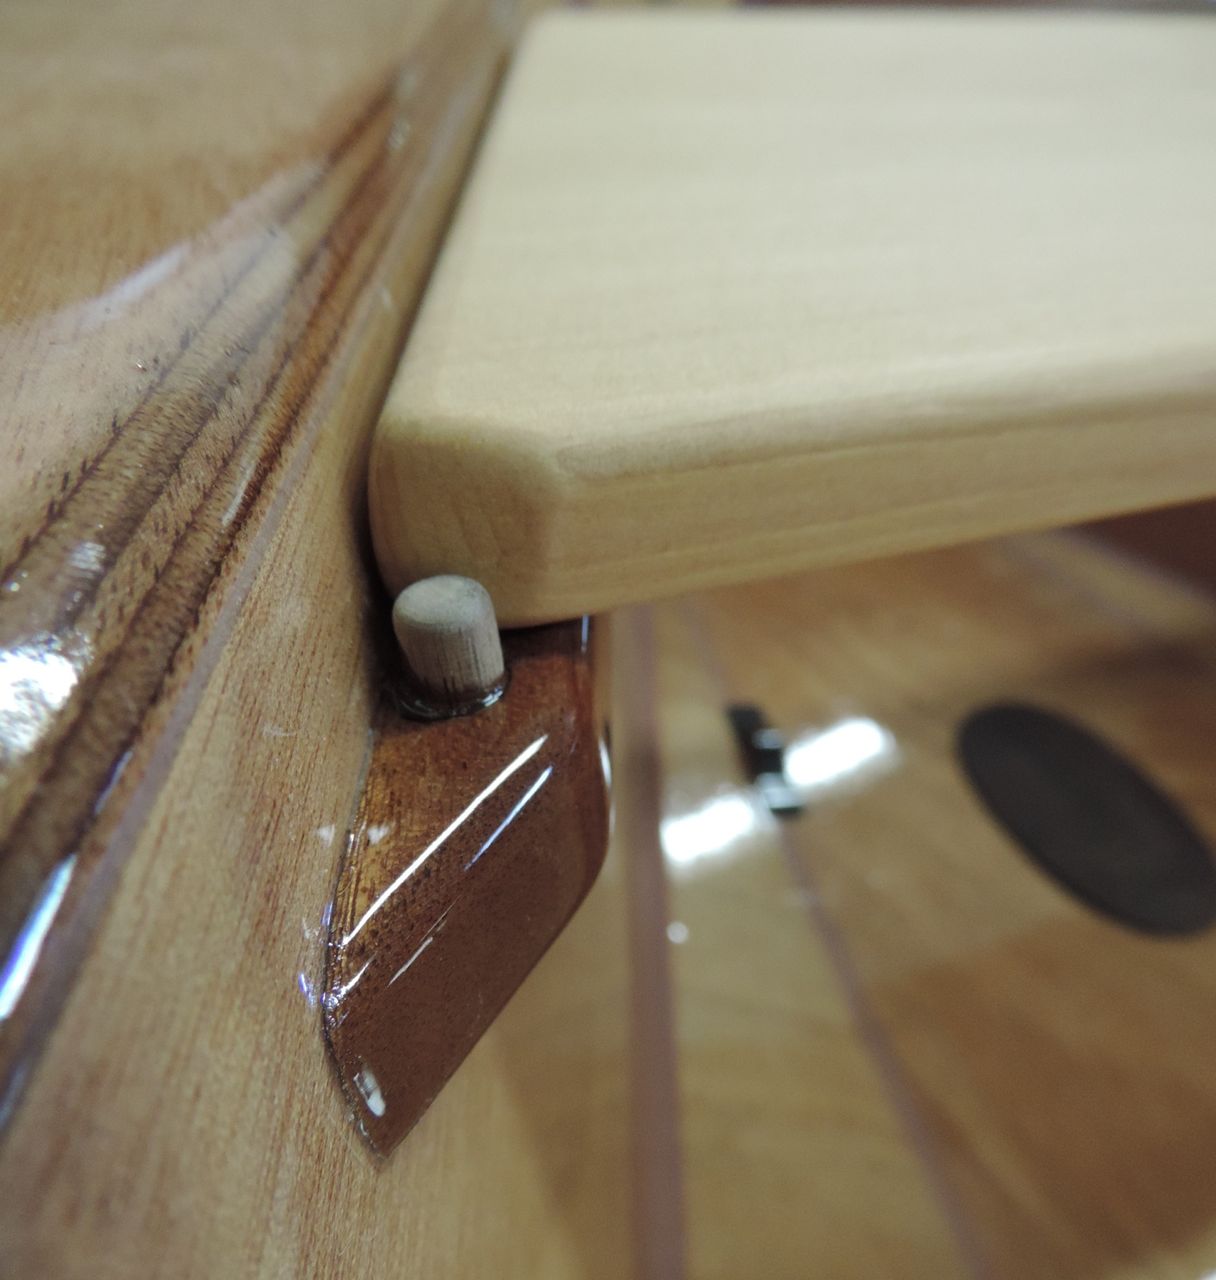
The other issue is that the back seat could slide forward, (even with the bunji cord) come off the cleats, and drop you on your butt.
The fix is pretty simple. We trimmed a bit from the outboard edges of the seat with a sanding block (to move the seat aft) and we block sanded the forward corners of the seat as shown, all so that there was enough cleat showing to drill holes in. We then drilled 1/4” holes to a depth of 3/8” for the 5/8” long hardwood dowels to glue into.
This works well, it’s an easy fix, and if you already have a boat, we can send the dowels to you along with the handy-dandy tether washer we shown below.
See the dowel stopper in the bottom right corner of the photo.The back seat dowel stopper prevents the seat from slipping forward.
Custom machined Delrin (TM) washers with tether loop.
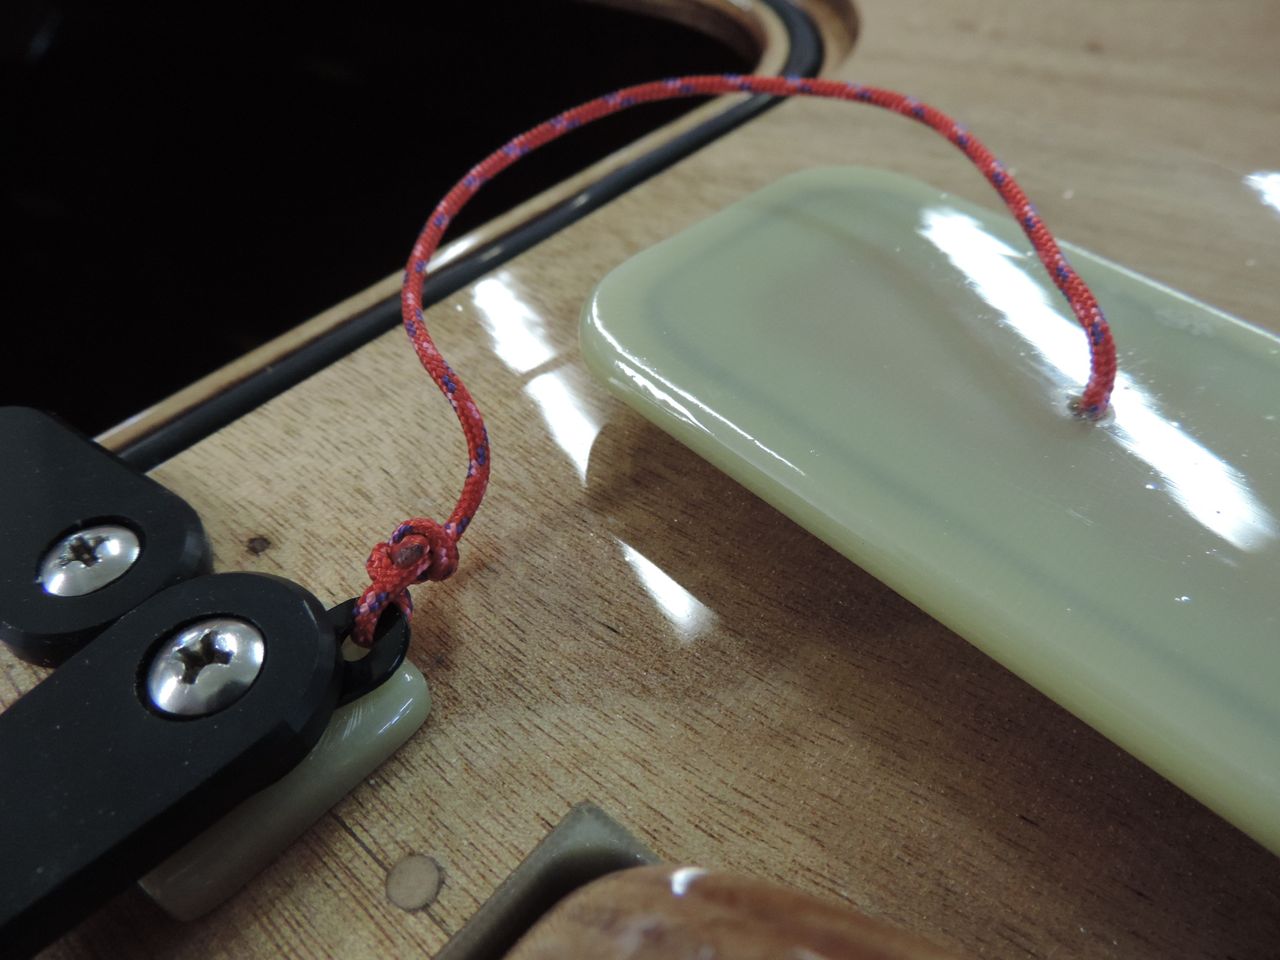
We have always kept our dagger-board trunk cap in the forward compartment, but it can be hard to find in there if it’s full of stuff. It’s easy to glue a tether into a hole drilled in the cap, but where to tie the tether? To the washer under the forward turn dog, that’s where.
It’s a special washer made for us by a neighbor who laser cuts other parts for us as well. This is a thin Delrin(TM) part, but we had a very hard time breaking one.
Replace the round washer with this one and rotate the washer aft for fishing the tether through the hole.
PT 11 dagger-board trunk cap with tether.
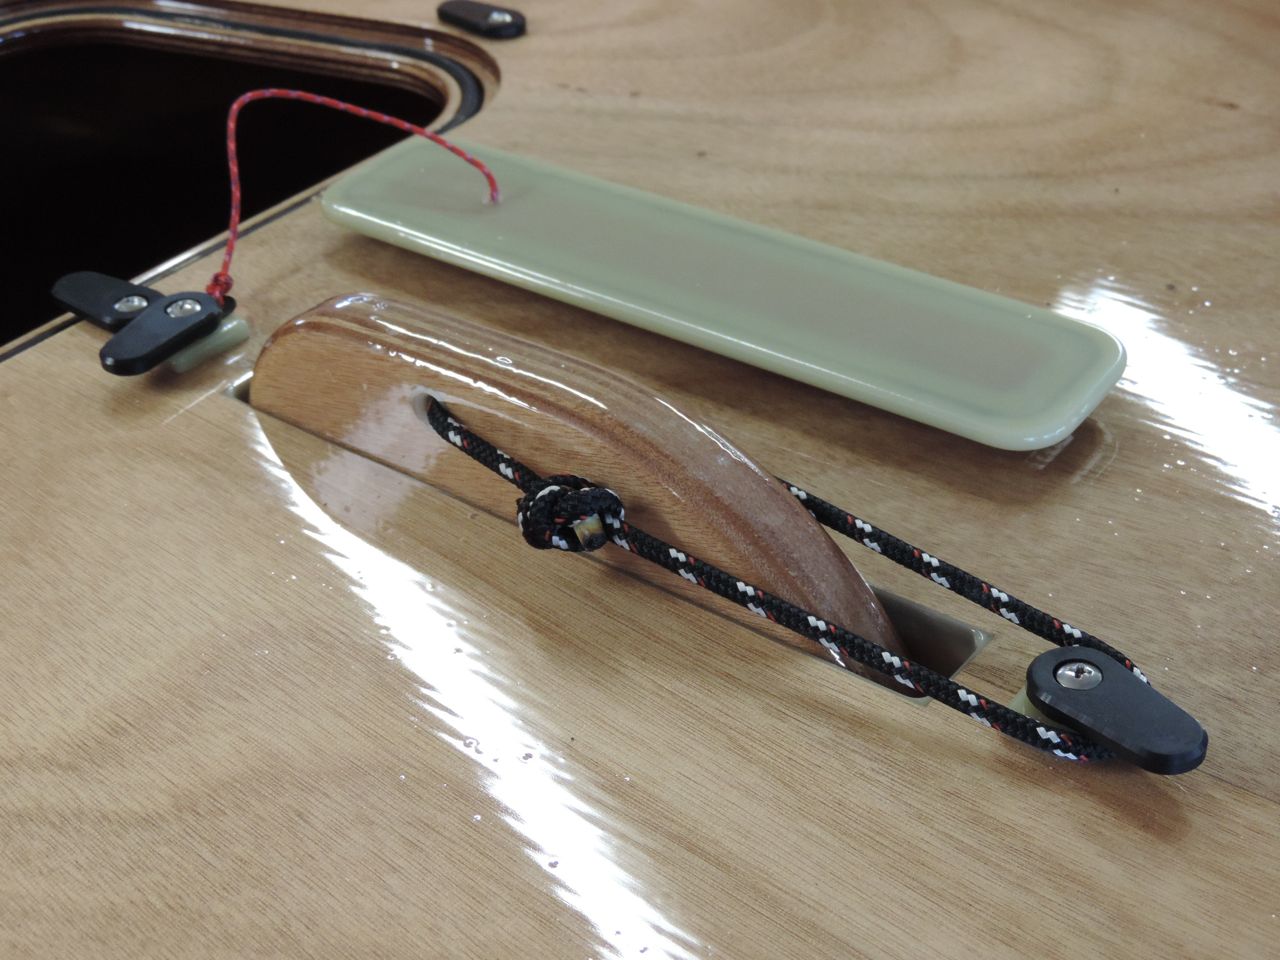
Holding the dagger-board down has always been done with a rope loop that can hook over the aft turn dog, but having the loop fairly snug (as shown below) keeps the board down all the way.
Having the loop the right length keeps the board down all the way.
Having the board down fully will make the boat climb like a 12 meter when sailing upwind and it will also help you run aground. No, what I meant is that it will help if you run aground.
-showing the dagger-board fully down at the underside of the trunk.
We hit a rock very hard and not only did it nearly throw us out of the boat, but the sharp trailing edge of the board hit the aft end of the trunk (because the board was up about four inches) and did a small amount of damage to the trunk. The dagger-board was fine, but we now sail with the dagger-board down all the way or we unhook it and let it float up (about a third of the way).
Work on a slightly re-designed PT 11 and a much improved building manual for the 11 is well underway.
We have long been planning to develop a smaller version of our nesting dinghy, but for several reasons, we decided to focus our efforts on making the PT 11 as good (and as easy to build) as we can make it.
One reason for this decision is that we are a small company with no employees (just ourselves) and even though the design process for the smaller boat was well underway, the thought of needing to stock all the parts necessary for a smaller boat seemed like too much.
Very few of the parts for the bigger boat would fit the smaller one. Even the rig and foils would need to be different, so the PT 9.5 has been put aside... For now.
The PT 11 has been a constant evolution. I have built so many prototypes and modified the manual so many times that I have lost count, but we love the boat and it has become quite a popular kit.
The new changes in the boat (and the manual) are mostly aimed at making the boat easier to build.
The biggest change is to make the gussets both thicker and slightly larger so that the builder can avoid the tricky job of applying the structural fiberglass over the gussets, besides making sense structurally.
The gussets will now be pre-beveled so that the upper gussets fit the hull without the builder having to do it and the curved gusset edges will be pre-rounded so that builders without router tables can avoid the risk of rounding their finger tips.
We wanted to make the two halves of the boat key together more snugly when nested, so the transom inwale is now wider and has a reinforced notch cut into it that the stem fits into when nested.
That, along with the larger gussets will mean that the forward half will just fit into the aft half, and once it’s there it won’t be able to move.
We will have the new boat cut in half soon to check our tolerances and then machine new gussets and inwales for future kit orders.
In the manual we are changing many parts of the process, mostly just to clarify parts of the process with more photos and better text, but some parts, such as the process of fiberglass taping the chines has been changed to a much better method, one we have used on the last couple of prototypes.
We have also been working on a video of some of the more challenging parts of the process. This video will (eventually) include filleting, chine taping, glassing, gloss coating, and painting.