I admire those who take on the challenge of building a boat or an airplane. CNC technology on kits has done for creative people, what the GPS did for adventurous people. (Not that they might not be one and the same) Cruising is far more accessible to those without traditional navigational skills, and CNC routering has opened up a whole new avenue to those who want to create something that would otherwise have been beyond their skill level.
Pause on that thought while mentally revisiting a lot of fun sailing..... OK-back to the present.
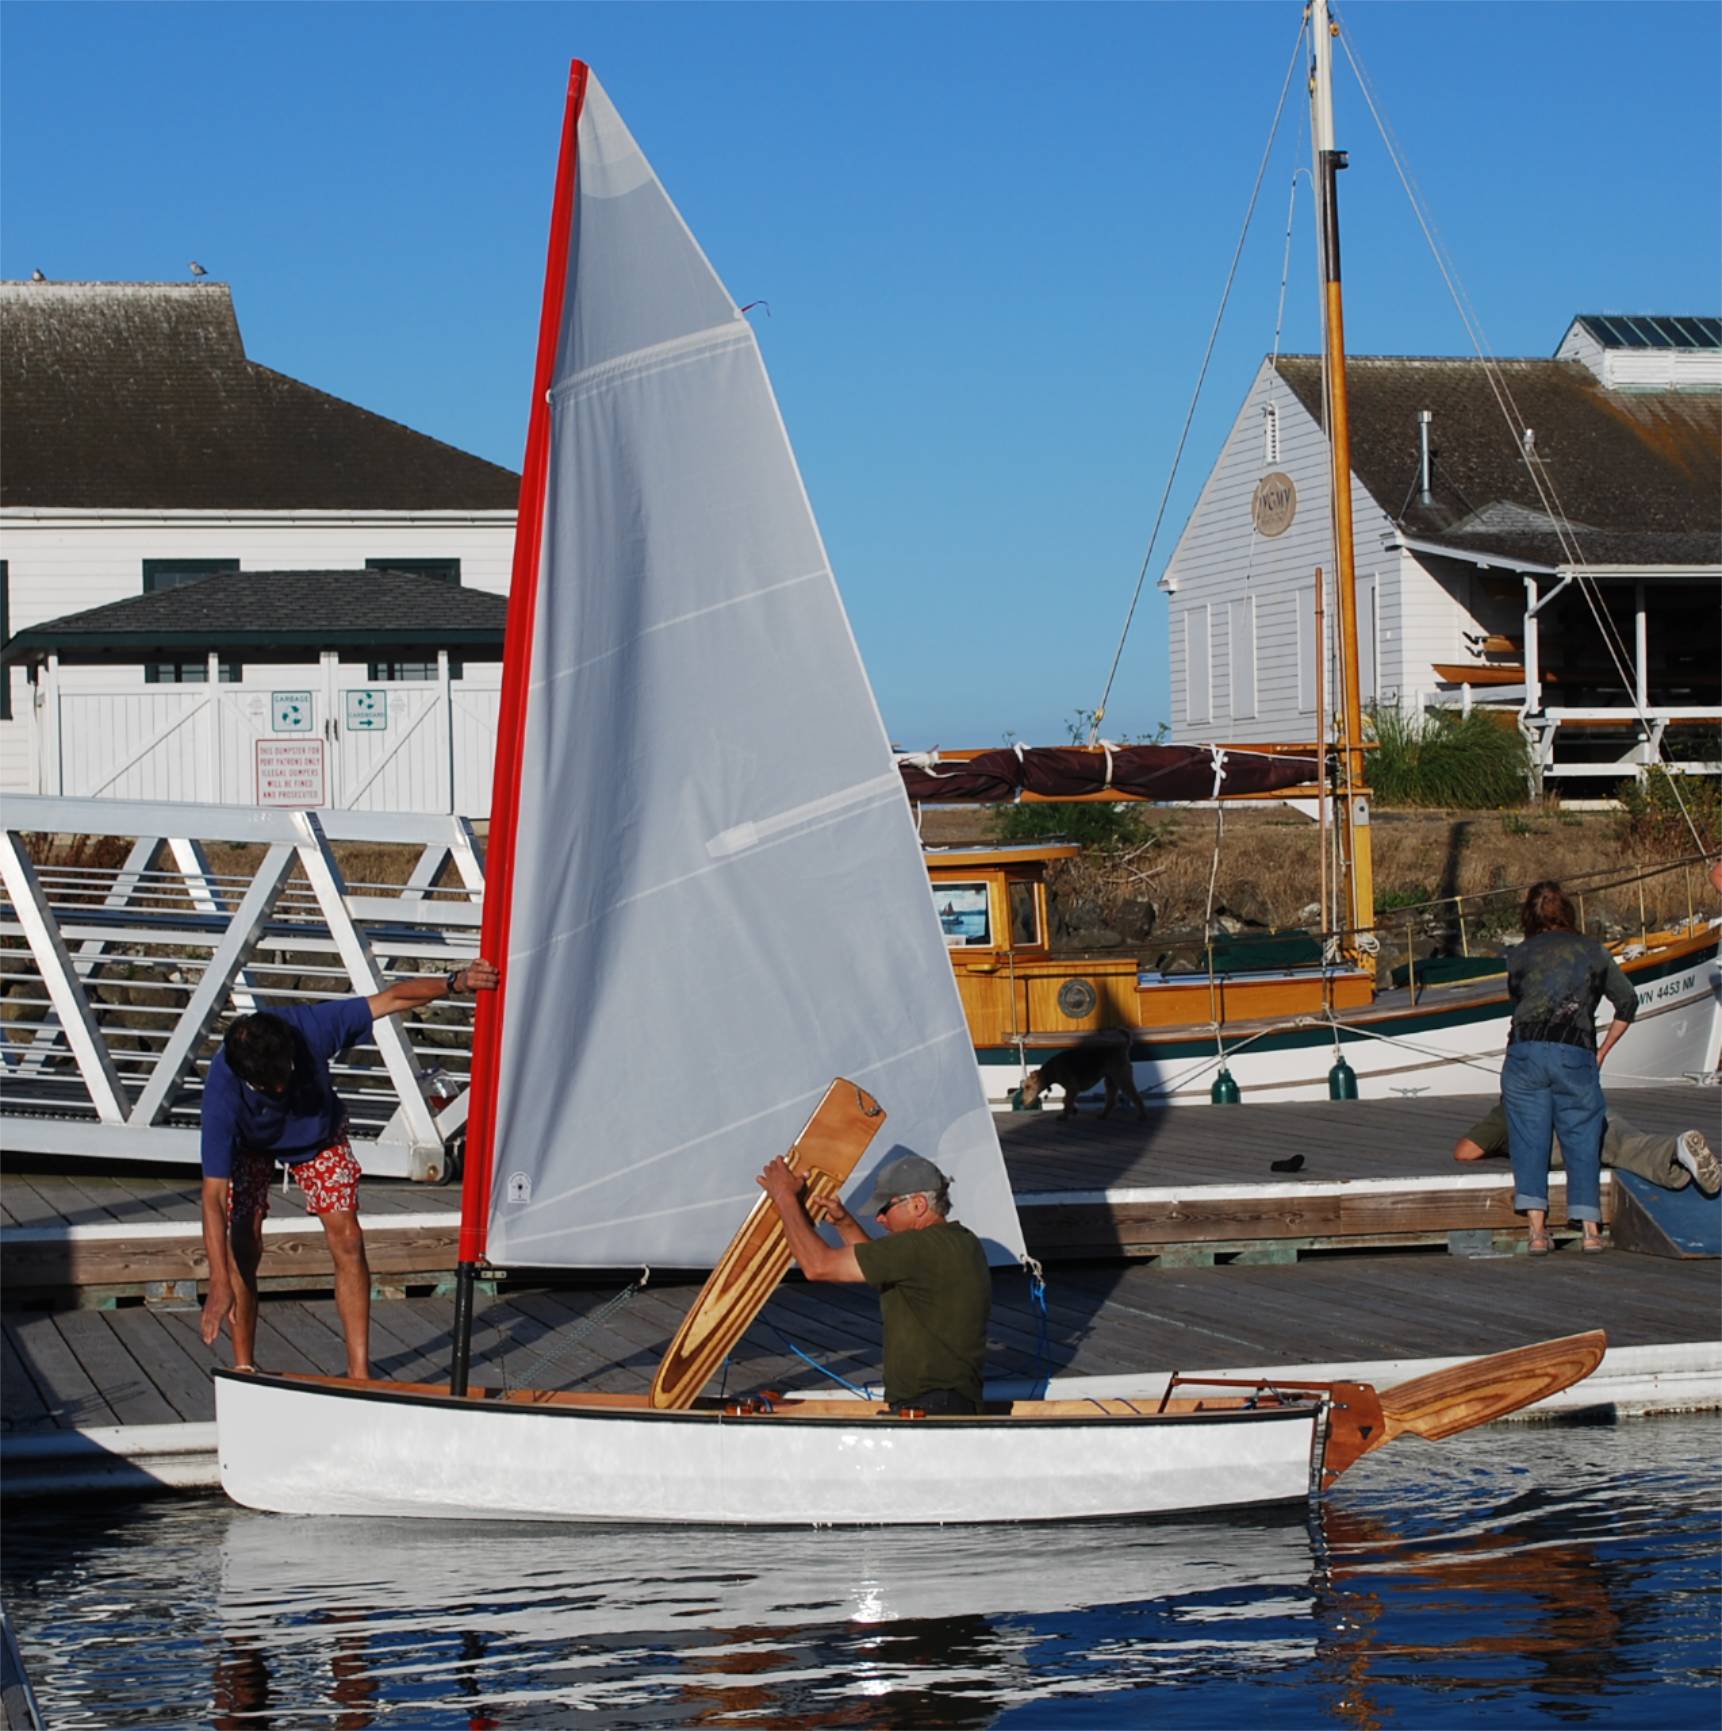
PT 11 nested in the truck. Photo;Randy KerrKim and Mark get the boat wet for the first time. Photo;Randy Kerr
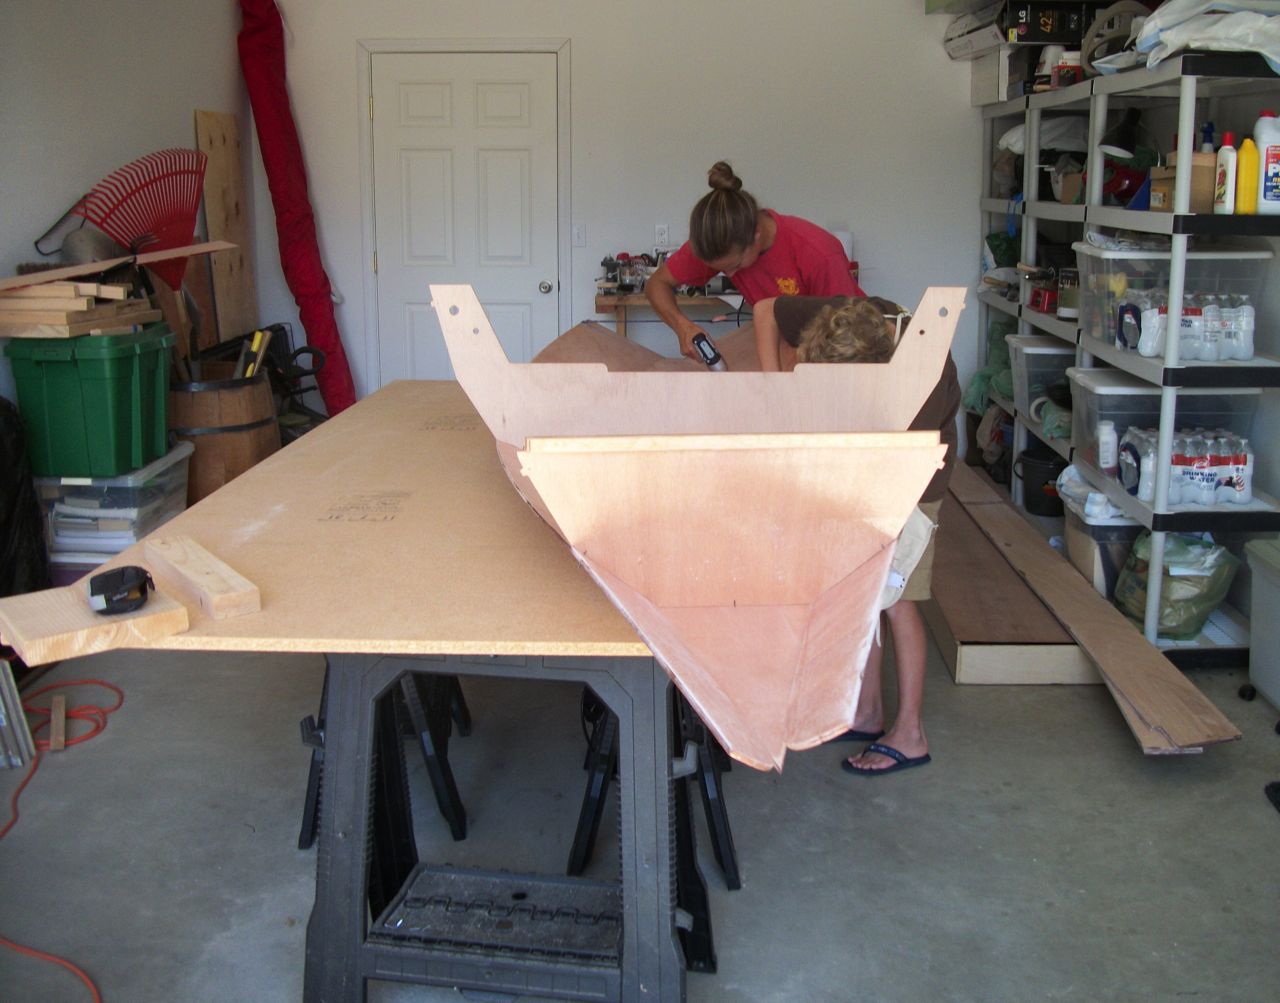
Our customers come from many walks of life and a wide range of ages and skill levels. However; they never fail to impress me. While Russell can take credit for creating a beautiful design, kit and manual, our customers need the vision, passion, patience, and attention to detail for good results. To add the complexity of documenting their own efforts takes the same qualities and much more. I cannot, for example, count how many tens of thousands of photos Russell had to carefully set up, snap, choose, and edit to get a few hundred for the manual.
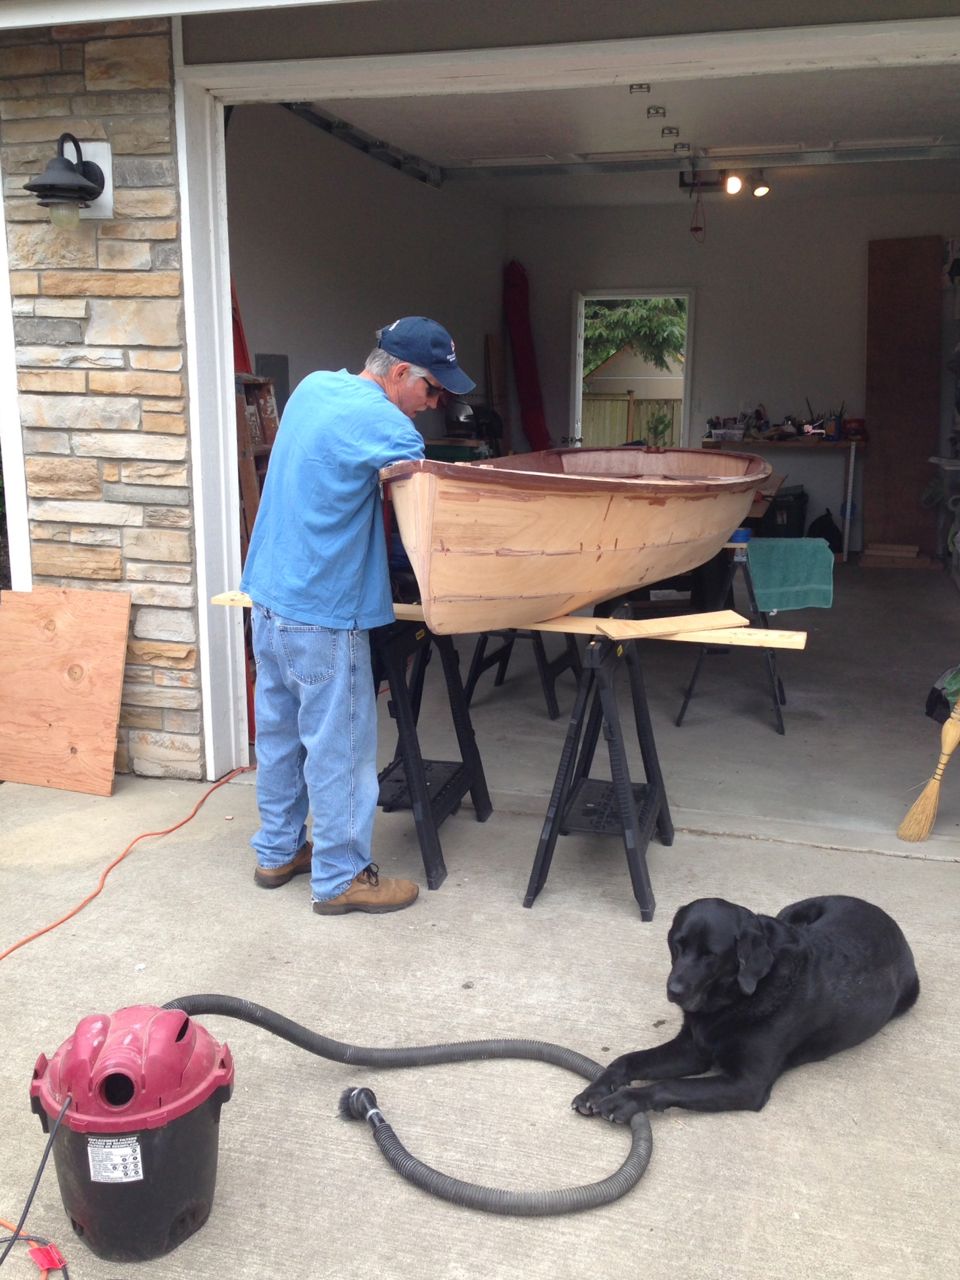
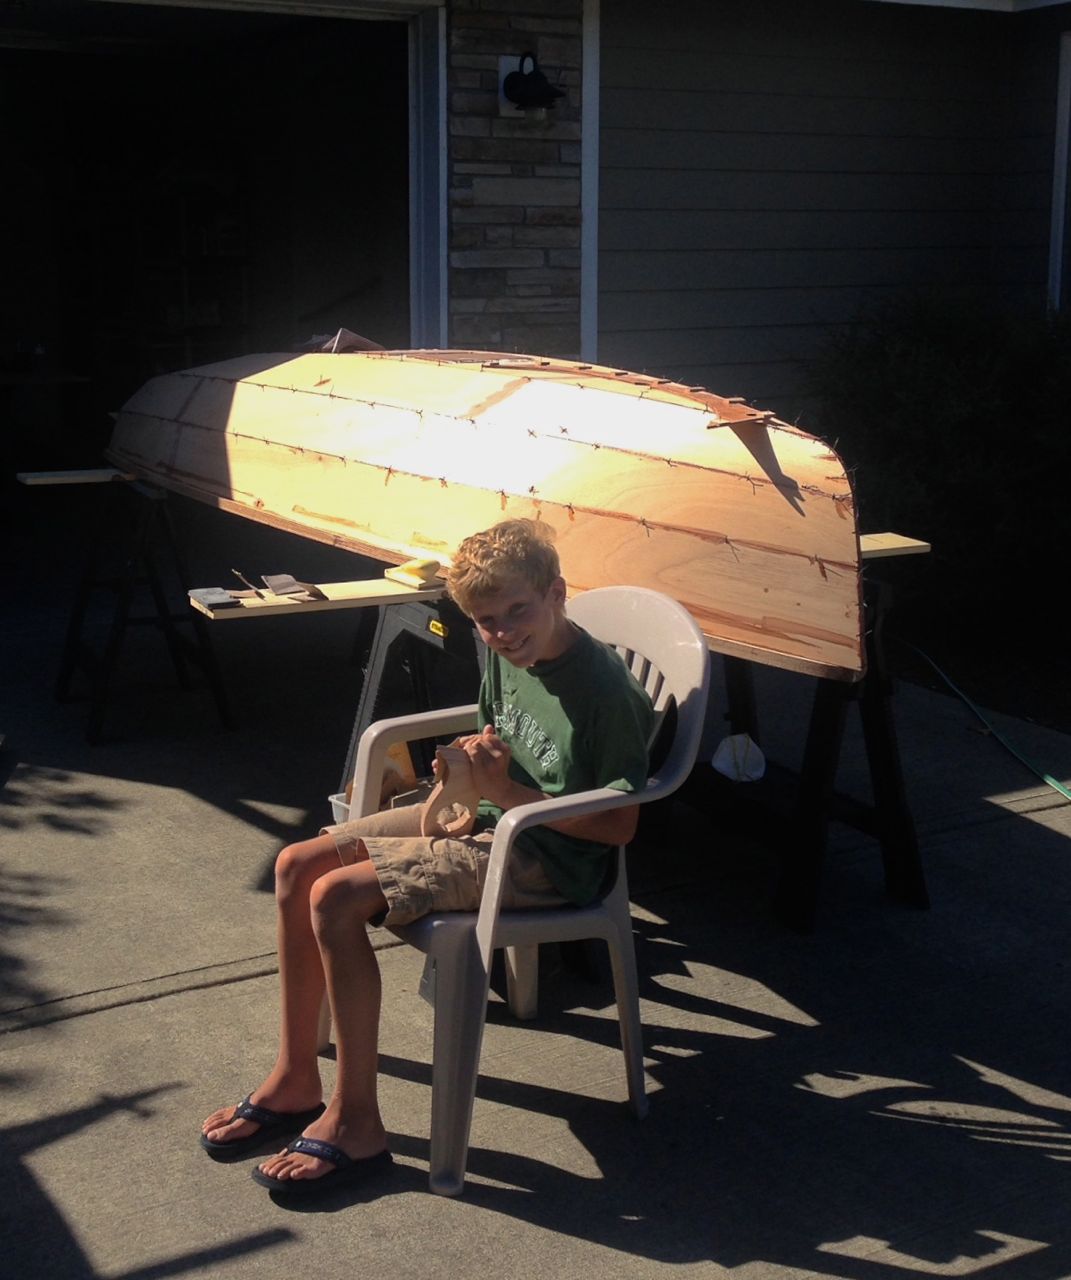
Hence, for this post, I would like to point the spotlight on the Kerr Family; Randy, Kim, son Alex, and good friend Mark. Not only did they complete their beautifully built PT 11, "Lil' Bear" in about 6 weeks, their documentation of the experience resulted in a wonderful
"Lil' Bear" named in honor of Kim's great uncle who was on the crew of the Coast Guard cutter "USS Bear" back in the late1800’s. Photo;Randy Kerr
and creative little video. The feedback from Kim and her family has been so meaningful to us and I feel puffed up with pride like a mother hen. With their permission I am sharing some of that feedback and the wonderful present of this video. Randy's videos are all beautifully created and fun to watch so explore and let them know what you think.
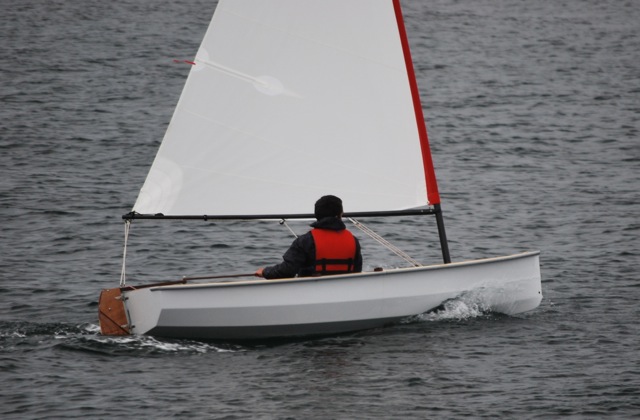
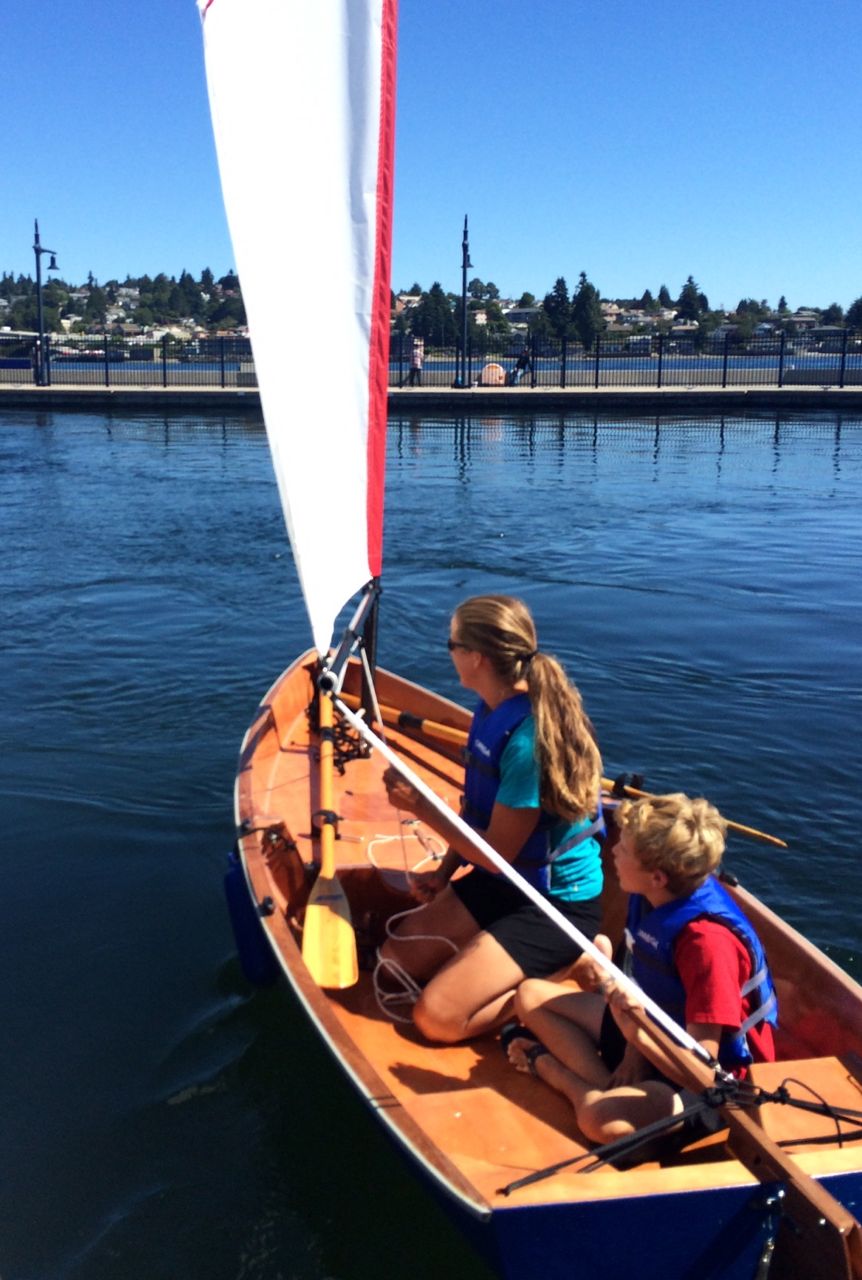
Kim goes for her first sail in her PT 11. Photo;Randy Kerr
From Kim, "It was your PT11 kit that made my dream of having a sailboat come true!!!!! Randy and I can’t quit talking about how grateful we are that you guys put so much heart and thought into such a beautiful and smart kit. She sails and rows like a dream! Highlight of our summer to build and sail that boat! So thankful for you and Russell."
https://vimeo.com/187076801
Yes, there are some crazy things happening in our country and in the world. I refuse, however, to let that overshadow all of the wonderful things and people that, through shear existence and positive attitudes, are in some way, making this world a better place, cherishing what is good and beautiful. Thank you to the Kerr family and all of our customers for your inspiration. AEB 😉
Yesterday morning began with a tropical downpour that is just as out of character for the PNW as this summer's 90 degree temperatures. A few days ago the driveway was suddenly littered with crunchy yellow alder leaves. It has hit me hard that summer is coming to an end. For us, it also means that our local Wooden Boat Festival, (the 40th!) is upon us. We will be there! September 9, 10, & 11.
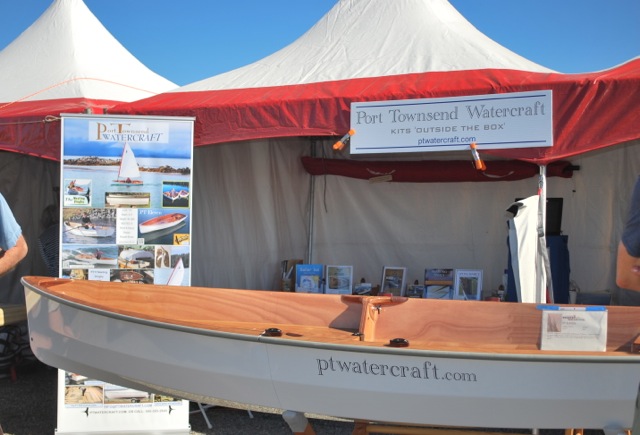
Port Townsend watercraft in the WEST SYSTEM tent on the point near the Wee Nip.
We are pleased to announce that two, customer built PT Skiffs to be at the festival this year!
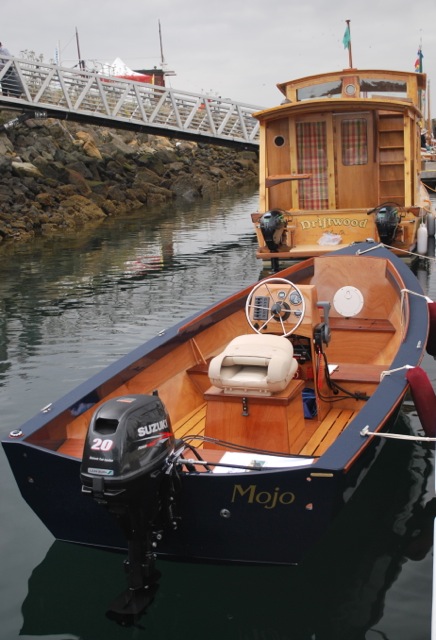
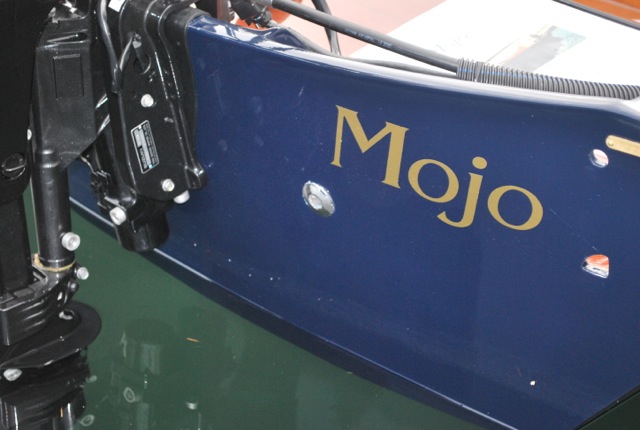
Mojo at the Wooden Boat Festival
Takin' Five to be at the 40th Wooden Boat Festival in Port Townsend
Immediately prior to festival, we will be in Deer Harbor (Wooden Boat Rendezvous), and just as promptly after festival, we will set sail northward, incommunicado, for 2 weeks.
We try to go sailing every year after festival and this year is special as it will be our first trip in our 'new' boat. We have yet to give it a name and perhaps this first real sail on her will help us decide on a name from our list, many suggested by friends.
If you are curious about our odd but inspired cruising boat, a G-32, the original promo videos can be seen HERE, and Russell's refit blog HERE.
G32-First day out in Port Townsend. Photo; James Curtis
We will have the PT 11 with us as we travel up to Desolation Sound and back. During that 2 weeks we will aim to get new video, recharge our creative and productive energy banks and be on full power for our busier Biz season; Fall through Spring. Hence, we will be a little difficult to reach by phone and a little slow to respond to emails for the rest of September, but please write and leave messages anyway! We will get back to you and new production favors the early birds. There is also the quick deposit button if you are ready to secure your place in line for kits while we are away.
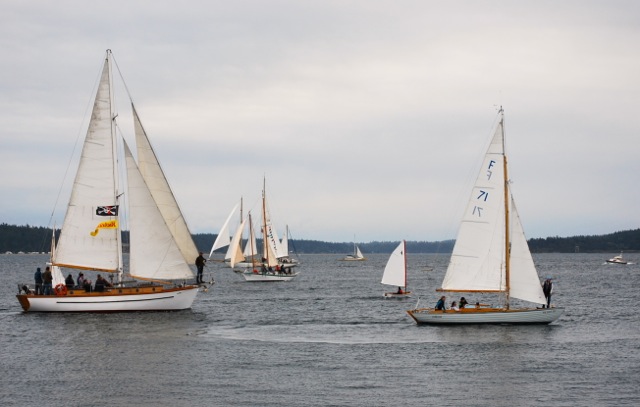
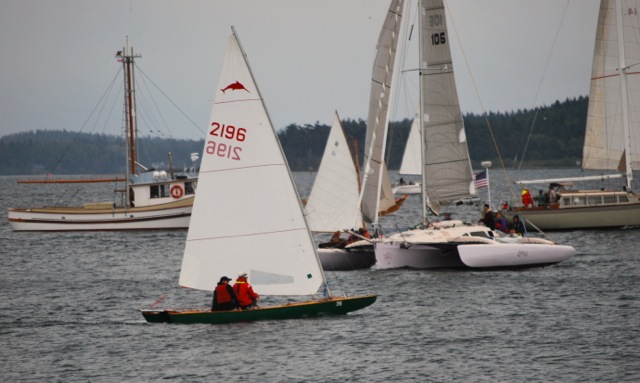
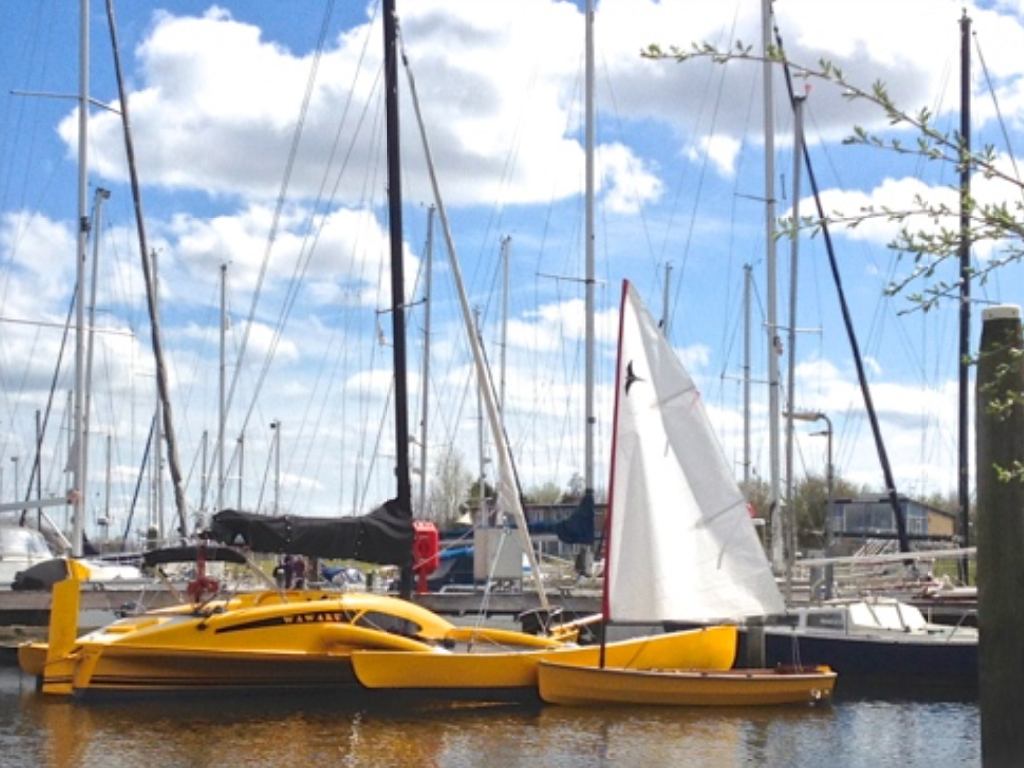
Lined up for a light winds race around the anchorage..
While I am at it, I want to share a couple of pictures of some dinghy fun from this summer. It is exciting for me to realize that quite a few PT 11's and PT Spears have been completed locally and regionally (with many more on the way!). We had our first 'mini regatta' of friends at Watmough Bay this summer and look forward to having more PT 11 'meets' in the future.I also have this vision of a Wooden Boat Festival here, perhaps the 41st next year, where-in a veritable fleet of PT 11's and Spears fills the foreground of the sail-by on Sunday afternoon, escorted of course, by several PT Skiffs.... my how our family is growing. Mark it on your calendars if you think you can make it. 😉 AEB
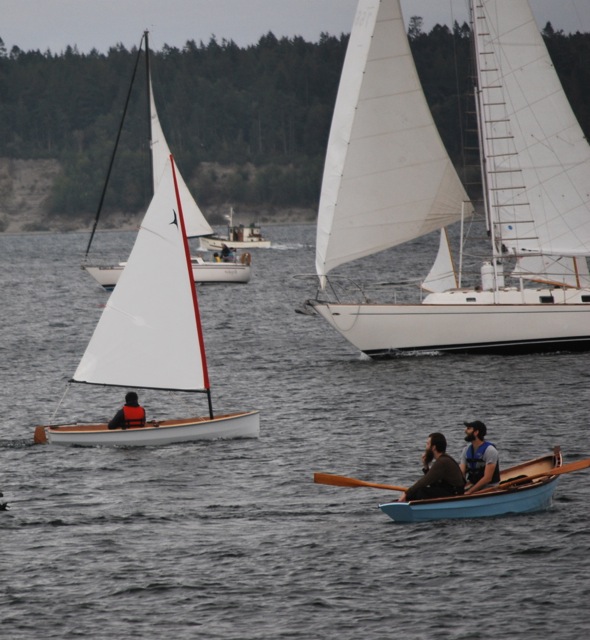
Mid August PT11 and PT Spear buddy sail in Port Townsend Bay. Here, stopped for lunch at the North West Maritime Center.
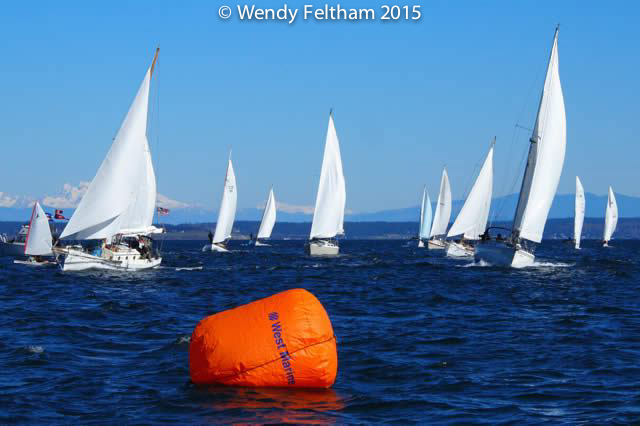
One of my favorite festival sail-by's, up close and thick with sails...Early one festival morning...
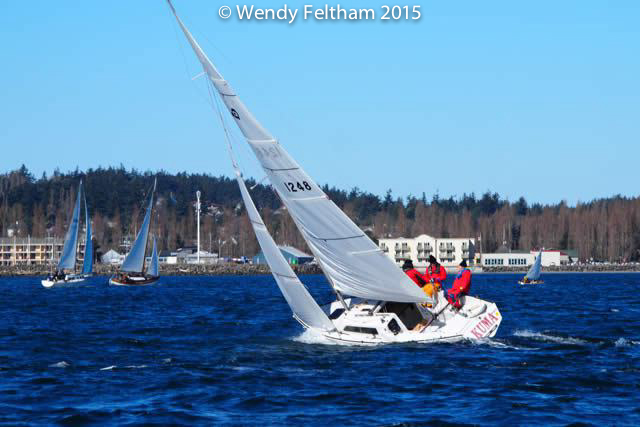
Fun! For the second year we had a blast in our PT 11 as the smallest entrant in the Shipwright's Regatta hosted by the Port Townsend Sailing Association. Russell was at the helm and I was ballast, chocolate dispenser, and "kite" handler, .... hmmmm... maybe we have some work to do if we are going to get real about racing...
My little kite... 'I think I can, I think I can...' photo by 'Ace' Spragg
Of course Russell would have been much faster by himself but no fun without me! Kidding aside, we didn't do all that bad (13th out of 19 boats in Class B) since our competition was all multiples of us in waterline. (except for Simeon in Noddy, his SCAMP)
Lil B is our PT 11.
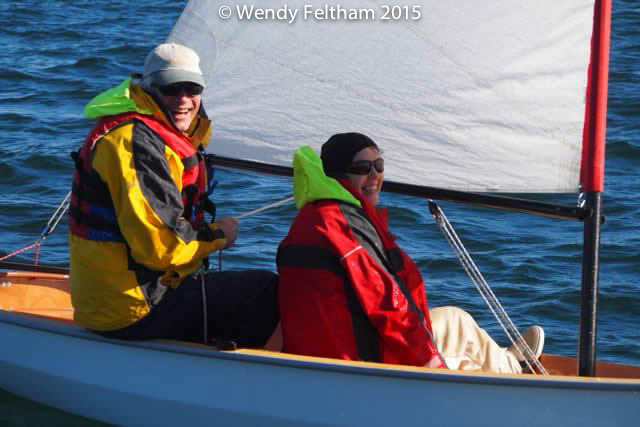
It was a beautiful day, perfect breeze, sunshine, and little chop. I took some photos and Ace managed to capture a shot of our "kite" on the down wind leg... yes, it really was a kite. I could not get it out from behind the mainsail but it actually did have some pull to it. The one time I got it up higher, it nose dived into the water and became an instant drogue. A funny experiment that confirmed we could come up with an 'itty bitty' spinnaker and make use of it. We shall see...
Oddly, for Russell and I, it takes more discipline to actually get it together to participate in our local sailing events than to work in the shop and office every day! Gotta work on that... 😉 AEB
Pictures follow.
Cito
photo-Ashlyn Brown
Crusoe
photo-Ashlyn Brown
Bieker designed PT 15
Photo:Ashlyn Brown
photo-Ashlyn Brown
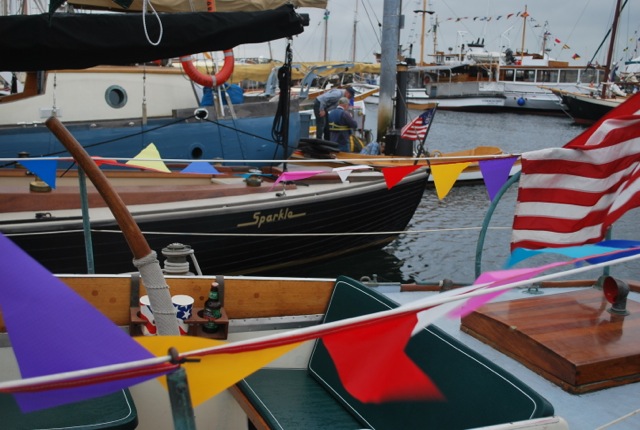
Sparkle
Photo: Ashlyn Brown
Bieker designed PT15 with the 505’s
photo-Ashlyn Brown
photo by Ashlyn Brown
Our great race commitee, photo: Ashlyn Brown
Class B starting line.
photo-Ashlyn Brown
T-Birds in their own class. photo-Ashlyn Brown
photo-Ashlyn Brown
Crusoe coming up astern in black and white. photo-Ashlyn Brown
Crusoe passing us on the second round. Photo-Ashlyn Brown
What is different about kits from PT Watercraft and why do they cost what they do?
To start, we produce the kind of kit that we would like ourselves, something more advanced. Advanced from the perspective of functionality, performance, longevity, and good strength to weight ratio, etc.
This approach seems to be working as our nesting dinghy kits (our most complex kit) has been selling very well.
Most kit companies avoid hand-made parts when possible, and for good reason; they take a lot of time to produce and they increase the cost of the kits.
How can we afford to have so many custom and hand-made parts in our kits? Because we have no real employees and a very low overhead. This can be limiting in some ways, but it does afford us the ability to to really focus on each and every part that goes into a kit.
Development and manufacturing has been a lifelong interest. Figuring out new, more efficient ways to produce parts is fun for us, so we thought we would share a bit of it with you.
Double checking the packing lists
Even though there are 5 different thicknesses of plywood in a PT 11 kit, the 6mm plywood parts (shown below) form most of the hull, foredeck, transom, etc.
There’s no handwork here; all these parts are cut by a very good CNC operator (Turn Point Design). There is however, much effort that goes into buying and grading this plywood. We reject unattractive or warped sheets and pick the best looking sheets for cutting the foredecks, buoyancy tanks, etc.
We are lucky to have Edensaw Woods, a very large plywood importer right here in Port Townsend, yet finding good (and good-looking) plywood has become both more expensive and more difficult. When we find what we want, be buy a lot of it.
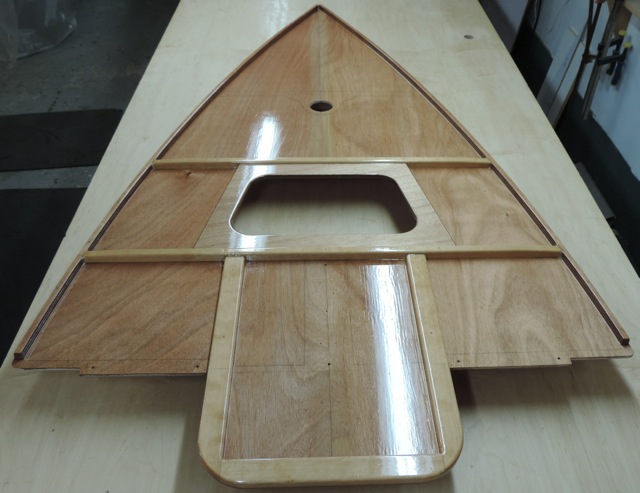
The 6mm parts are the first parts to go in the crate. We use a 5 page “map” to show how the layers nest to take up the least space and yet lay flat in the crate.The main connective bulkheads (12 mm plywood) are also CNC cut with scribed marks for locating doublers, gussets, and trunk. The forward of these two bulkheads has a notch for the hull gasket, which unfortunately needs to be on the opposite face as the scribed marks, so CNC cutting the notch is not easily done. We very carefully cut the notches with a jig and router as shown below.
hand routering the gasket notch in the PT 11 main bulkhead.
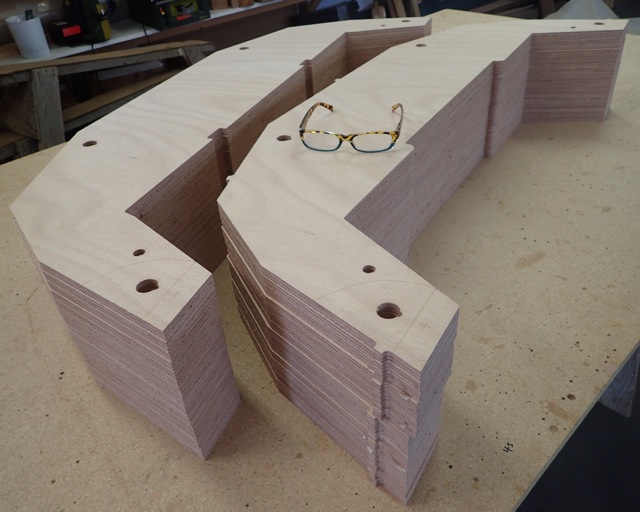
The large gussets, visible in most PT 11 photos, are what really tie the front and back halves of the boat together (and help us sleep at night).
There are 8 of them per boat (complete set in foreground of photo below) and they are made from 25mm (1”) thick plywood. Being so large (and thick) makes them both very effective at taking the loads and also relatively easy to install in the building process.
For the first couple of years of selling kits for this boat, we asked the builder do the handwork on these parts which, without the right tools could be difficult and potentially dangerous.
The upper gussets (right hand cluster in the foreground below) are heavily beveled on the outboard edges to match the angle of the hull. We do this with a large 1 hp tilt-table disk sander hooked up to a large vacuum.
The appropriate edges are then rounded on the router table, which is far safer and easier than the builder rounding them with a router by hand.
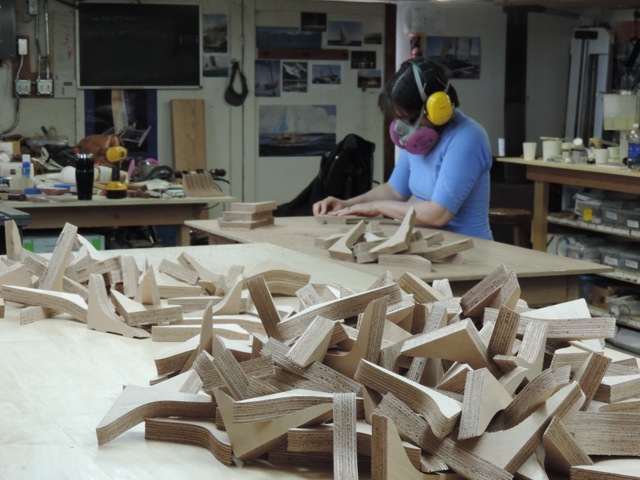
There are only 3 different gusset profiles when we start the handwork part, but when we finish beveling and rounding edges, there are 6 different parts. In other words, it’s critical to bevel and round the right edges and pack the right parts.
Ashlyn is shown here at the router table removing the tabs left from the CNC machining.
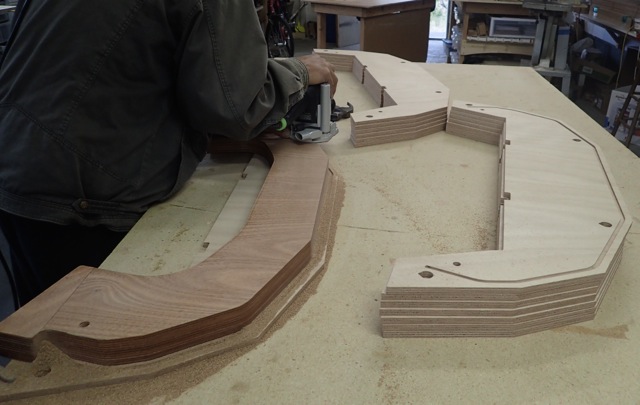
The machined gunwales (also made from 25mm plywood) don’t require handwork, (besides checking the joints and packing), but they do a very effective job.
Not only are these gunwales easy to join and install, but they lock the upper edge of the hull into its designed shape without having to laminate the gunwales and without needing much framing to support the upper hull panels (see photo).
The outer faces of the gunwales are “capped” with unidirectional glass to make them very strong for their weight before gluing on the bumper.
Making gunwales from plywood was not an inexpensive route for us to follow (we are the only kit company currently doing this) but the result has been worth it.
PT11 gunwale kits
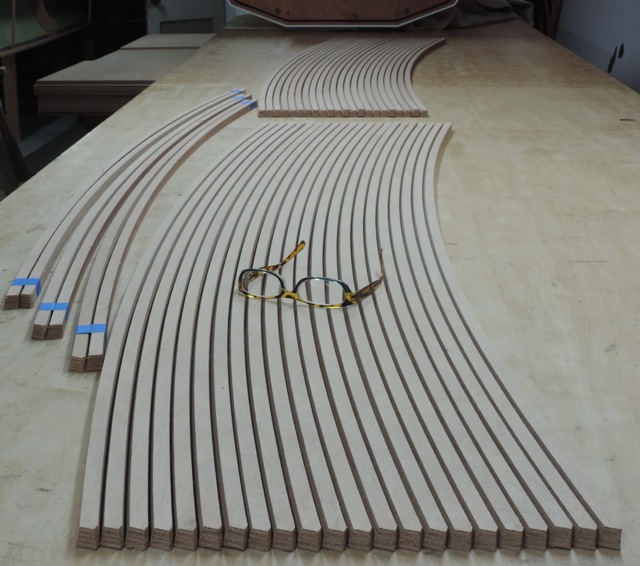
The lumber kit unfortunately ends up hidden under the foredeck (mostly) in a finished boat. Unfortunate, because we use high grade Sitka spruce that no one but the builder gets to see.
We use Sitka spruce to keep the parts light and strong.
The foredeck stringers (the biggest of these parts) let us keep the foredeck thin and light, yet stiff and strong enough to be walked on.Joining the foredeck to the hull are machined 15mm plywood glue cleats. These are machined to the curve of the foredeck edge to make them easy to install and pre-beveled to fit the angle between hull & deck.
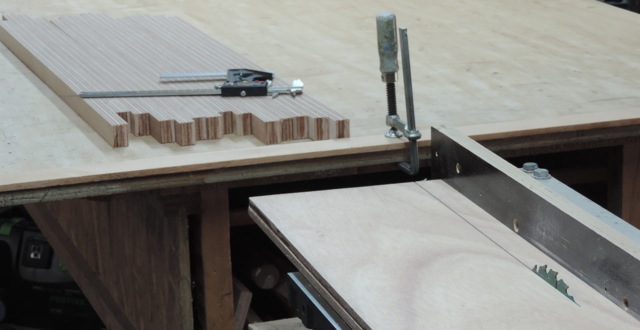
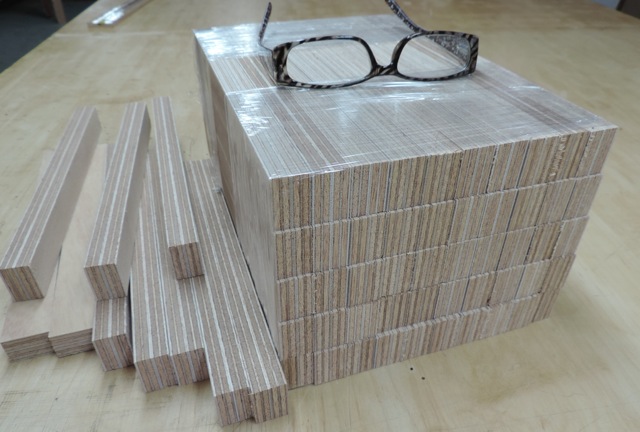
Our trunk logs (the spacers that separate the daggerboard trunk walls) are cut on the table saw from pre-fiberglassed stock.
Why do we pre-glass?, because if the builder were to glass these pieces it would be difficult to keep the edges square when trimming the glass. Square trunk logs help make square trunks, which helps the dagger board fit into the trunk, etc.Making our own mast sockets is necessary because the masts that we use are an odd outside diameter and the mast must fit into the socket without a lot of wiggle room.
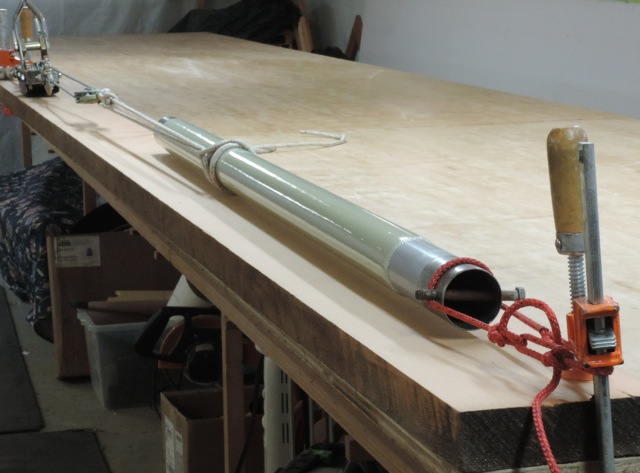
We found a steel tube the right diameter (after much searching) and use this as a mandril to make tubes long enough for 5 sockets to be cut from.
How we actually make these tubes is more than we want to show, but how we get the tubes off the mandril is interesting: The mandril is covered with adhesive-backed Teflon film (small photo), so after the tube has been laminated and post-cured (with heat), the tube is pulled off the mandril with a come-along.
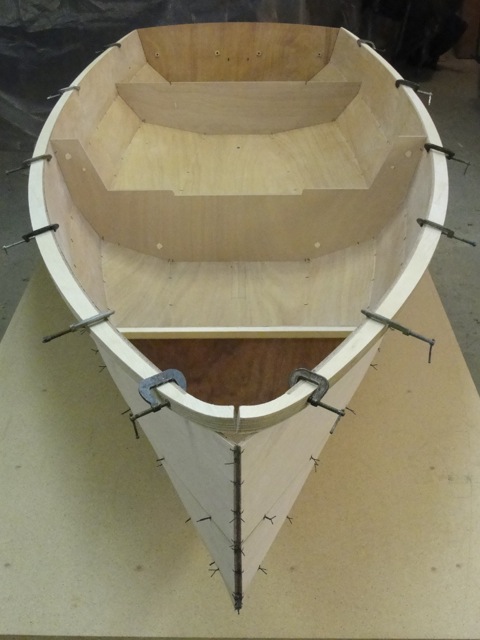
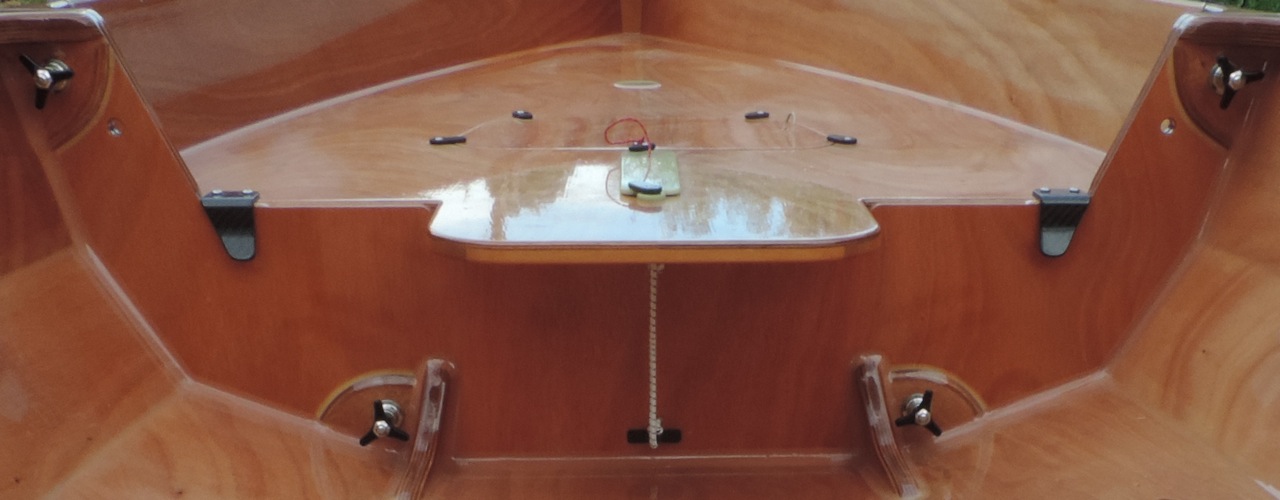
We used to do this between the shop truck and a tree (it takes a lot of pulling), but now have found that we can put clamps over the ends of a 2” thick plank and pull from those as shown.This photo shows the mast step assembly placed on the mast step bulkhead. These parts are easy to install (if one follows the manual) and easy to install accurately as there are scribed centerline marks on all the parts.
All bulkheads have tongues (visible in this photo) that fit into slots machined into the hull panels.How we make the alignment clips is also more than we want to show, but they are really a lot of work to make. We almost cry when it’s time to make more of them.
They are molded from many layers of carbon in a long blank and then cut into the shapes shown.The alignment clips are part of the joining system. They automatically (when pushing down on the forward hull-half), align and hold the two halves so that the threaded pins can find their sockets.
The alignment clips seat over small strips of filled epoxy (photo on left) that are glued to the bulkhead edges and then shaped level with the foredeck, where the clips are attached.
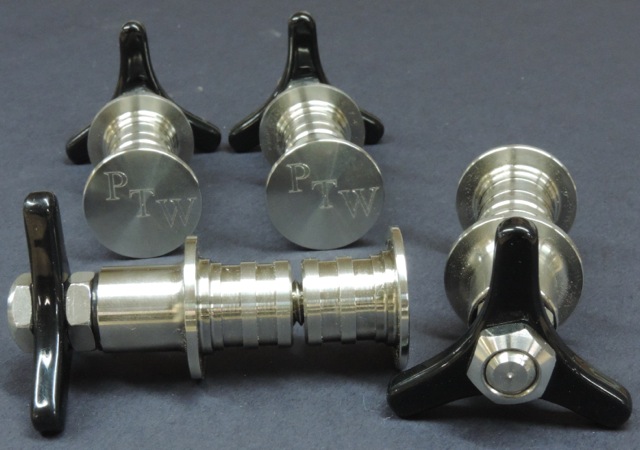
At the heart of the PT 11 is the connective hardware. This hardware has evolved considerably since our early prototypes.
Designed by Russell Brown and Paul Zeuche, this hardware (4 sets per boat) is very strong, easy to use, and maintenance-free.
Paul Zeuche machines these parts from 316 stainless steel and does so with a lot of care and pride.
We assemble these parts with the knobs and the custom beveled cap nuts and check tolerances, etc.
The knobs (star knobs, we call them), are machined from G-10 fiberglass plate.
This is a very dense and strong (similar to aluminum) epoxy and glass material that machines well and doesn’t corrode.
Unfortunately, G-10 is no longer available in black, but since the builder has to sand and coat the knobs anyway, they can just as easily be painted instead, even with enamel paint in a rattle can.
These are cut by the CNC machine, but we chamfer the edges on the router table and tap (thread) the holes.
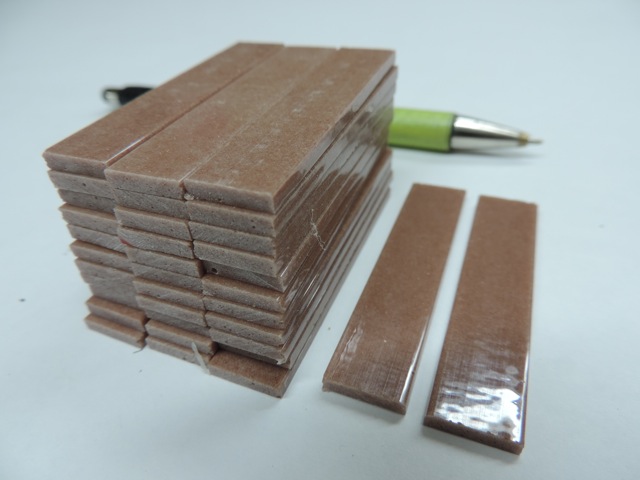
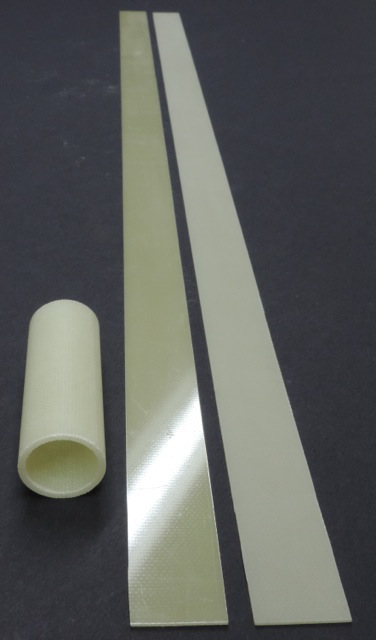
Also made from G-10 plate are the wear strips that are used at the upper and lower ends of the dagger board trunk.
Our method is a very effective and easy way to seal and toughen these damage-prone edges.
The towing hole is a piece of G-10 tubing that is bonded into the cutwater area of the stem.
A towing point should be strong enough to yank hard on the boat when it is full of water and this one is.
.
.
.
The PT 11 is covered in fiberglass cloth on every exterior surface (including the inside).
Glassing inside and out gives the boat a very long potential life span and it’s not hard to do.
The method we use is to pre- fiberglass and sand all inside surfaces with light cloth before assembling the hull, while the parts are laid flat on the table.
The outside of the hull is glassed with heavier cloth after assembly, and the bottom of the hull is glassed with even heavier cloth yet.
This takes a lot of cloth and three weights of cloth...And there’s peel ply for the chine taping.
The fiberglass types and weights used on the PT 11 are carefully chosen to make the boat as light and strong as possible.
Unidirectional fiberglass (additional to the 3 types mentioned) is used on the outside faces of the gunwales to dramatically stiffen and strengthen them.
We carefully roll the cloth onto tubes on our 24’ long cutting table.
.
The parts you have seen in this article are base kit parts. Several parts included in the kit are not shown here. See the kit contents photos.
In 2016, some of the parts that have previously been options will be included in the base kit.
The PT 11 (and Spear) foils are not the usual dinghy fare. Good foils are just as important as good sails if you want performance, especially upwind. Again, we went for something that we would want ourselves.
Sailing adventures on our multiple PT 11 prototypes while cruising have provided some of the highlights of our trips. Having a dinghy that really performs, especially upwind, makes it possible to explore farther and it is definitely more fun.
The accurate foil shape (NACA 0012 section) and high aspect ratio are what makes these CNC machined foils perform so well.
Machining them from plywood (instead of making them from fiberglass in a mold) is more affordable and there’s not a huge amount of labor involved in going from the kit to finished foils. The result can be really beautiful and tough foils that are lighter than most molded dinghy foils.
Unfortunately, the Okoume plywood industry has recently moved to using thicker veneers in thick plywood panels, so instead of the foils being made from 9 ply (12mm), they are now made from 7 plies.
The foils are machined in halves (photo below) and bonded together with vacuum pressure so there are actually 14 plies in a foil that is almost 1” thick.
Machining foils from plywood is the ultimate way to find defects hidden within the layers. All of our foils have some visual defects or slight waves in the veneer lines, but sometimes a whole batch of foils will become “paint grade” foils sold at a discount.
From one 4’x8’ sheet of plywood we can machine 12 foil halves, which sounds like a lot, but that makes only 6 foils, enough for 3 boats.
Vacuum bagging the halves together is a laborious process, mostly because the parts have to be held straight when being joined, but we have a new method to try, which could be better.
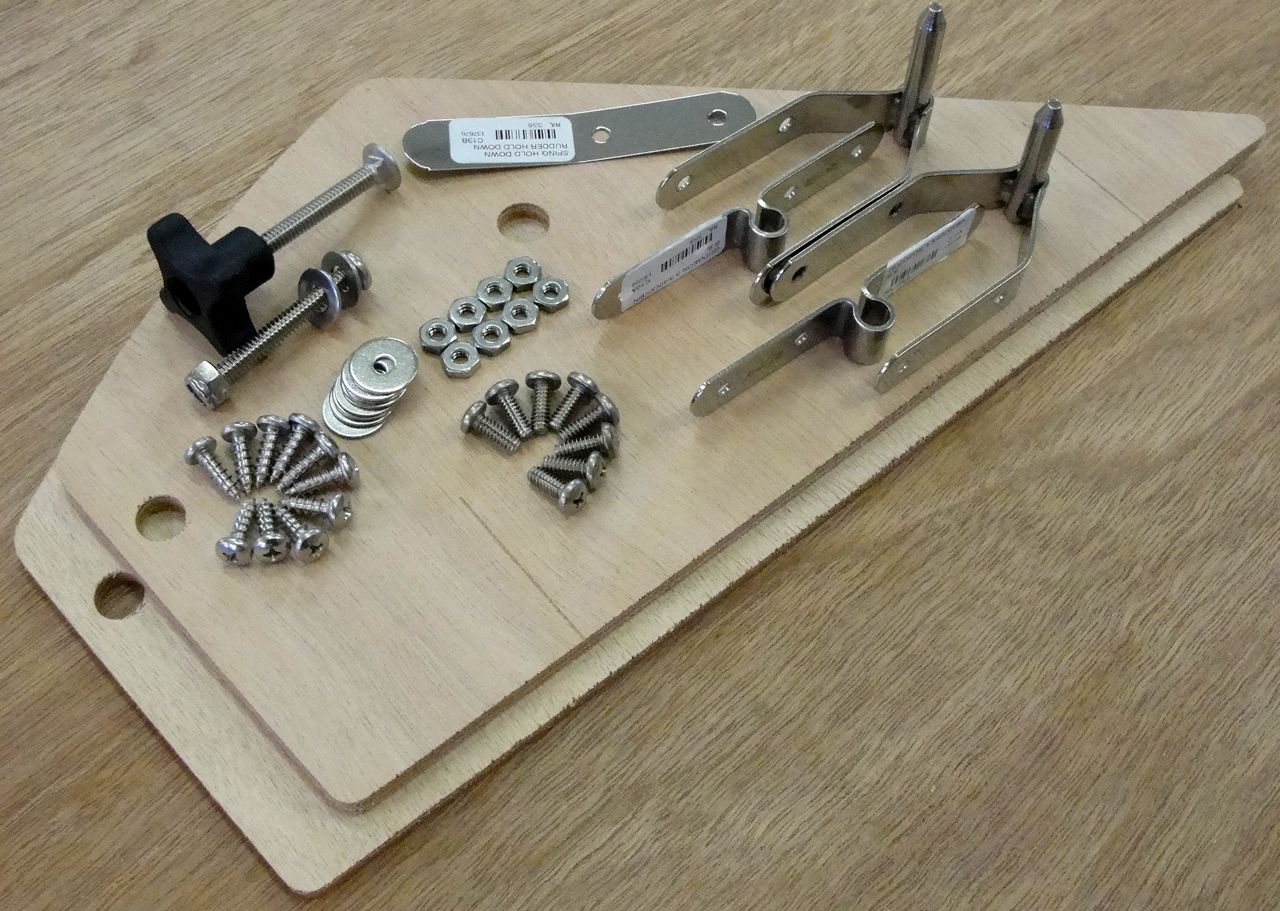
The machined surfaces of the foils are very accurate and fair, but we sand out the tooling marks after the halves are bonded together. We sand just until the tooling marks start to disappear, and then sand the edges and round the upper (rectangular) parts on the router table.The design of the foils parts is something we are proud of. The kick-up rudder is simple yet can be locked down or up and can be folded back to fit in a foils case.
The gudgeons are modified (by us) to be the right width for our rudder case and there are scribed marks machined into the case walls to show gudgeon location.
The tiller and hiking stick are Sapele mahogany. The tiller is tapered on three sides in a router jig and the holes drilled in drill press jigs, leaving just the edge rounding to the builder.
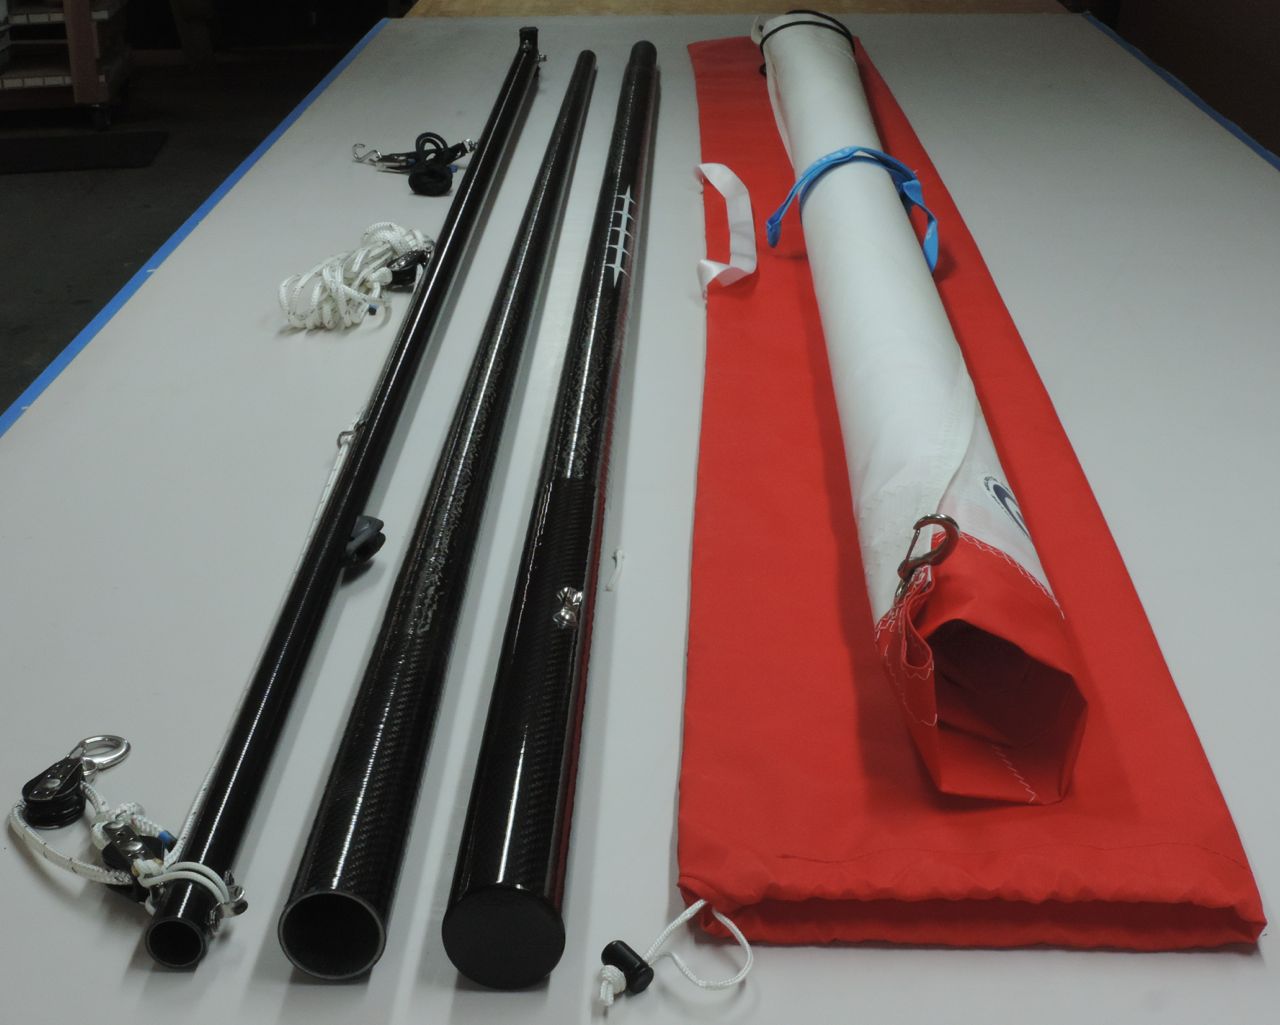
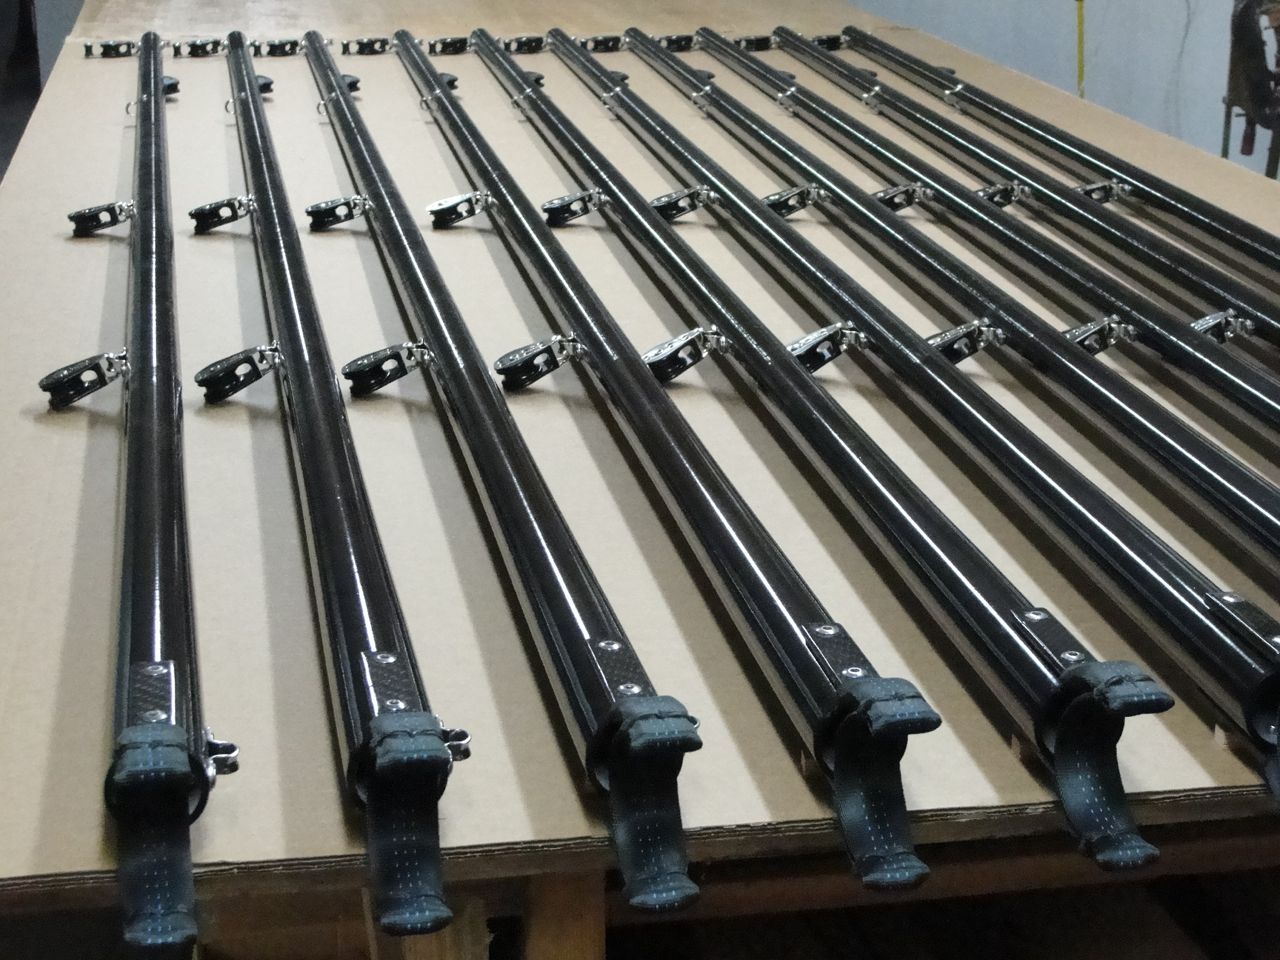
The rigs are an entirely different kind of work for us. The wonderfully lightweight two-piece carbon masts come to us through the windsurfing industry, but we do a large modification to the bottom ends of them to make them strong enough to be socket-stepped.
The boom tubes are made for us by ICE and they are so lightweight that adding the Harken and Ronstan hardware to the booms just about doubles their weight.
We build the rigs complete. They are ready to use when they leave the shop.
Having grown up dinghy sailing (from a cruising boat mostly), I knew that for our rigs to be successful, they had to extremely easy to use. Carbon fiber spars make it possible for us to build a 13 pound rig. That’s 13 pounds for the mast, boom, sail, running rigging, and the bag that it all fits into.
Set-up and break-down of this rig is fast and easy enough to make a “quick sail” something that one actually does, instead of just thinking about doing it.Like everything else we do, we try to build a lot of rigs at one time. Shown here are 10 rigs worth of spars. The upper mast sections (far right of photo) are the only part that isn’t much work.
The fatter sections are the lower ends of the masts, where all the hidden reinforcement happens.
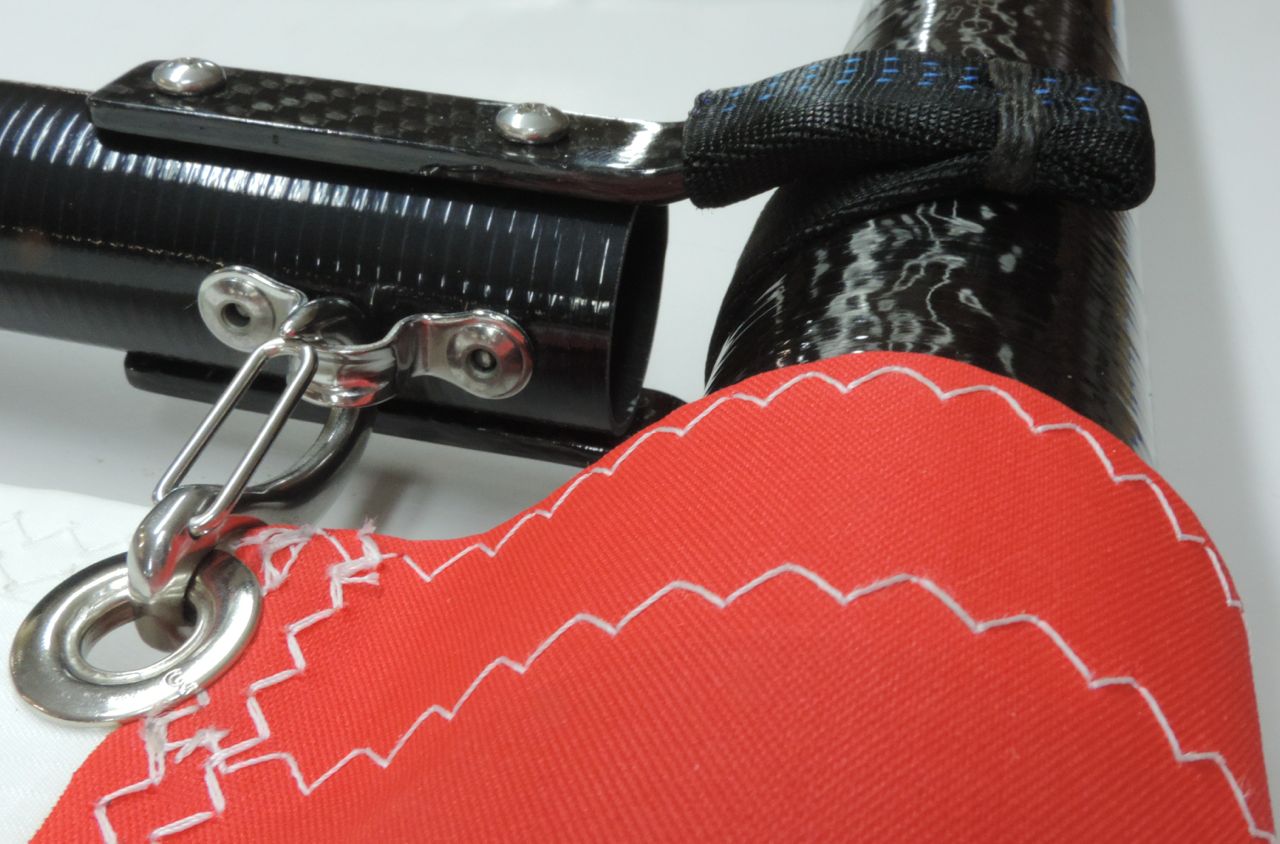
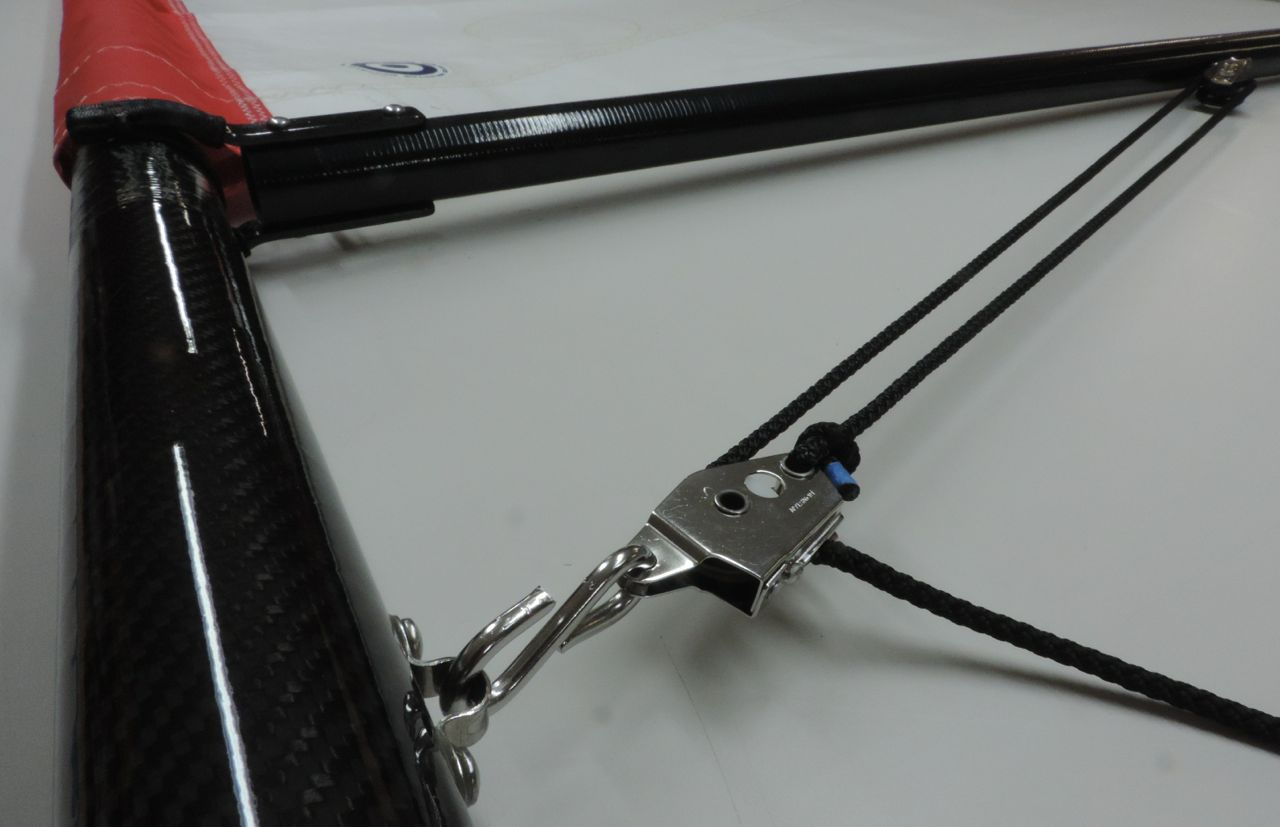
On the left are 10 booms just started, with only the gooseneck fittings attached.This kind of work can be stressful, as mistakes would be very costly (the tubes are expensive), but also quite rewarding. The process is refined with every batch we do.The gooseneck fittings are built this way for two reasons: # 1 is that assembly is so fast. Just plug the boom onto the mast and snap on the tack hook instead of fiddling around with fitting a gooseneck pin into the end of the boom. # 2 is that no hardware is bolted to the mast, which would weaken it. This gooseneck is strong and is very nice to the mast.
The gooseneck fittings are made of molded (vacuum bagged) carbon fiber in long blanks and then cut into strips on a table saw. All very easy until the corner and edge rounding, coating, and drilling, and of course mounting to the booms.All the hardware for sailing and all the running rigging is carried on the boom.
Sheet, vang, and outhaul all live on the boom.
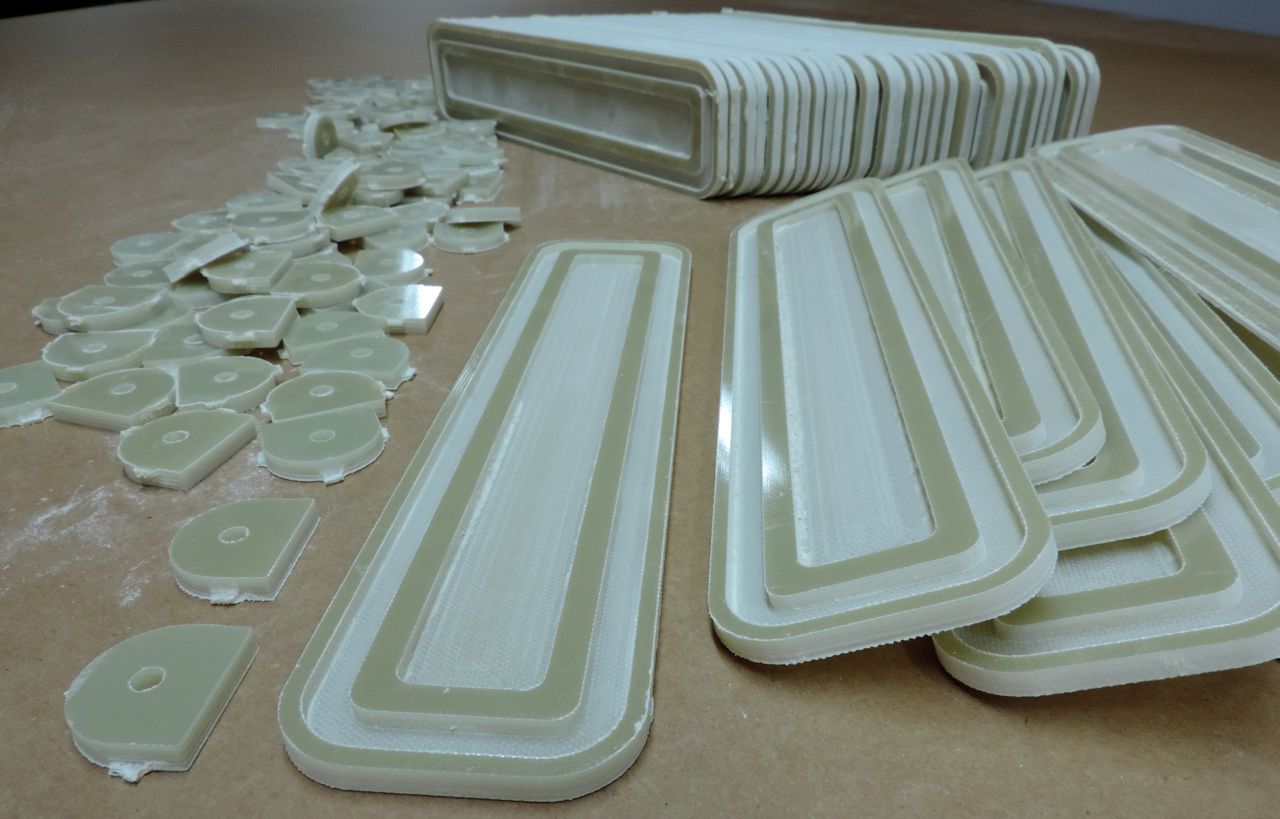
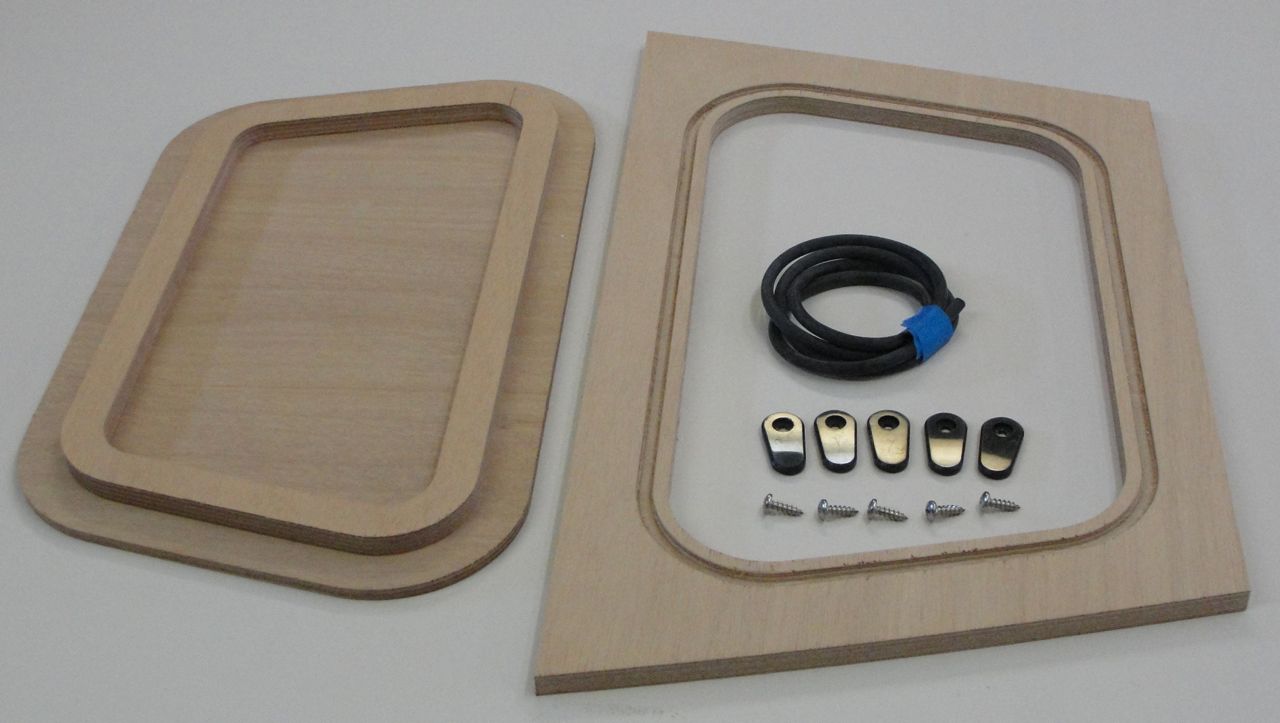
The quick disconnect vang set-up is shown here.The dagger board trunk caps are machined for us from 3/16” G-10 plate. They are machined with a gasket notch and now are machined with a recess for the mahogany stiffener. The recess makes it easy to bond the stiffener in place and also makes the cap significantly lighter.
A good trunk cap is a luxury if you like dry pants and a necessity for towing, and is now included in the base kit.
We sand and chamfer the edges of the caps and riser blocks and we make the stiffeners.The daggerboard trunk cap kit uses many of the same parts that the hatch kit uses, except that the cap uses riser blocks to lift the turn dogs to the level of the cap and custom washers to lift them just a bit more. One of the two washers provides a tie point for the lanyard (see both photos below).The hatch kit will be included in the base kit in 2016 because everyone purchasing the PT 11 has opted for the hatch kit.
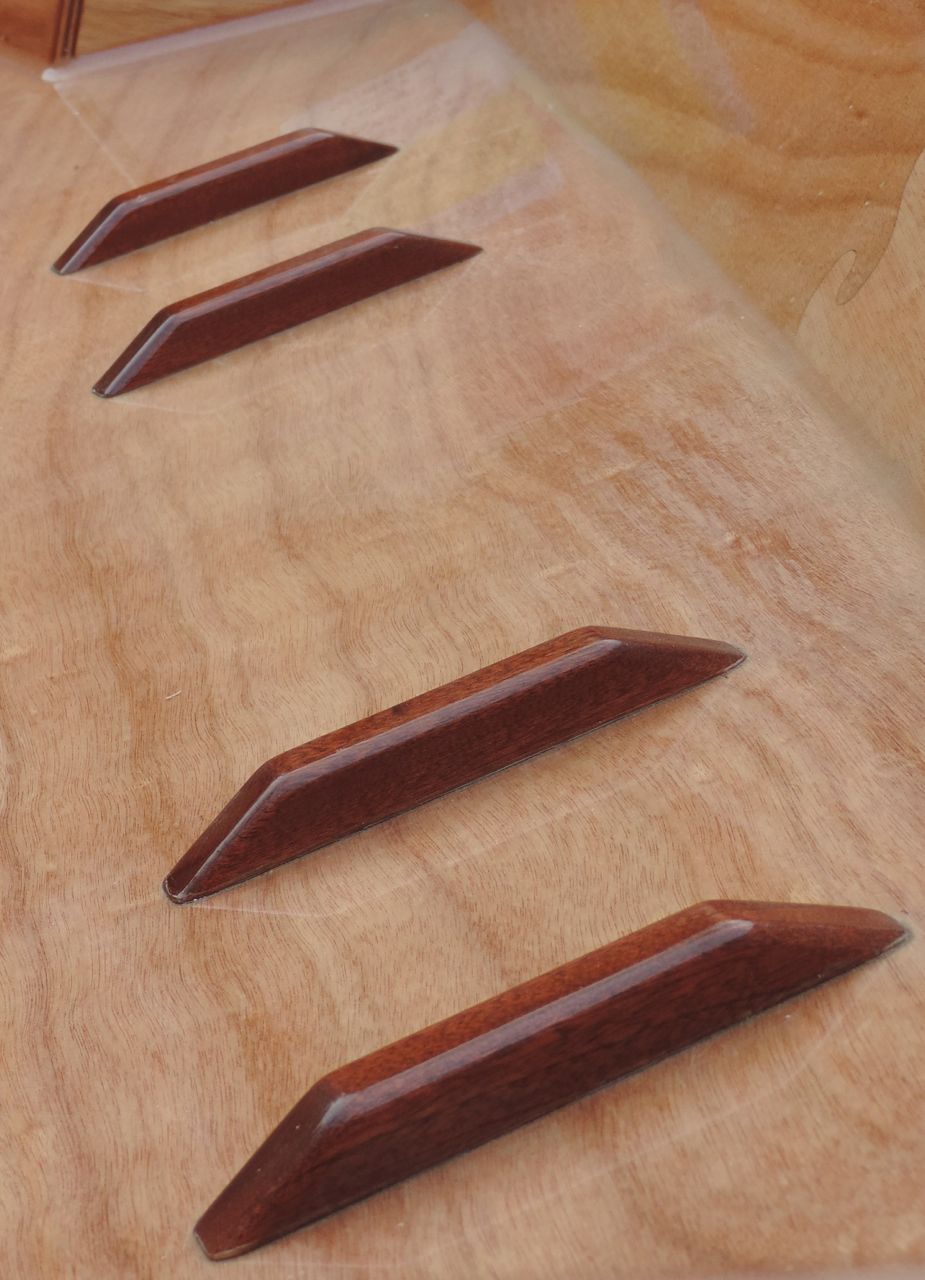
The hatch opening and turn dog fastener locations are now machined into the foredeck and we now pre-round the edges of the coaming opening and lid stiffener.The hatch is flush, which is necessary because it is sat on when rowing with two. It is also airtight (the gasket sits inside a machined gasket notch). How airtight? Removing the lid takes a good pull if the boat has cooled as the vacuum pulls the lid down tight.We machine a lot of small mahogany parts such as foot braces, back seat cleats, stiffeners, and oarlock riser blocks. We have gotten pretty good at producing parts that are basically ready to install and finish.Foot braces are almost as important as oars when it comes to rowing.
We have experimented with many different types of foot braces and keep coming back to these glued-on Sapele mahogany braces. They are easy to install (with the included template), lightweight, hard enough to hold a finish well, and made from a species that would hold up well even without finish.
The back seat cleats are also shown in photos above and below.
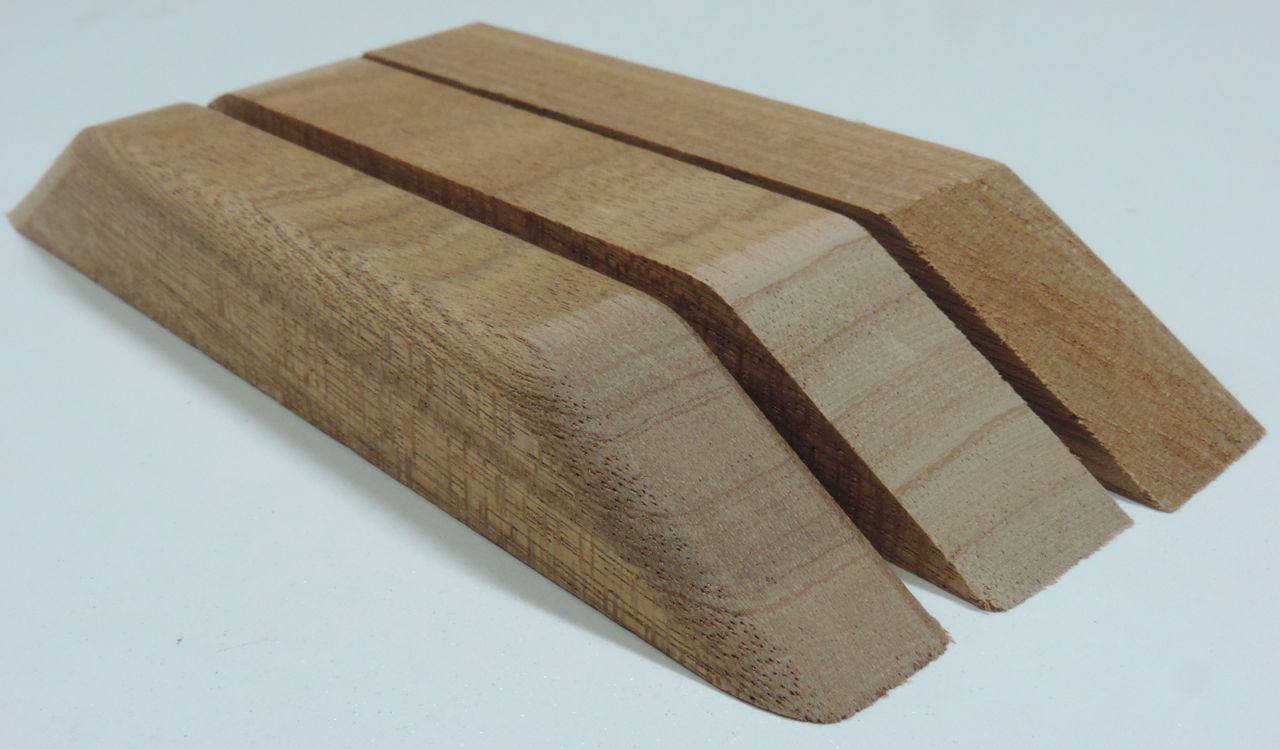
The photo below shows three of the finishing steps used on all the cleats, stiffeners, and foot braces.
The piece on the right has had its ends cut to length and angle on the table saw. The piece in the middle has had its sawn faces sanded and sharp corners rounded on a table sander. The finished piece has had its edges rounded with a sharp round over bit in a router table.
All the stock for these parts is run through a sharp thickness planer after cutting to make all four edges smooth before cutting the individual parts.
To say that we make a lot of these parts is not an exaggeration.
Shown are foot braces and back seat cleats for only five boats.
.
.
.
.
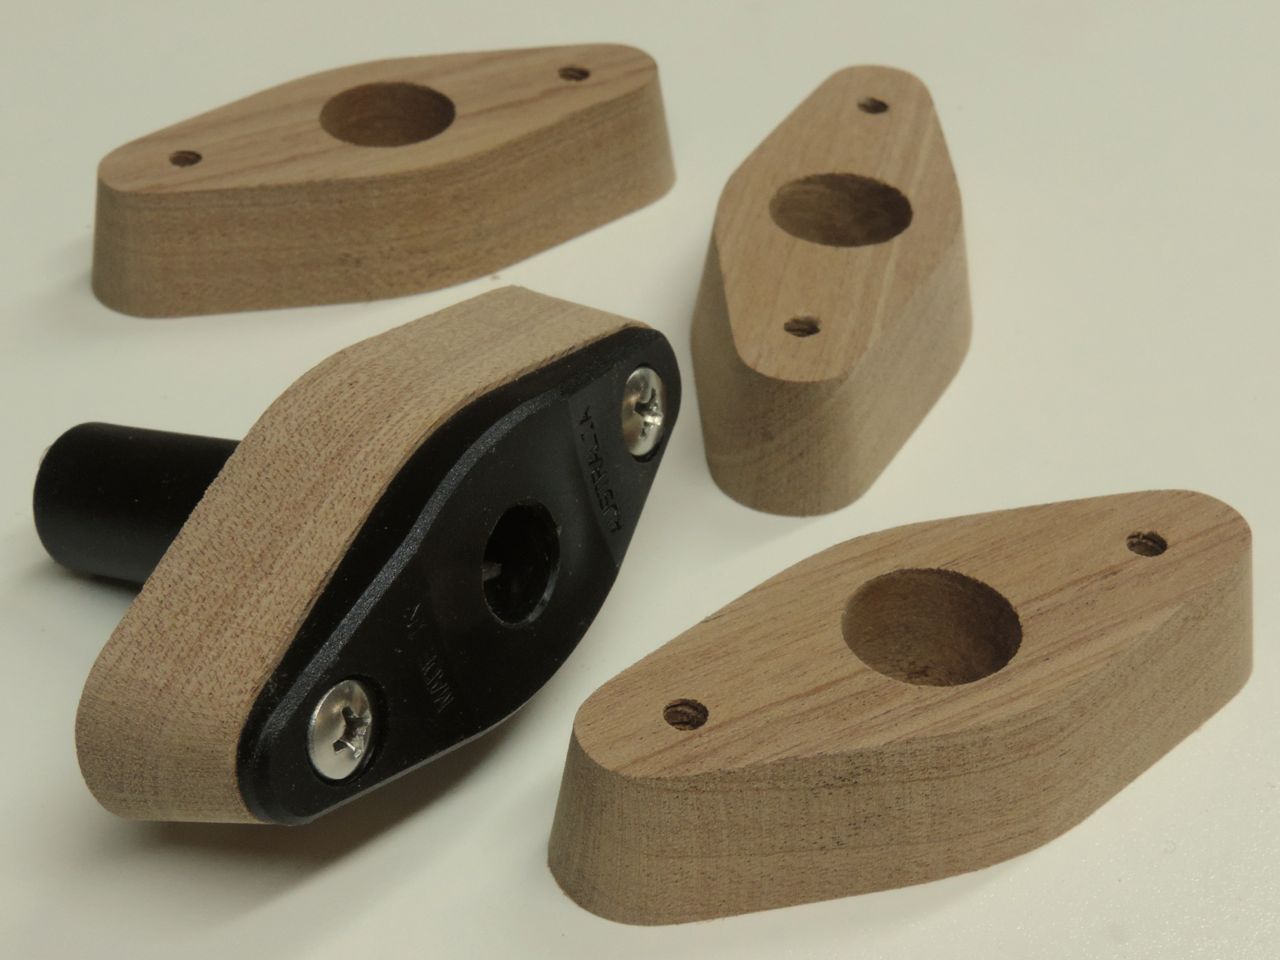
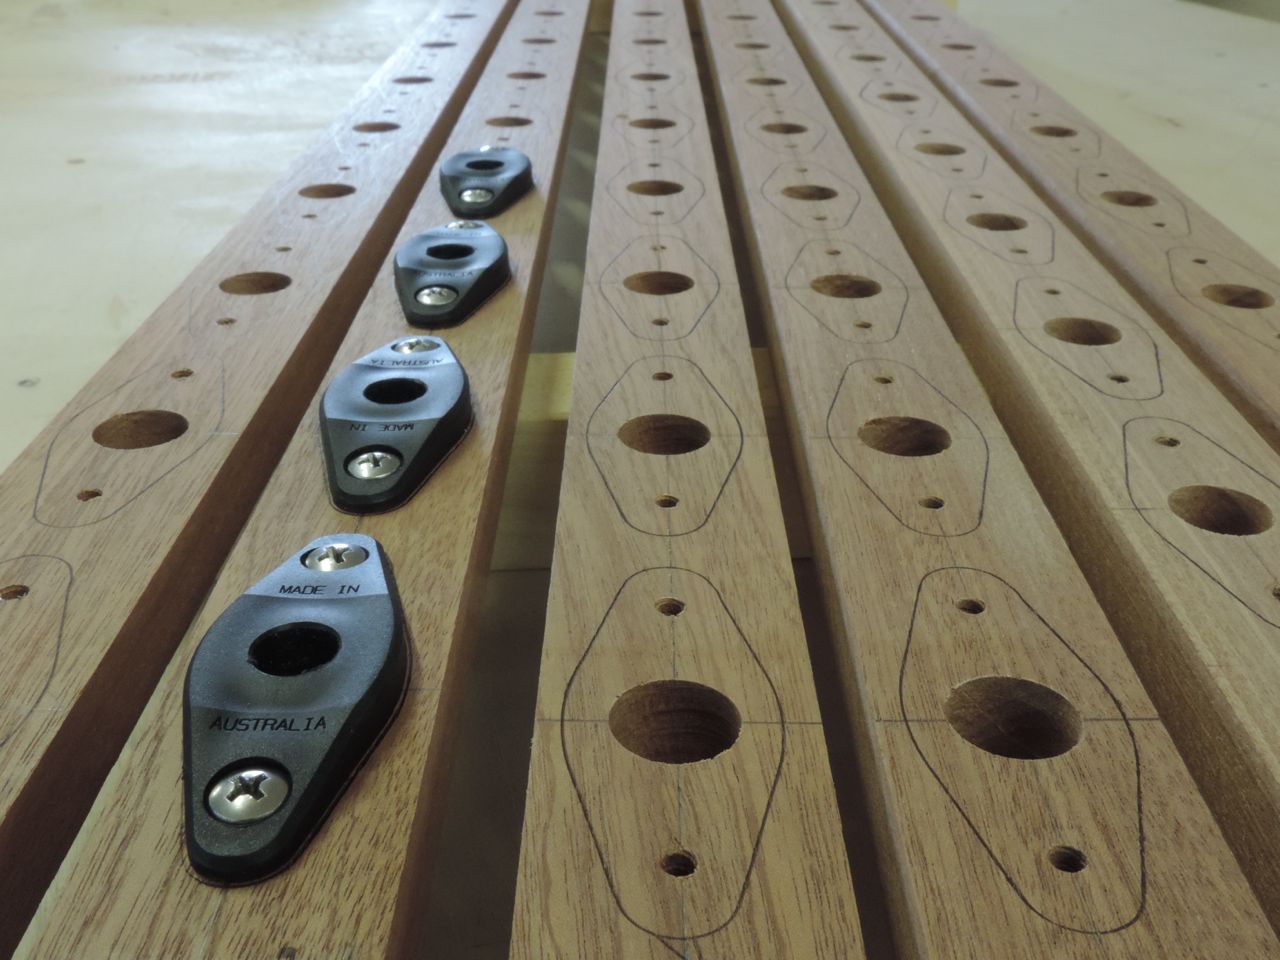
The oarlock riser blocks are not strictly necessary, but they give the sockets more support and give arguably better ergonomics, especially if you like to sit on a cushion when rowing.
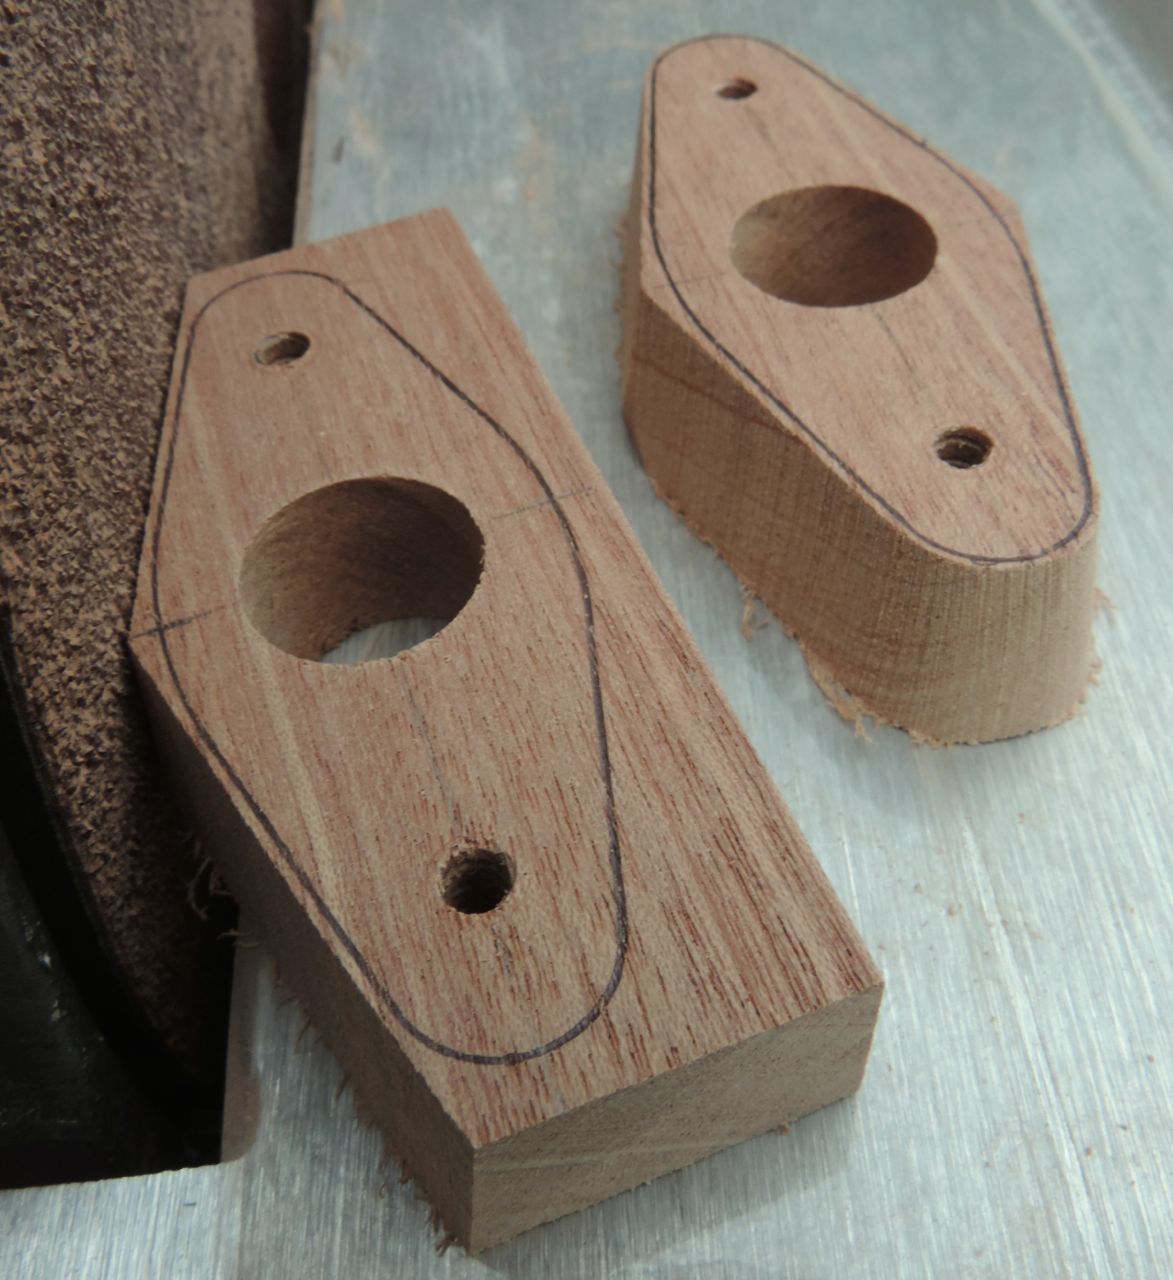
A block of wood with holes drilled in it would work fine, but we machine them to the shape of the socket.
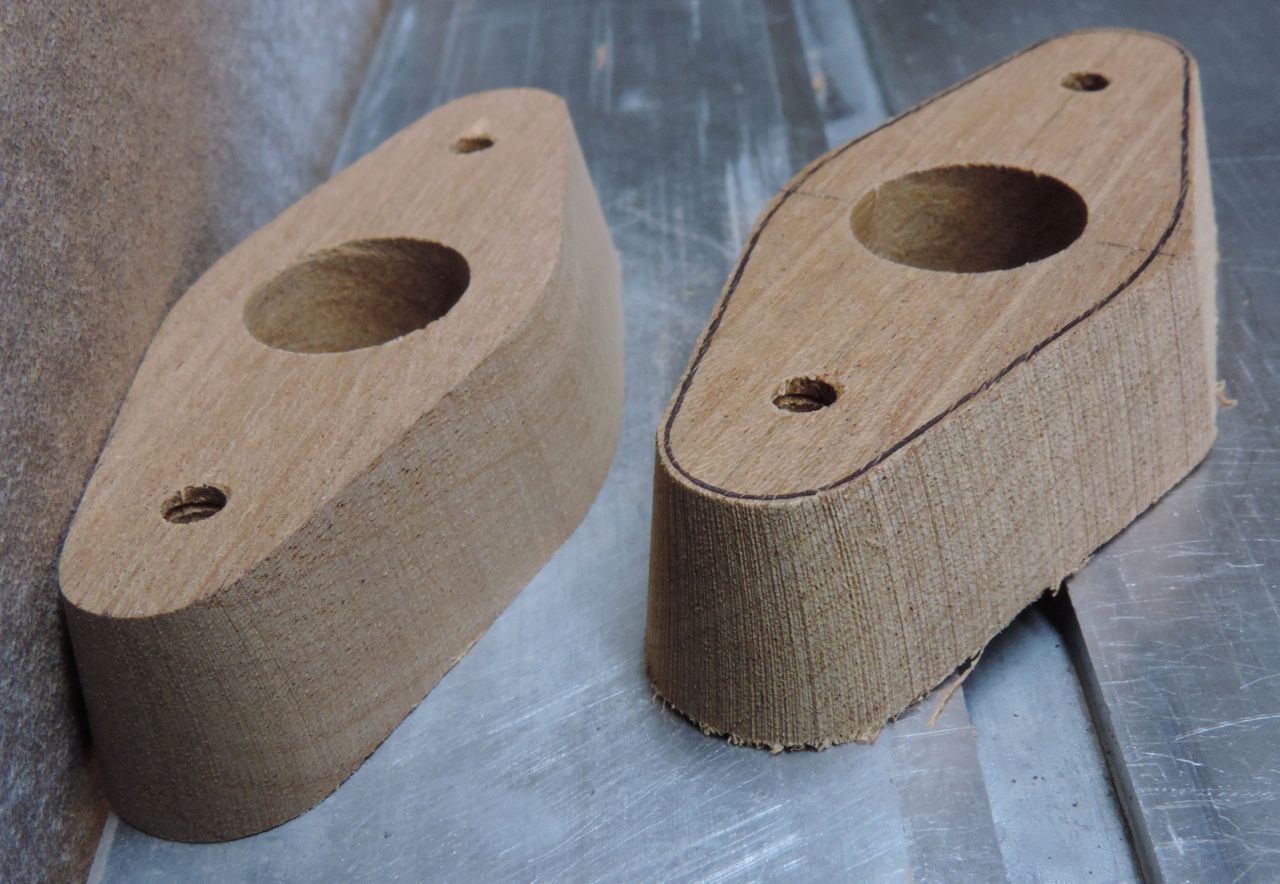
Making these parts is laborious and makes sense only if a lot of them are made at one time.
CNC machining them is possible, but would be expensive (5 axis machine) and the parts would still need finish sanding.
.
.
.
.
The drill press is used with a fence to drill both large and small holes on center.
The sockets are installed with the screw size that will be used for final installation and marked around as shown.
After cutting the strips into individual parts, the shapes are roughly machined very quickly on a large tilt-table sander. They are then finished on a smaller tilt-table sander with fine sandpaper as shown below.The back seat (also visible in photos above) is made from very tight grain Red Cedar which seems to be an ideal material for a removable seat. It’s very light, looks good, and doesn’t ding up the inside of the boat. We pick through piles of expensive wood to find the nicest pieces, plane them to thickness, and cut them with a template.The construction manual is what ties all the parts together.
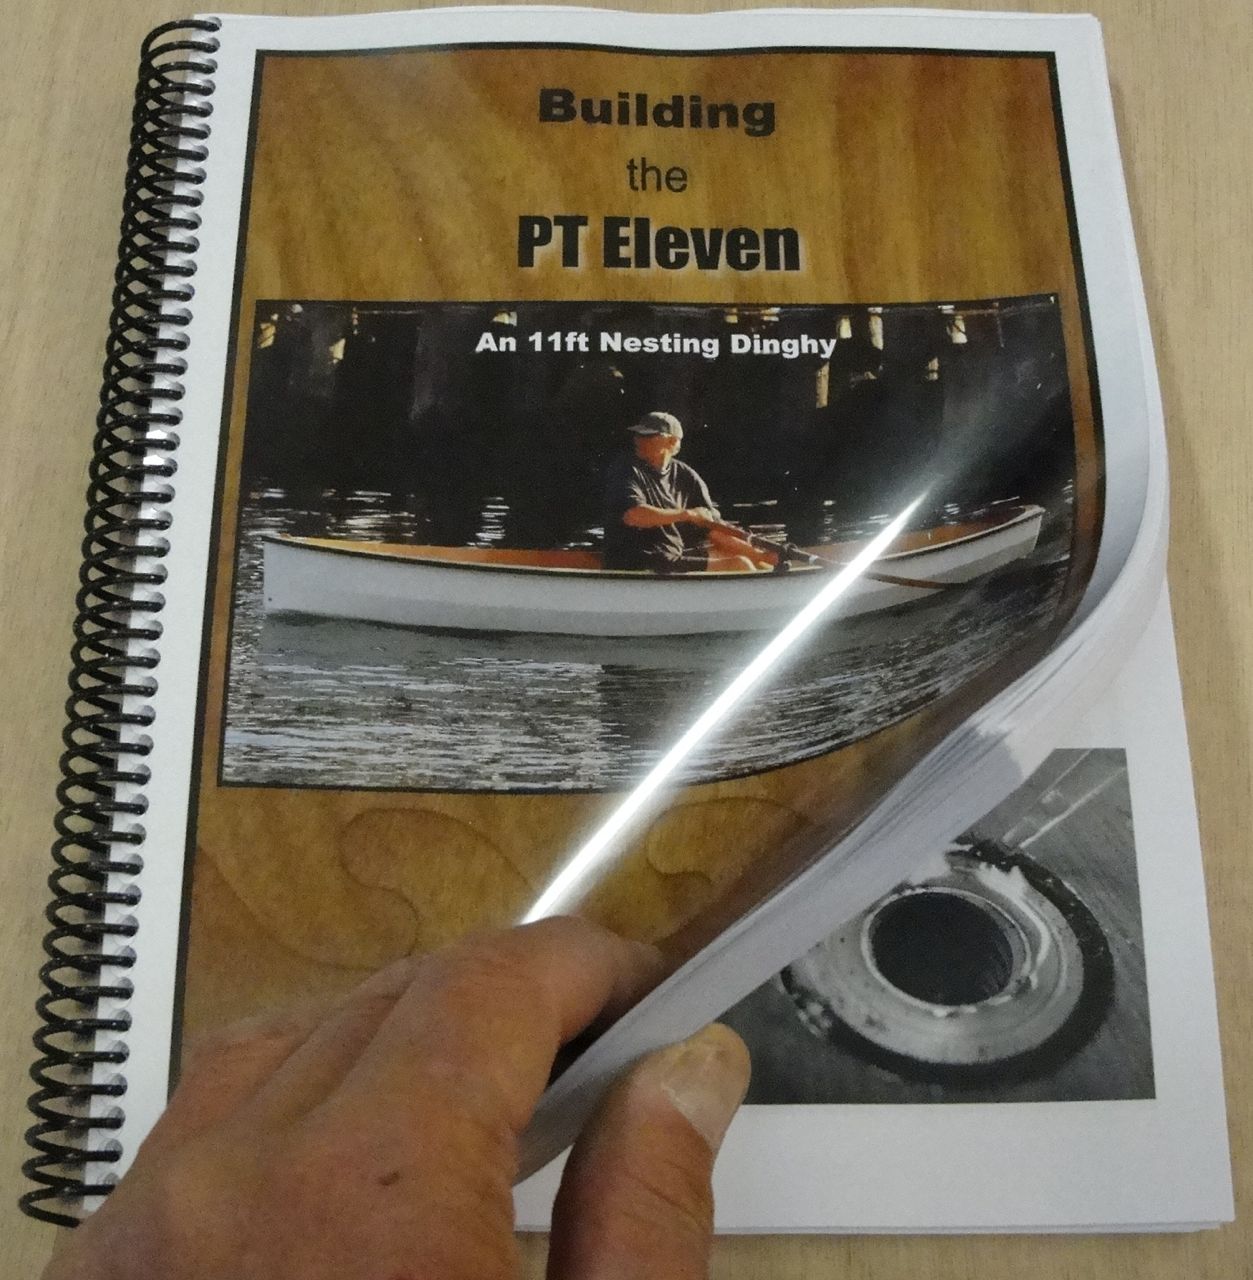
The PT 11 manual has been the largest single effort of this boat. It seems to be paying off as we get very few “tech” calls or calls from builders in trouble.
The only embarrassing thing about the manual is that it is so thick (306 pages) and some find that intimidating.
The reason it’s so thick is that we try to show more with photos than with words and there are more than 700 photos in this book, showing every step of the building process.
The PT 11 is not a simple boat and while the manual needs to be carefully followed, total amateurs have built very nice 11’s and had a good time doing so.
The manual has undergone multiple re-writings (even very recently), which usually involves building a new boat to use as a photo prop for design changes or changes in process or sequence. The result of all this is that the boat is now both better and easier to build.
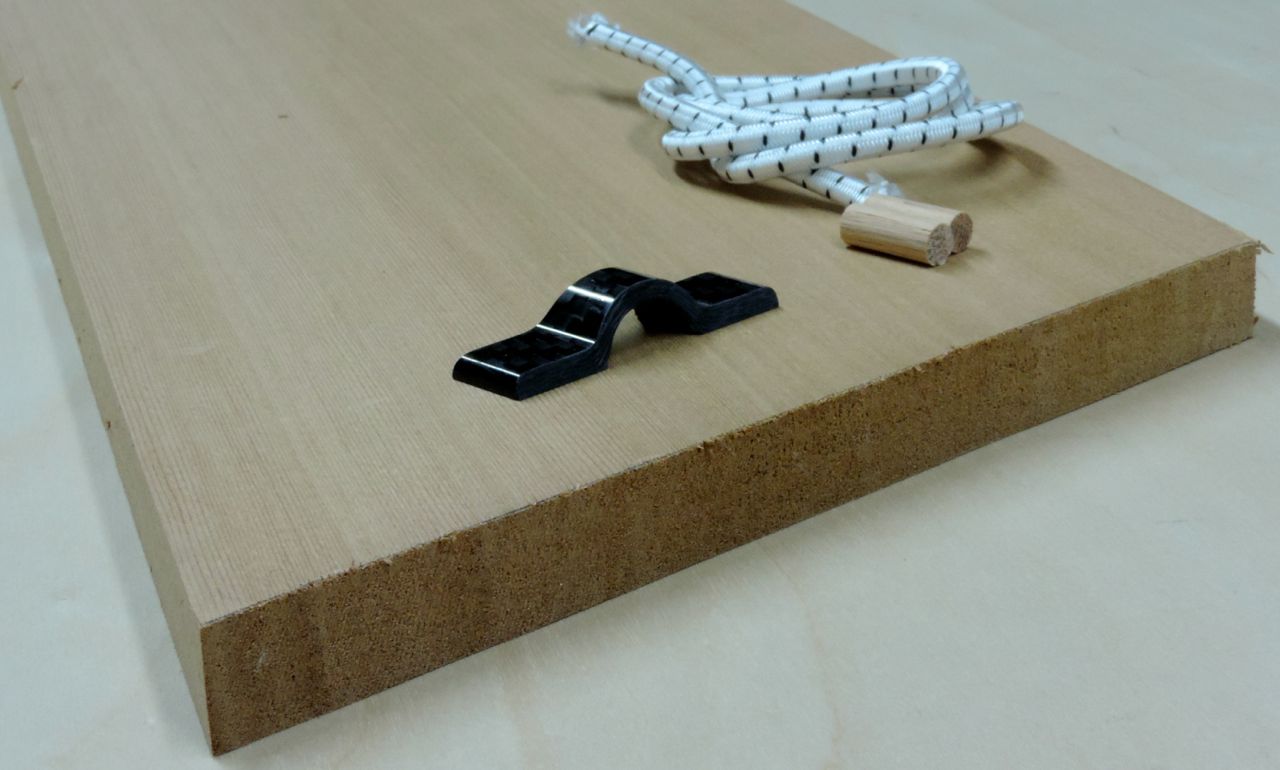
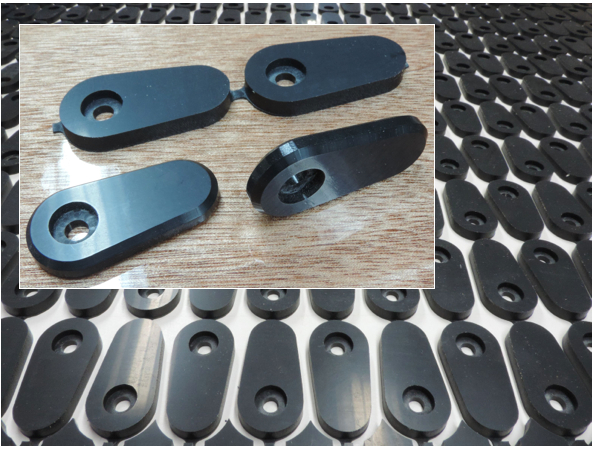
What do we do with our “spare time”? We make other stuff, such as turn dogs and carbon eye straps. We make these parts for our own boats, but we also make them for our friends at Chesapeake Light Craft, who have managed to sell many thousands of these parts for use on their own kits.
The turn dogs are machined from sheets of Delrin(TM) and we bevel the edges on the router table, which sounds dangerous, but really it’s just mind-numbing (and finger cramping). Small fingers like Ashlyn’s are pretty much a requirement for this job.
..each piece has the upper & lower edges chamfered on a router table...
The carbon eye straps are popular because they look cool, but also because they can be glued to a surface (such as a kayak deck) without fasteners. We make long blanks in a two-part mold (long enough to make 80 eye straps). After trimming and finishing the blank, the eye straps are cut, beveled, and finished by hand. Both the turn dogs and eye straps were just an idea (floated with crude samples) to our friend John Harris at CLC about 5 years ago. These parts now are a small industry and can be seen on boats far and wide (including our boats).What’s next for us?
Kit sales in 2015 challenged the production capacity of our shop so the thought of someone else taking over PT Watercraft has crossed our minds more than once. This would allow us to develop other boats and write about building techniques.
For the present, however, we are happy to keep producing the best kits we possibly can.
This is kind of a long post featuring my festival pictures, our booth, the Pt 11 on the water, a customer built PT Skiff, end show humor, & video links...
The Port Townsend Wooden Boat Festival is a great event any year. This year, the 39th, was no exception. We had two hot and sunny days and Sunday cooled considerably under cloudy skies. In spite of the Hood Canal Bridge closing earlier in the week and again for a flotilla, people made it to our peninsula.
I did not get as many festival photos as usual but here are a few. It is hard not to get the same pictures as everyone else. Everywhere you look seems photo-worthy.
Holiday
NW Maritime Center
Festival Burgees
PT Skiff arrives
Flags flying
masks watching
layers of boats
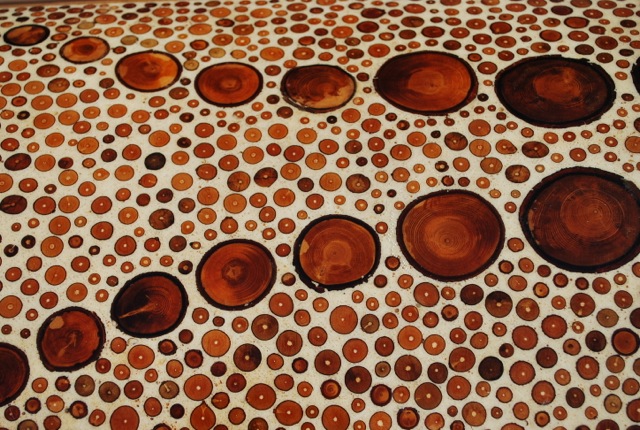
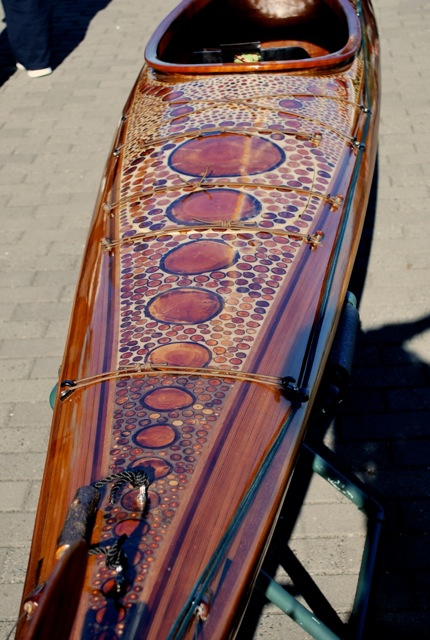
wood rounds inlay
inlaid kayak
fish net skills
tug wow
shapes
planks
sparkle
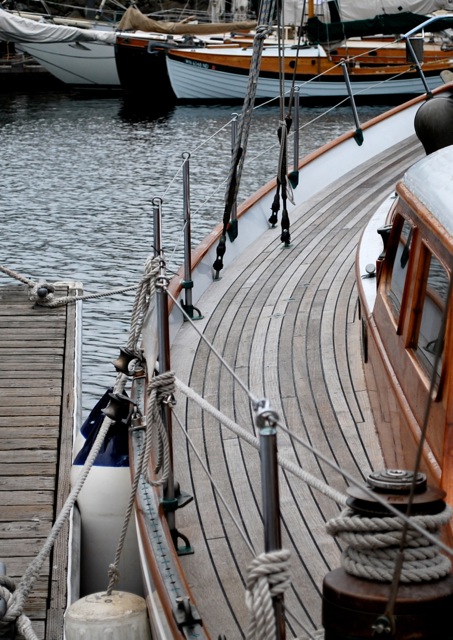
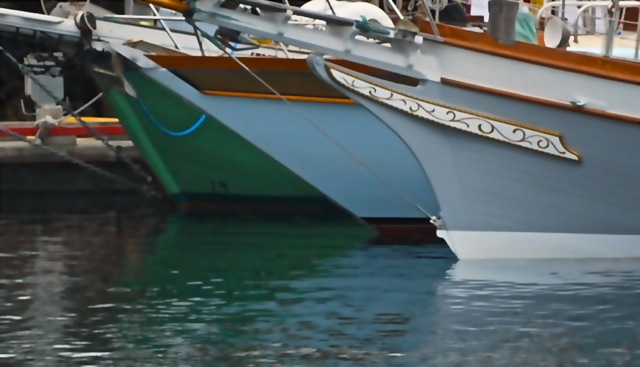
bows
Festival time
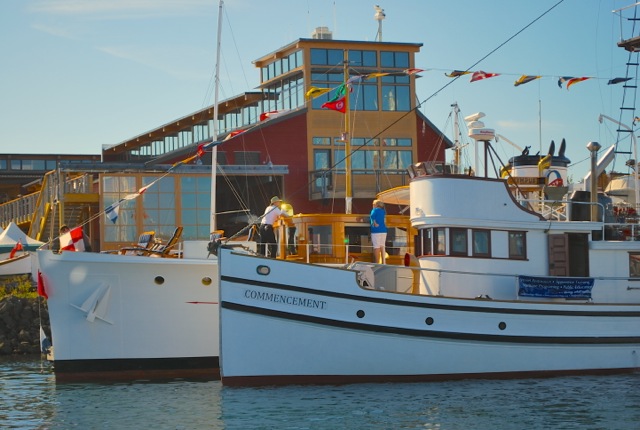
Classic motor yachts
more classic motor yachts
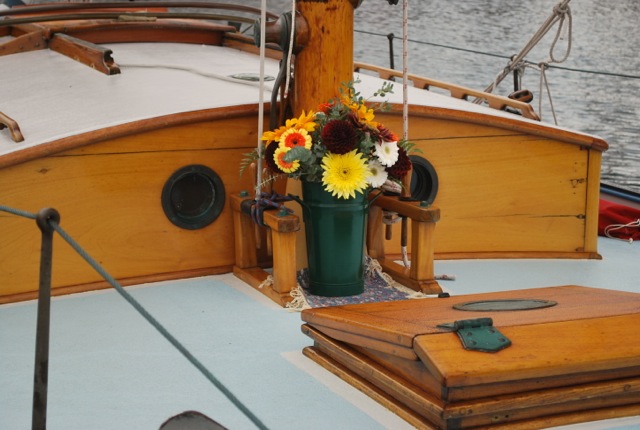
Vito’s bouquet
For PT Watercraft, the festival is increasingly a family reunion of sorts. Among the thousands who visited, were quite a few builders of our kits; some of our earliest customers, some who recently completed beautiful boats, and some who are just beginning construction. We were so happy to see everyone. We even have show regulars who are still dreaming about building a PT 11 or a skiff, and they come every year to stroke the bright-work, listen to conversation, ask new questions. It is great to see familiar faces.
Our booth photos;
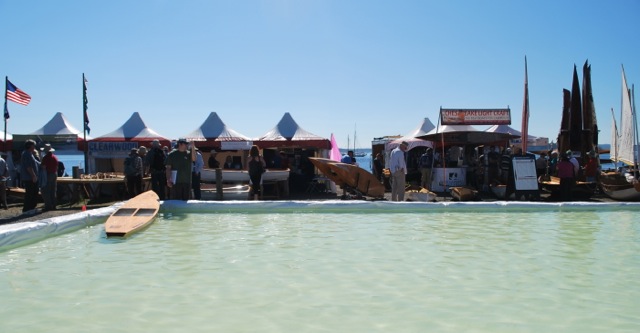
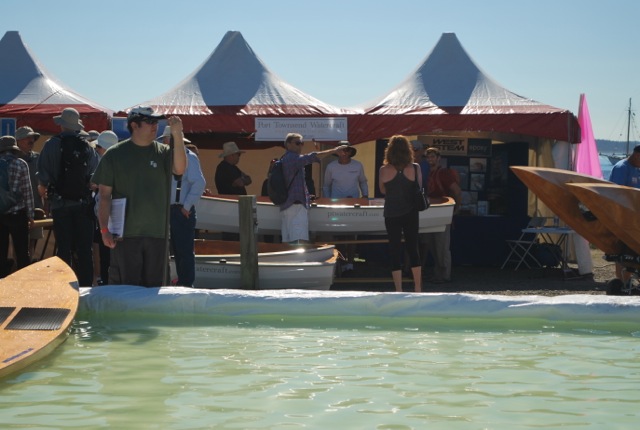
We were across from the paddle pool
Our booth with WEST SYSTEM
Port Townsend watercraft in the WEST SYSTEM tent on the point near the Wee Nip.
Schooner Martha in the Classic Mariner’s Regatta 2014
You can probably tell that I love our wooden boat festival even if I talk myself hoarse over the three days. I walked the docks Thursday afternoon as boats were filling the harbor, and again early Sunday morning. The Sunday Sail-by is a highlight, though this year I found myself talking to booth visitors more than watching the hundreds of boats out on the water at once. Still very impressive! I expect lots of videos will appear on Youtube.
Harbor masters get boats into their slots for Port Townsend Wooden Boat Festival in 2015
Our annual helper, Cooper Parrish, raced the PT 11 in the 26ft & under, and then sailed around during the Sail-by. Cooper makes very cool things at Scaled Composites in Mojave and we are so grateful that he is happy to take time out and join us at the show. Our friend Simon Miles of 206 Composites here in Port Townsend, had the Patin out as well. The Patin is probably the first beach cat design ever. Interested cat sailors might want to check out videos of the Vela Patin.
boats from the past…
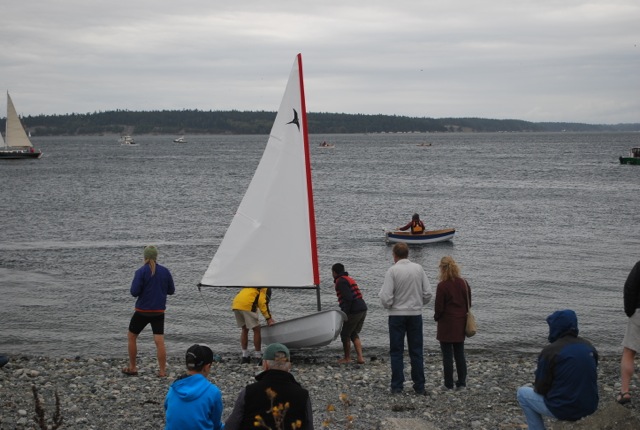
Setting up on the beach
ready to go…
90# dinghy and a 13# rig
heading out…
this way…
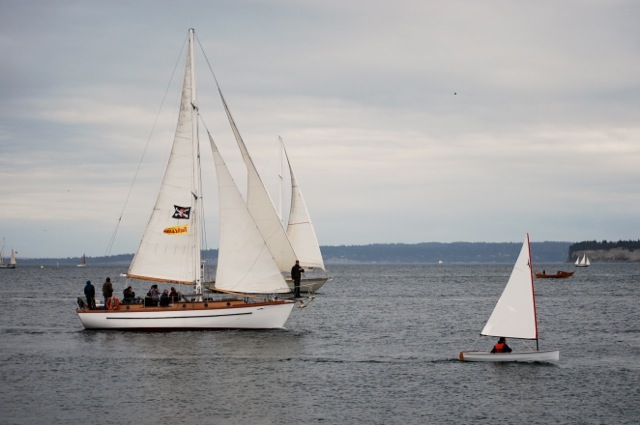
amongst giants…
that way…
PT 11 and Vela Patin
Vela Patin & Trimaran Lotus
Cooper
boats everywhere…
coming in…
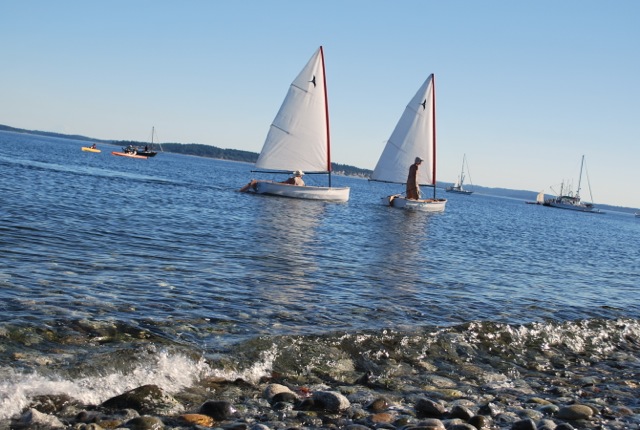
2 PT Spears
Customer built PT Skiff 'Mojo', was in the water. It was great to have a skiff at the festival for folks to check out. Builder/owners Mark and Meg were rightfully proud of their boat. Mark chose to really spiff it out with various woods, a sprayed paint job in indigo blue, and some plush outfitting choices.
PT Skiff arrives
Mojo
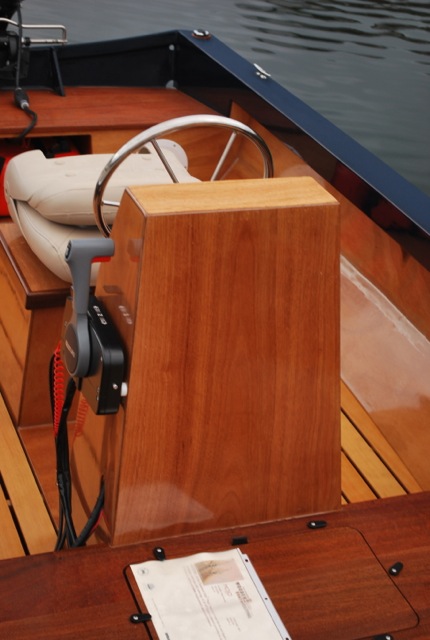
using alternative woods on the console face and seat tops
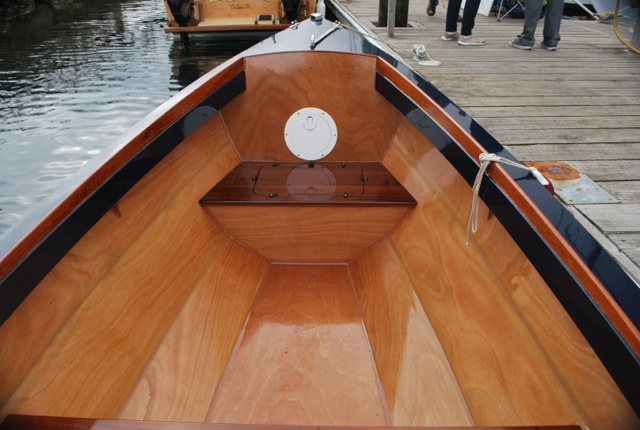
foreward cockpit
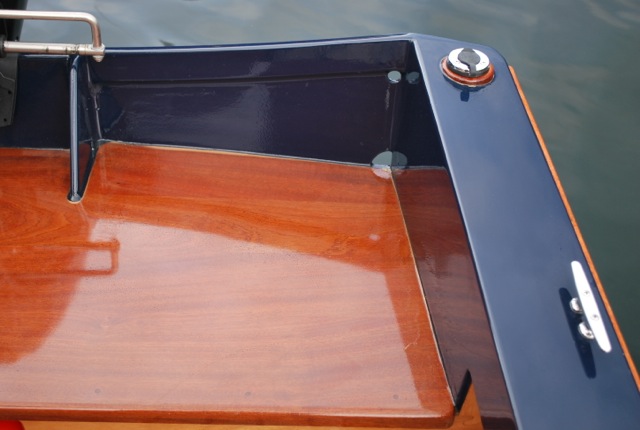
aft seat and stern light plug in
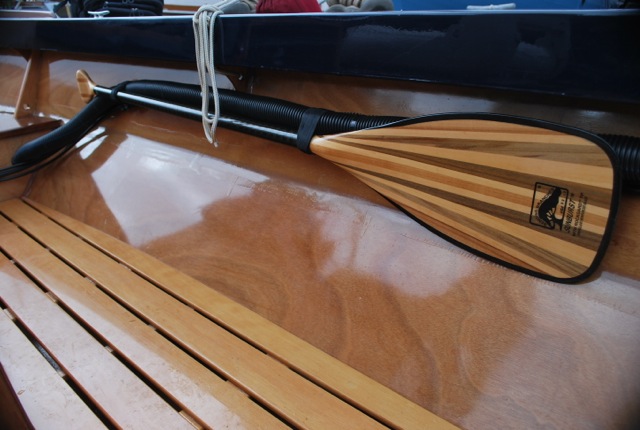
cables and paddle installation
controls
Mark set up a bilge pump self bailing system.
Sapele upper coaming
At the end of the festival, packing up has a party like feel to it. We all survived a fun but physically challenging weekend. Our friends and show neighbors, Chesapeake Lightcraft, often display a bit of end show humor. This year, they thought the Wee Nip bar next to them was closing the festival with 'BYOB' for a fill up. Well, John and crew brought a boat! Thanks John for all the laughs!
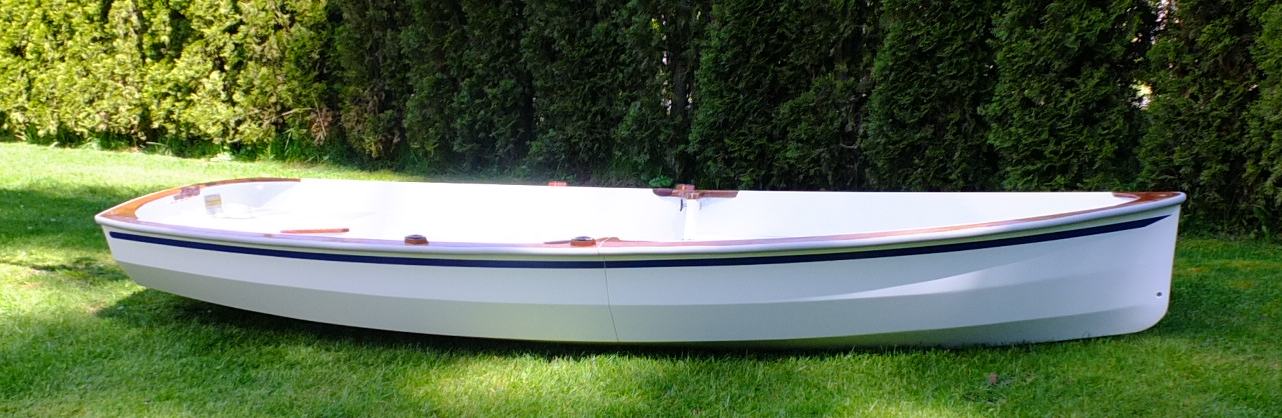
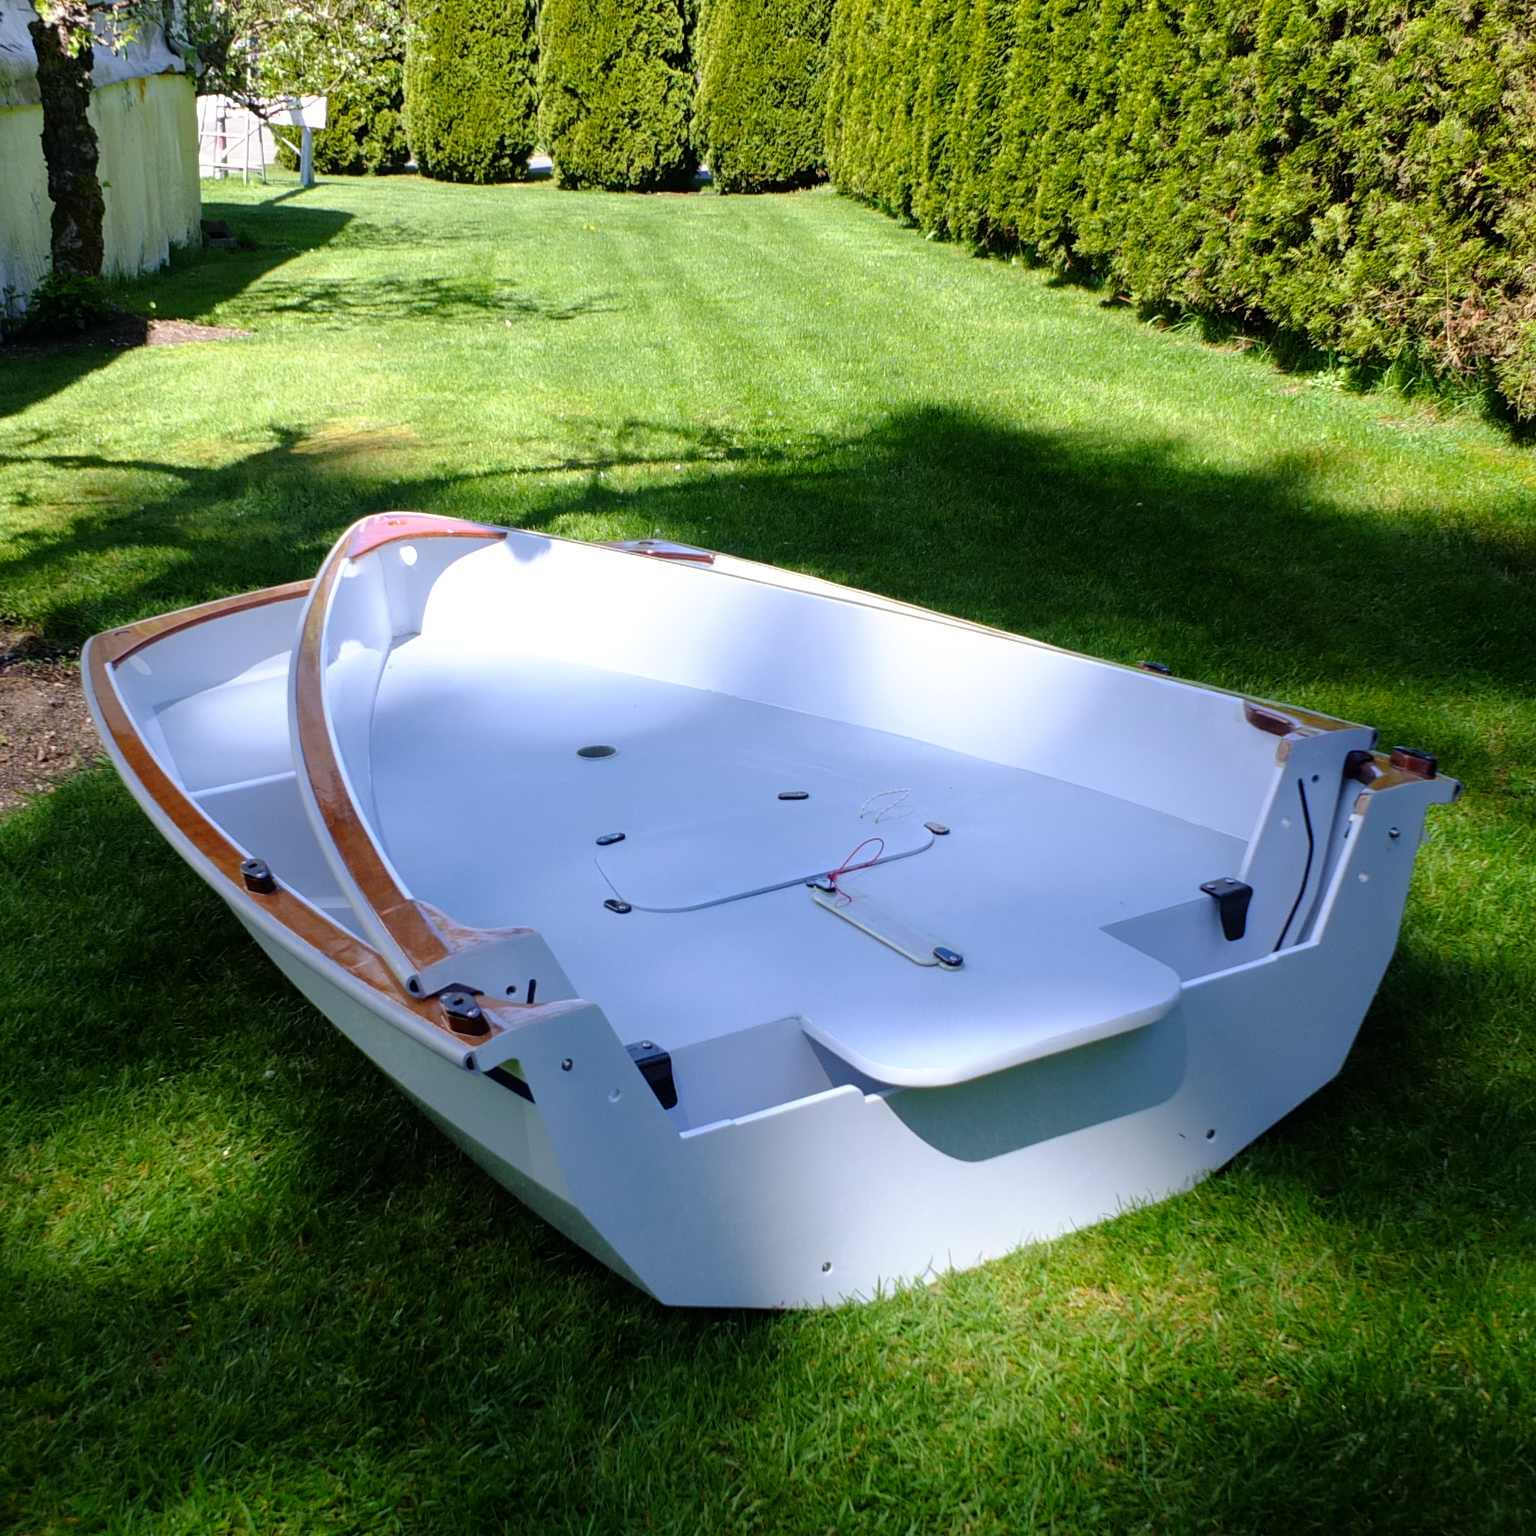
As beautiful as clear coated Okoume is, a couple of builder's have chosen to paint their dinghy interiors. They have also added non skid. I have to admit, I think these boats look super smart!
exterior paint job on Sadee Ann includes a nice racing stripe.Sadee Anne PT 11 nesting dinghy nestedSadee-Ann with painted interior and clear coated accents.A PT 11 in Holland with paint over non skid on the interiorThis PT 11 in Holland matches the 'mother ship'
February 28 2015 was a beautiful sunny and breezy Saturday, and it was the occasion of the annual Shipwrights Regatta in Port Townsend. Russell and I are not racers but this seemed like a good excuse to get out on the water. We entered the PT 11 thinking there would be a host of dinghies in the fleet as is often the case in Port Townsend. Well, we turned out to be the only actual dinghy! Our 11 footer was the most “water-line challenged” in the fleet. Next up in size were 505 Olympic class racing dinghies, then 6 Thunderbirds, and lots of racing and cruising yachts of a wide variety.
LIL B ON THE STARTING LINE, FAR LEFT (click to see larger)
When the horn sounded for the start, we were first across the 'line', together with the 'cruising class'. We made the course around the bay twice and crossed the finish line just over 2 minutes behind the last large boat. Yes, we finished last which, after-all, was pretty much a given at the start! It was a lot of fun and nobody was ever left far behind as even we were able to stay close to the fleet and boats with 10 times our sail area and 3 or more times our waterline.
LIL B FAR RIGHT (click to see larger)
A great thing about this town and this sailing community and regattas like this one is the fun loving spirit and a trophy of some kind for almost everyone. We won the Boat Hook, as the boat that 'could have used a little pull'... or one less crew, perhaps.. but we were tickled with our “win” and had a blast out on the water. I was having so much fun, cold as I was, that a childish grin was frozen on my face.
Lil B at the finish line
My fingers were too cold and stiff to work the Gopro camera very well but what I got is HERE, wet lens and all.
Other pictures of the day can be seen on the Port Townsend Sailing Association website. We are seen under the results and Annual Awards as "Lil B".
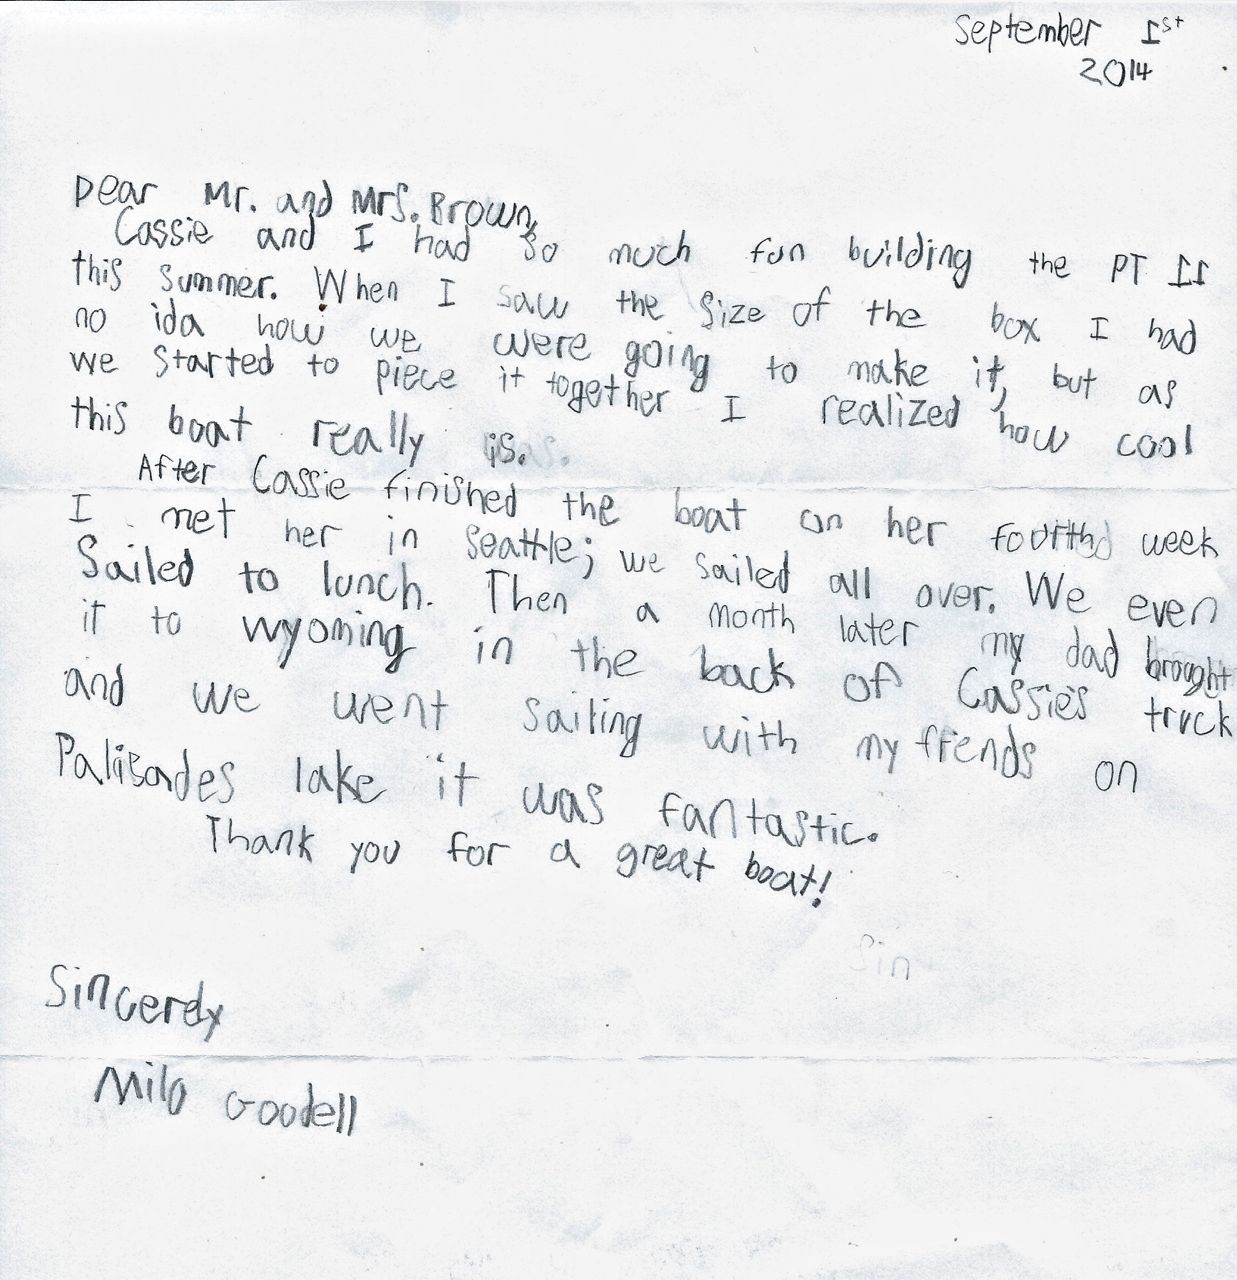
we received a very special New Years gift from PT 11 builder Cassie McDermott. It was a really nice email and a pdf attachment from 10 year Milo, for whom she built the boat. She concluded her letter thus:
"I knew that your boat changed our lives, but I didn't realize just how much. I am overwhelmed and feeling completely blessed for what you and your boat has brought our family. In the end, it's not just a boat."
On June 30th, Cassandra McDermott and 10 year old Milo arrived to pick up their PT 11 kit. 'Cassie' is a young woman who delivers boats, does a lot of sailing, boat finishing, refinishing, and polishing. I suspect she is very good at it, too.
Meeting Cassie and Milo (who also loves to sail) was a real pleasure. It was particularly exciting to have a pre-teen totally into building a PT 11 and that a woman was to be the primary builder. It often feels like building boats is perceived as 'such a guy thing' and I like to encourage more female involvement with the kits.
Besides the distinction for Cassie & Milo as the first ‘mom & pre-teen’ team so far to build one of our kits, they did it in record time.
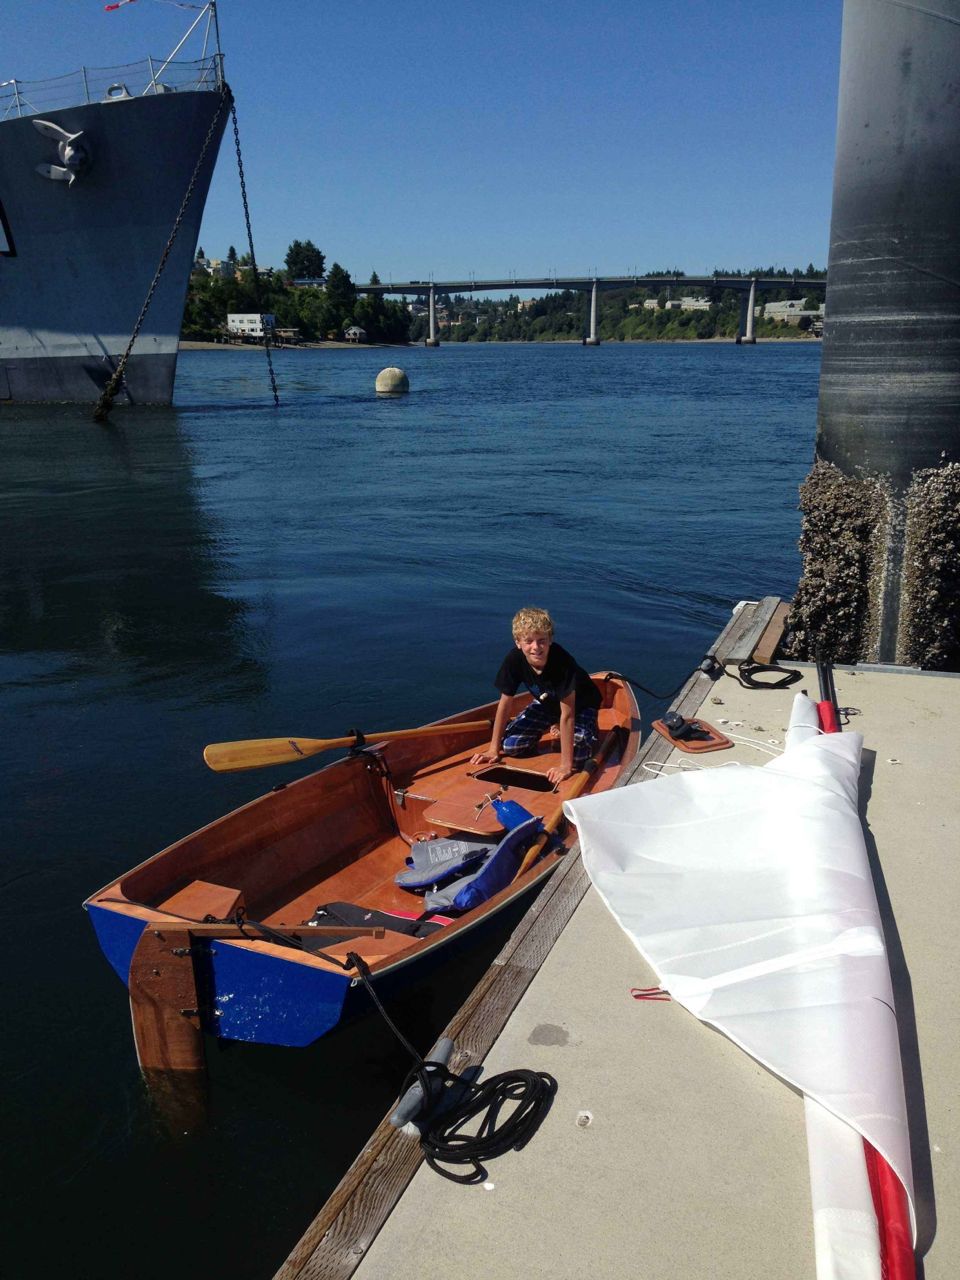
On August 3rd, barely a month after picking up the kit, we received an email, and I quote, “Well we launched last week! I will send you some pictures soon....We are having a blast. She is a great boat!” Then she sent this great photo of Milo in the boat, with it’s shiny blue hull, (in honor of the SEA HAWKS)... Russell and I were very impressed!! 😉
Milo in his PT 11
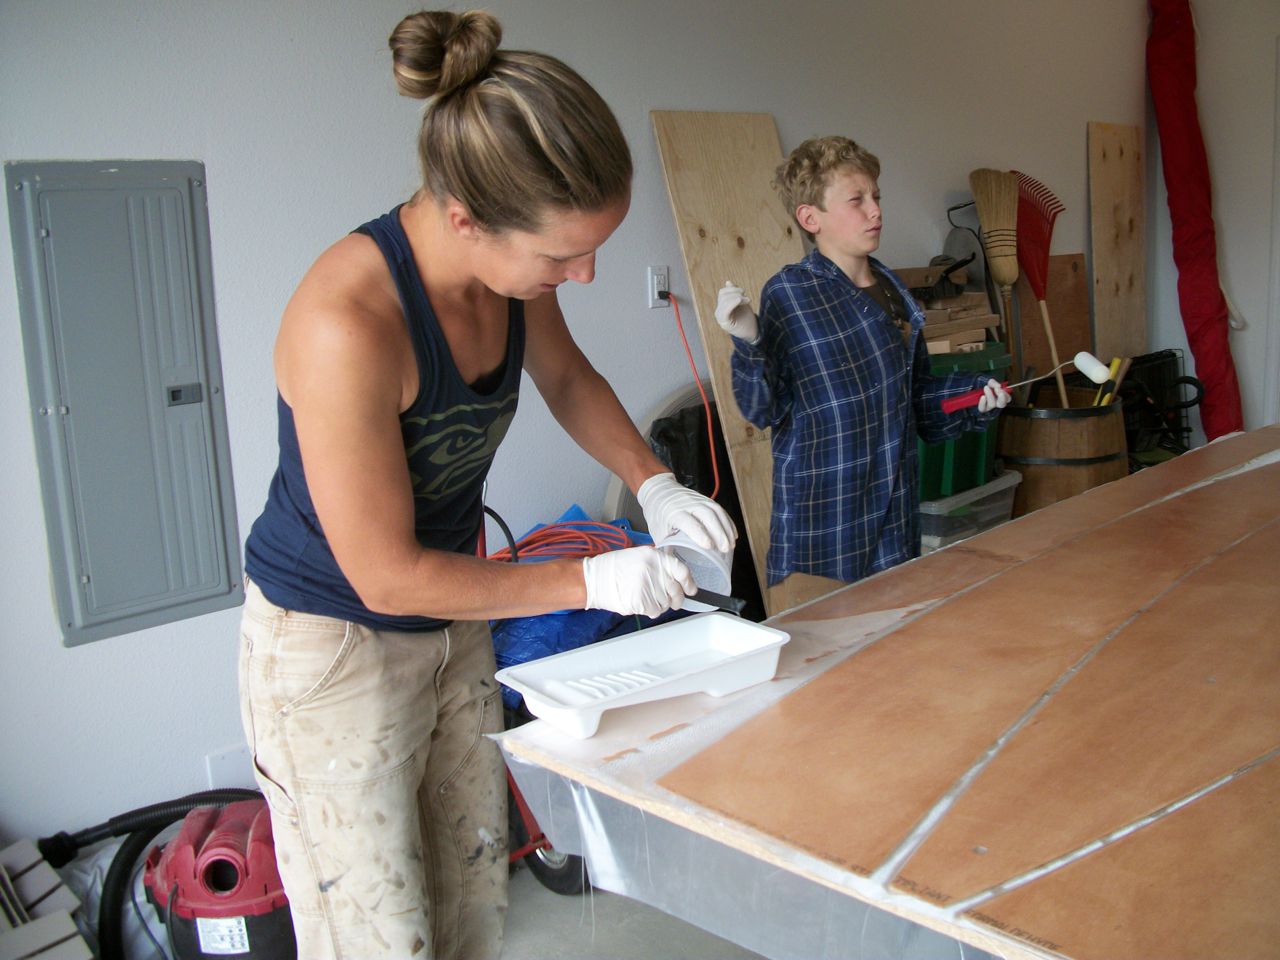
Cassie totally dedicated herself to the project, including setting her alarm clock for 3AM to make a fill coat. They really familiarized themselves with the manual so that while waiting for one thing to cure, they knew what they could begin to prepare and have ready for steps later on. Warm summer weather helped while they had several simultaneously curing parts. This consolidated a lot of the 'waiting-for-cure' time inherent in wood/epoxy boat building."The build went really well. We made a few mistakes-nothing structural and nothing we couldn't fix," she told me.
They also had a strong motivation. Milo was going back to school at the end of the Summer and Cassie wanted to be sure he had plenty of time to sail in his new boat before then. Milo wrote us a letter that deserves a frame in our shop. Photos & captions following, (compliments of Cassie and Milo), tell much of the story best.
And the sanding hasn't even begun yet!I drill you twist.Even Dad sanded a bit with Wilson ever ready on the vacuum.Testing the strength of our PPE.Remember all those twists? Time to snip.So there might be a few ice cream finger prints.
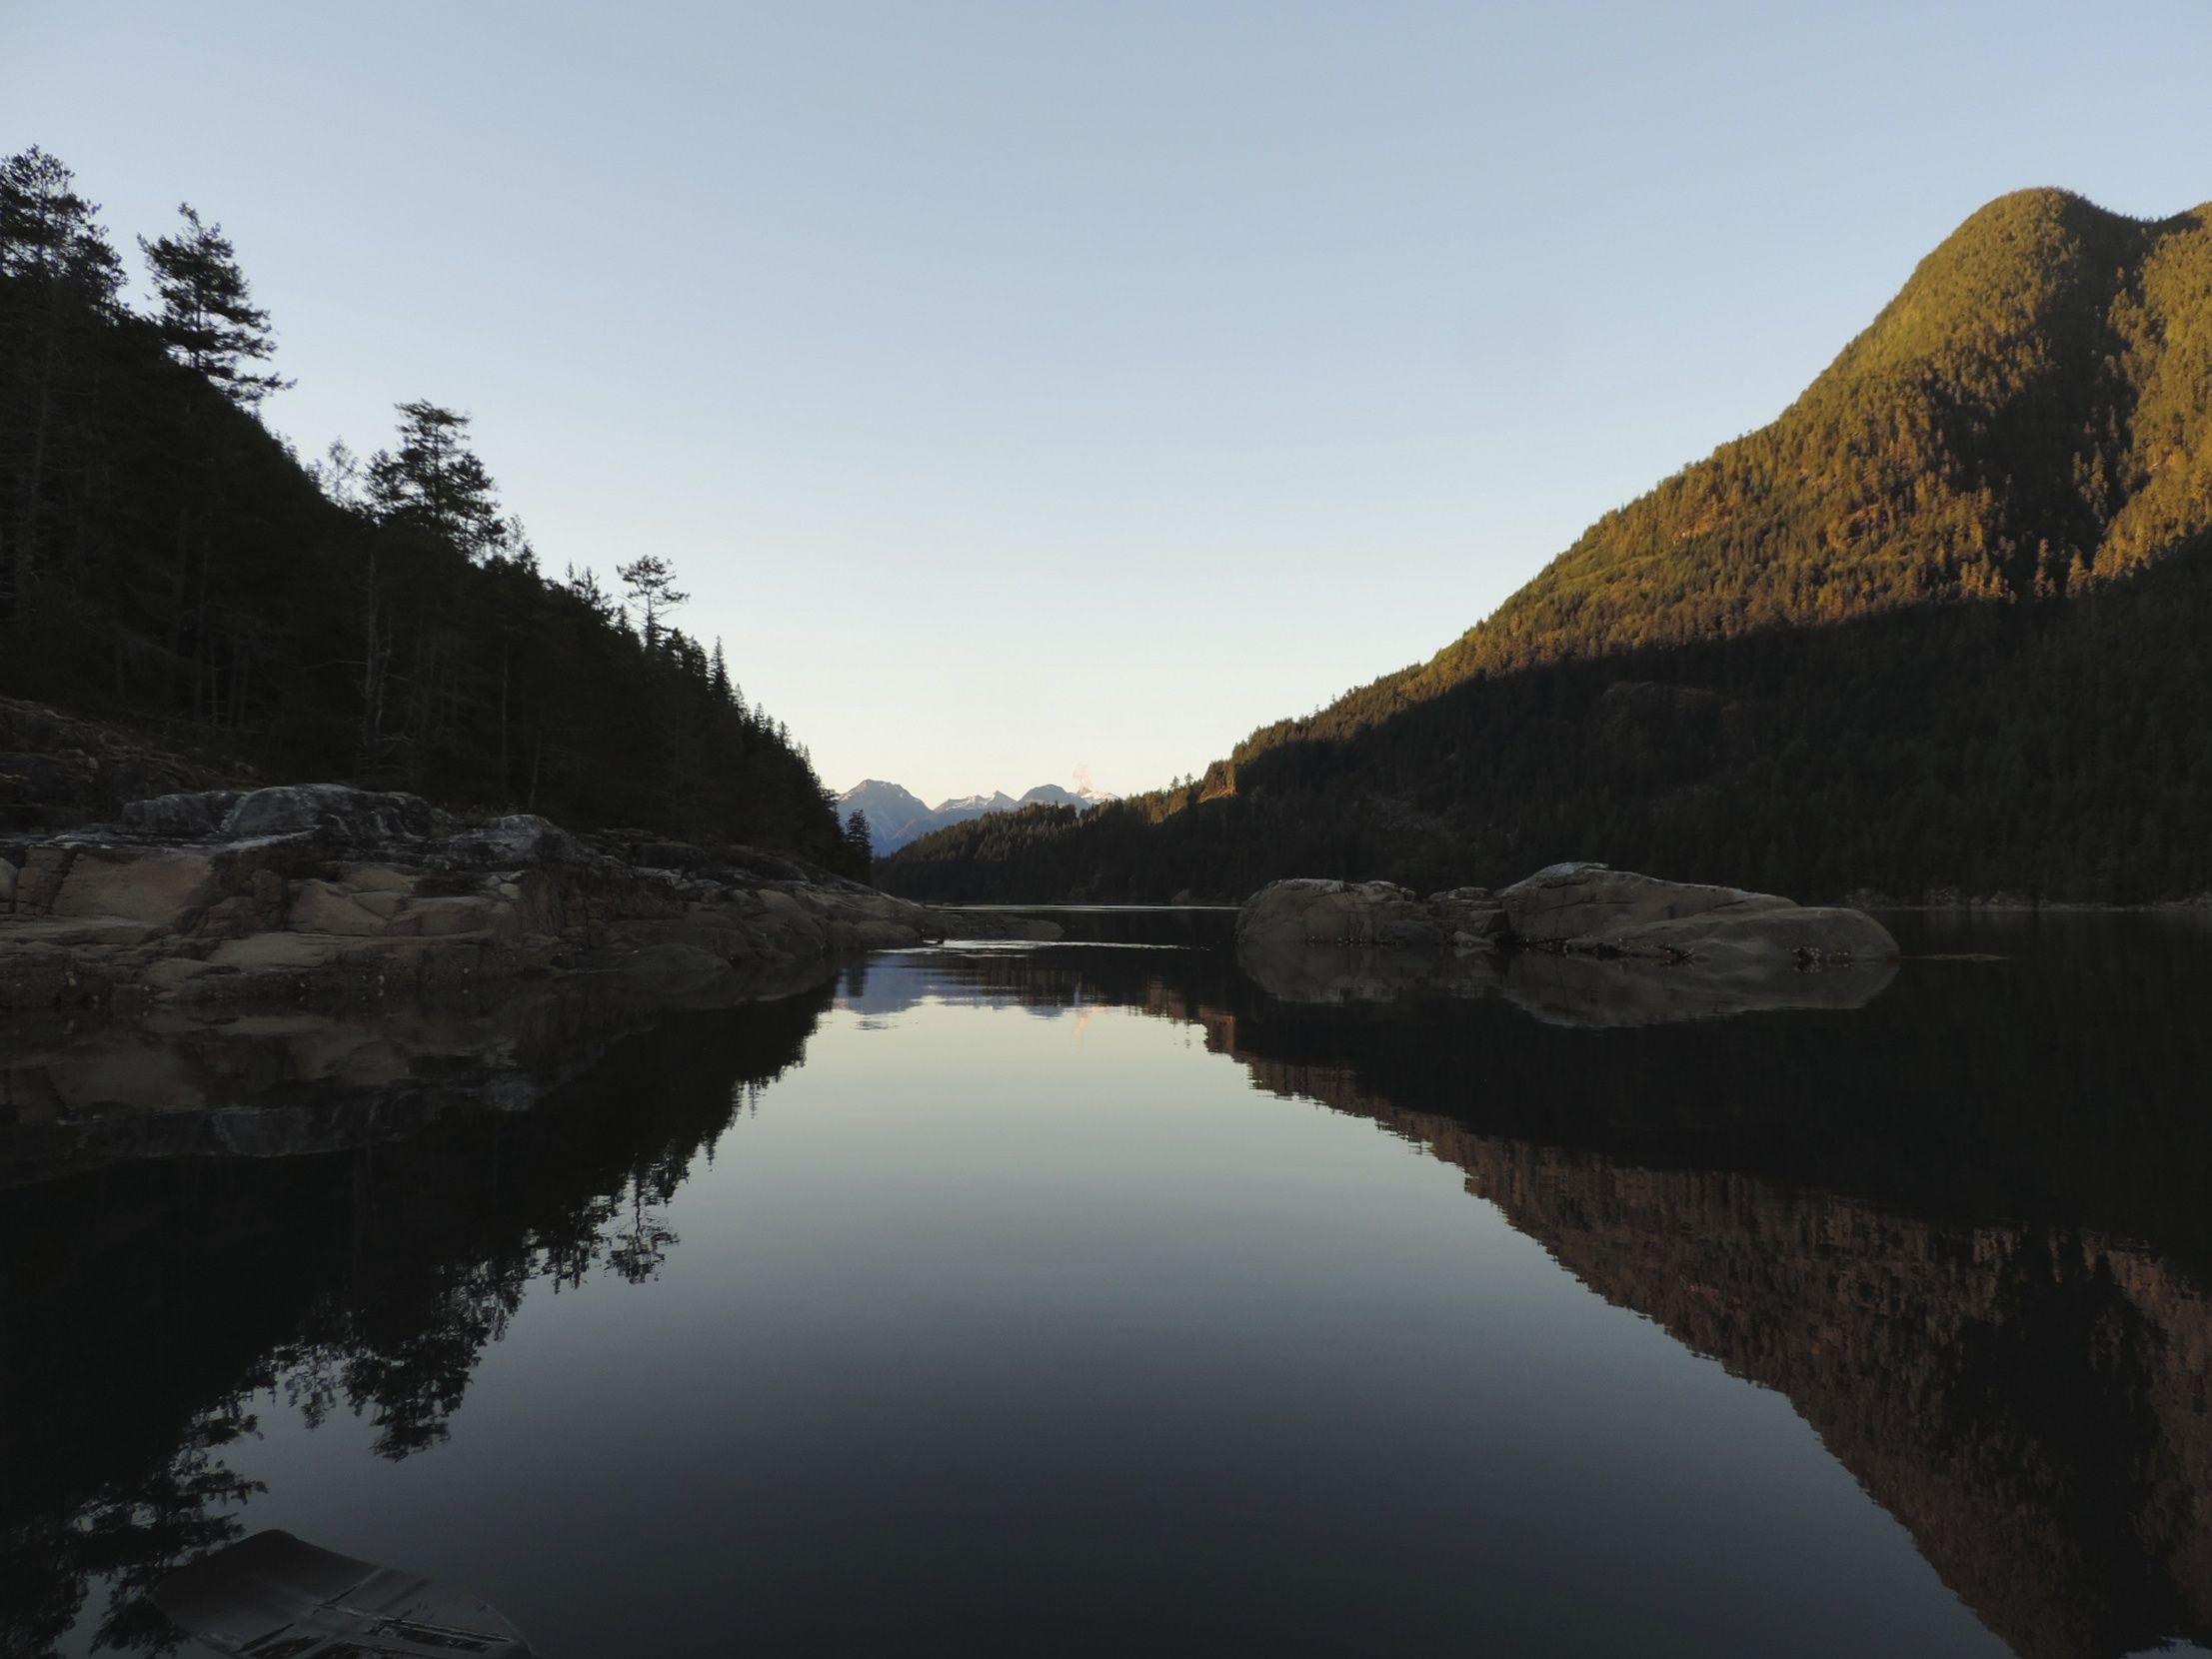
First sail day.Second sail day.Milo taking his teacher and friend out for a sail on Palisades Lake in Wyoming.
Building any kit can take weeks, months or years depending on a person’s working habits and available time. We recommend taking your time and enjoying yourself. Our builders have expressed real pleasure in the project and that is as much a part of it as the end result. The fact that Cassie met her self imposed and pretty short deadline AND had a great time is a testament to her skill and an inspiration for women boat builders! Hats off to you, Cassie and Milo!!
See some recent feedback from our builder's about our kits:
Robert in MA: It is a fantastic kit, and I thoroughly enjoyed the building project. Honestly, I felt a little intellectually lazy doing the build. Usually there are multiple details that have to be thought through, improvised, fleshed out, etc. Not with the PT11. You did all the thinking for me and didn't leave out anything. I didn't mind being lazy for a change. I can't think of a single thing to improve in the kit or manual. I can't wait to start rowing and sailing. August 2014
Simon in New Zealand: I didn't really realize how much of a delight to build she's been until the bumper had been stuck on and I was a little disappointed that there wasn't anything left to do except go sailing.


 I can't think of a single thing to improve in the kit or manual. I can't wait to start rowing and sailing. August 2014