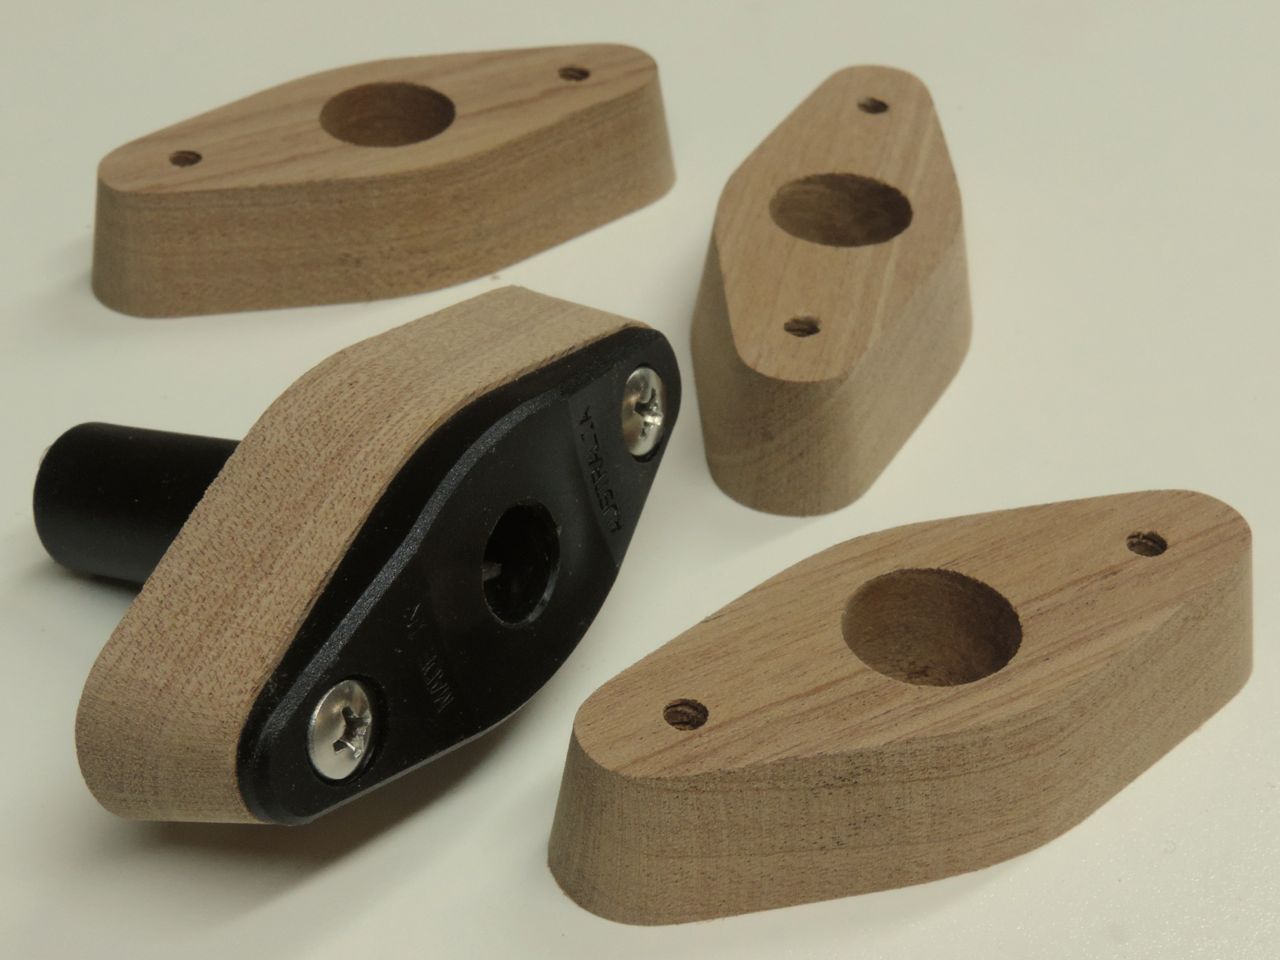
Our mahogany riser blocks of the past were beautiful complex shapes that performed a nicely functional duty; to give the oarlock socket more bearing and to offset the height of the seat relative to the height of the oarlocks. They were, however, rather beastly to make in the quantities we have been needing.
To improve production, Russell took the design to Turnpoint Design and figured out how, with minor changes, they could be machined on the CNC router. The remaining labor, (sanding out the tooling marks and rounding the upper edges ) is a great deal less time consuming than the previous version.
Comparison photo, new style left, previous version-right.
They are still made out of Sapele Mahogany. For those of you who wanted riser blocks this Fall when they were not available, this is our new product. Please let us know what you think. We have them IN STOCK! 😉 AEB
It’s time for us to admit it, our boats seem have a weakness. We may just be treating our boats poorly, but it’s more likely that there is an issue that PT 11 owners should be aware of.
Owners, please check your gunwales for cracks.
Beginning the repair...
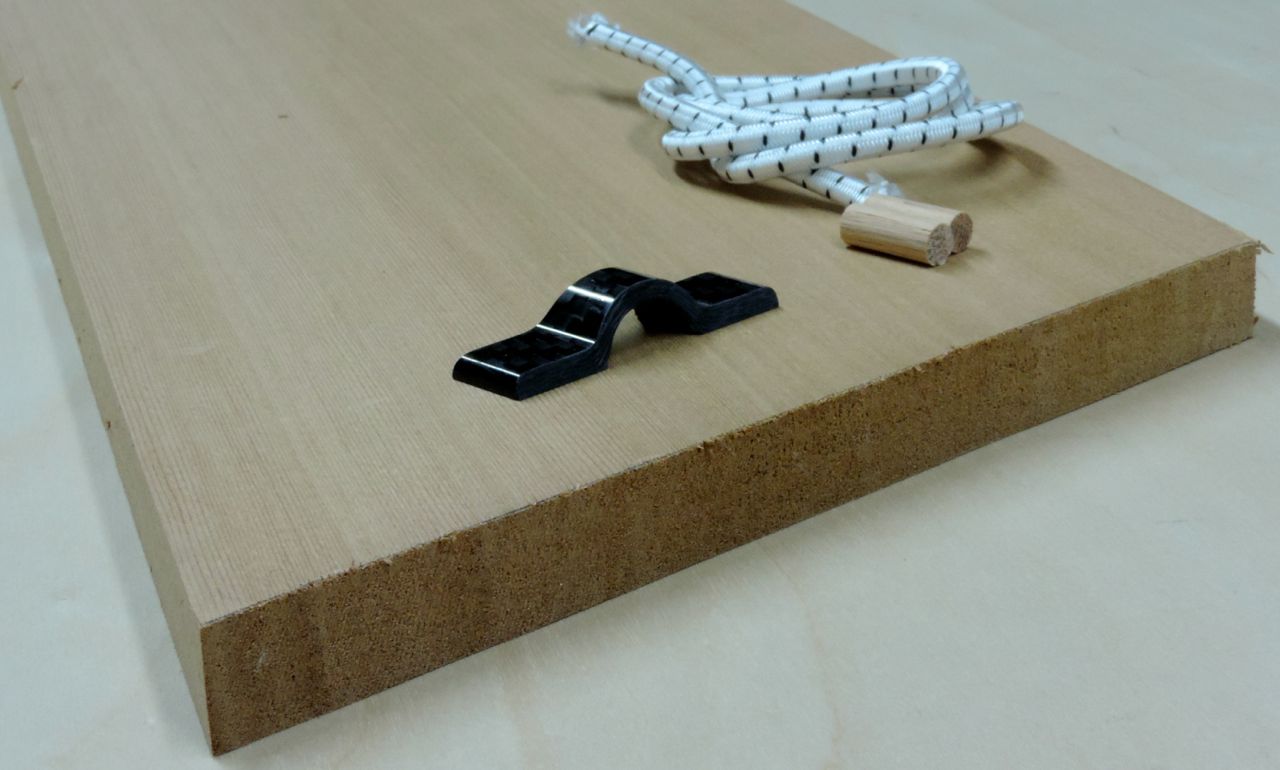
Builders, there will soon be an added step in the building manual to prevent the problem. If you haven't glued your bumper on yet, the fix is easy. This printable PDF informs for both a fix or the added step in the build process.
We have seen this failure three times now. The first, when one of our boats got driven over (just the edge) by a truck. We thought that was unusual punishment, fixed the boat and forgot about it.
The second time was a boat that got beat up by solid water while lashed to a foredeck. We didn’t really know what happened there.
The third time it happened, it was our newest PT 11 (3 years old now) and again we don’t know exactly why, but here is our theory:
When the boat is upside down in the nested position and somebody walks on it (or a bunch of people sit on it), where does that weight go? It goes onto the very ends of the gunwales on the fwd hull half.
photo shows where the load goes, (the aft corners of the forward half).
The failures we have seen have always been in the plywood hull skin (right where you would expect it).
Fixing the break and the weakness that caused the break are both pretty easy and important. The first is done by injecting epoxy into a carefully drilled hole to fix the crack, the second by putting screws (with epoxy) into carefully drilled holes.
I admire those who take on the challenge of building a boat or an airplane. CNC technology on kits has done for creative people, what the GPS did for adventurous people. (Not that they might not be one and the same) Cruising is far more accessible to those without traditional navigational skills, and CNC routering has opened up a whole new avenue to those who want to create something that would otherwise have been beyond their skill level.
Pause on that thought while mentally revisiting a lot of fun sailing..... OK-back to the present.
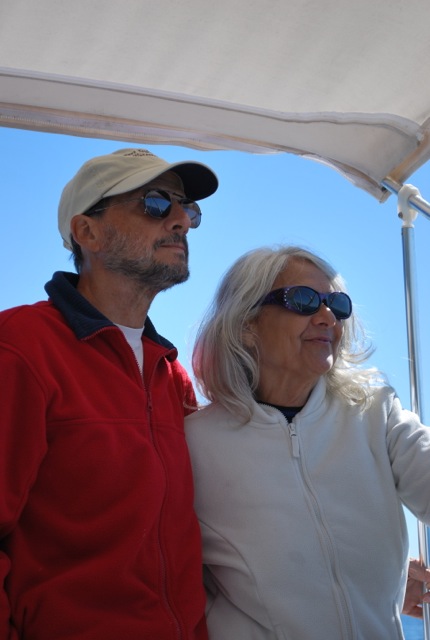
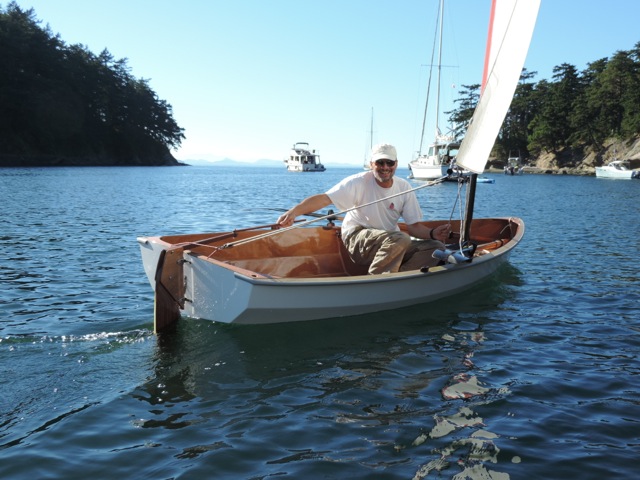
PT 11 nested in the truck. Photo;Randy KerrKim and Mark get the boat wet for the first time. Photo;Randy Kerr
Our customers come from many walks of life and a wide range of ages and skill levels. However; they never fail to impress me. While Russell can take credit for creating a beautiful design, kit and manual, our customers need the vision, passion, patience, and attention to detail for good results. To add the complexity of documenting their own efforts takes the same qualities and much more. I cannot, for example, count how many tens of thousands of photos Russell had to carefully set up, snap, choose, and edit to get a few hundred for the manual.
Hence, for this post, I would like to point the spotlight on the Kerr Family; Randy, Kim, son Alex, and good friend Mark. Not only did they complete their beautifully built PT 11, "Lil' Bear" in about 6 weeks, their documentation of the experience resulted in a wonderful
"Lil' Bear" named in honor of Kim's great uncle who was on the crew of the Coast Guard cutter "USS Bear" back in the late1800’s. Photo;Randy Kerr
and creative little video. The feedback from Kim and her family has been so meaningful to us and I feel puffed up with pride like a mother hen. With their permission I am sharing some of that feedback and the wonderful present of this video. Randy's videos are all beautifully created and fun to watch so explore and let them know what you think.
Kim goes for her first sail in her PT 11. Photo;Randy Kerr
From Kim, "It was your PT11 kit that made my dream of having a sailboat come true!!!!! Randy and I can’t quit talking about how grateful we are that you guys put so much heart and thought into such a beautiful and smart kit. She sails and rows like a dream! Highlight of our summer to build and sail that boat! So thankful for you and Russell."
https://vimeo.com/187076801
Yes, there are some crazy things happening in our country and in the world. I refuse, however, to let that overshadow all of the wonderful things and people that, through shear existence and positive attitudes, are in some way, making this world a better place, cherishing what is good and beautiful. Thank you to the Kerr family and all of our customers for your inspiration. AEB 😉
What is different about kits from PT Watercraft and why do they cost what they do?
To start, we produce the kind of kit that we would like ourselves, something more advanced. Advanced from the perspective of functionality, performance, longevity, and good strength to weight ratio, etc.
This approach seems to be working as our nesting dinghy kits (our most complex kit) has been selling very well.
Most kit companies avoid hand-made parts when possible, and for good reason; they take a lot of time to produce and they increase the cost of the kits.
How can we afford to have so many custom and hand-made parts in our kits? Because we have no real employees and a very low overhead. This can be limiting in some ways, but it does afford us the ability to to really focus on each and every part that goes into a kit.
Development and manufacturing has been a lifelong interest. Figuring out new, more efficient ways to produce parts is fun for us, so we thought we would share a bit of it with you.
Double checking the packing lists
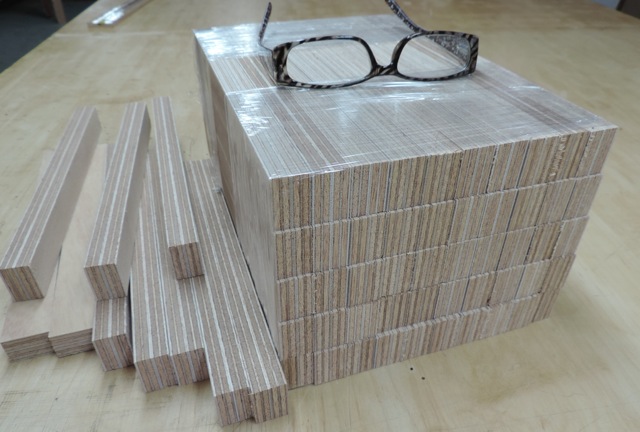
Even though there are 5 different thicknesses of plywood in a PT 11 kit, the 6mm plywood parts (shown below) form most of the hull, foredeck, transom, etc.
There’s no handwork here; all these parts are cut by a very good CNC operator (Turn Point Design). There is however, much effort that goes into buying and grading this plywood. We reject unattractive or warped sheets and pick the best looking sheets for cutting the foredecks, buoyancy tanks, etc.
We are lucky to have Edensaw Woods, a very large plywood importer right here in Port Townsend, yet finding good (and good-looking) plywood has become both more expensive and more difficult. When we find what we want, be buy a lot of it.
The 6mm parts are the first parts to go in the crate. We use a 5 page “map” to show how the layers nest to take up the least space and yet lay flat in the crate.The main connective bulkheads (12 mm plywood) are also CNC cut with scribed marks for locating doublers, gussets, and trunk. The forward of these two bulkheads has a notch for the hull gasket, which unfortunately needs to be on the opposite face as the scribed marks, so CNC cutting the notch is not easily done. We very carefully cut the notches with a jig and router as shown below.
hand routering the gasket notch in the PT 11 main bulkhead.
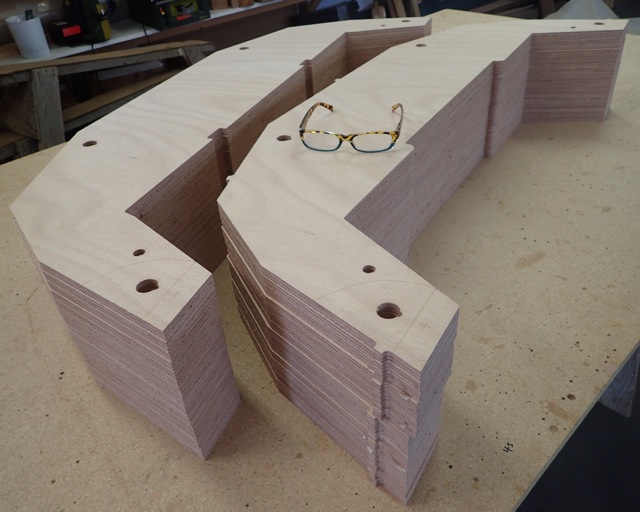
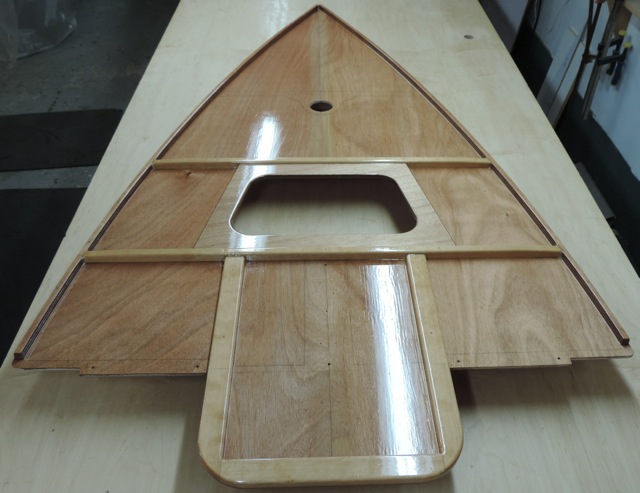
The large gussets, visible in most PT 11 photos, are what really tie the front and back halves of the boat together (and help us sleep at night).
There are 8 of them per boat (complete set in foreground of photo below) and they are made from 25mm (1”) thick plywood. Being so large (and thick) makes them both very effective at taking the loads and also relatively easy to install in the building process.
For the first couple of years of selling kits for this boat, we asked the builder do the handwork on these parts which, without the right tools could be difficult and potentially dangerous.
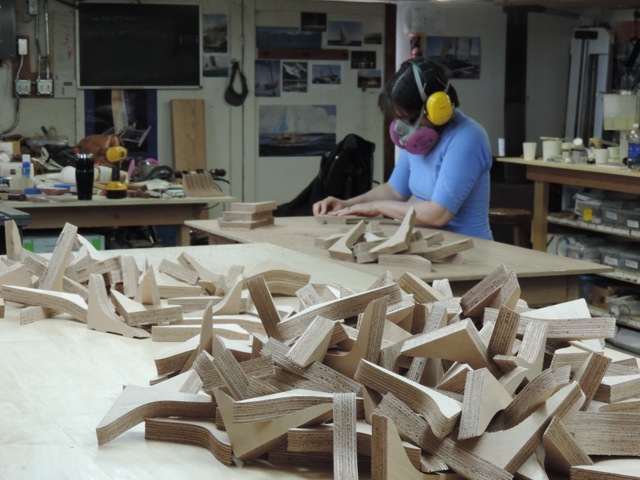
The upper gussets (right hand cluster in the foreground below) are heavily beveled on the outboard edges to match the angle of the hull. We do this with a large 1 hp tilt-table disk sander hooked up to a large vacuum.
The appropriate edges are then rounded on the router table, which is far safer and easier than the builder rounding them with a router by hand.
There are only 3 different gusset profiles when we start the handwork part, but when we finish beveling and rounding edges, there are 6 different parts. In other words, it’s critical to bevel and round the right edges and pack the right parts.
Ashlyn is shown here at the router table removing the tabs left from the CNC machining.
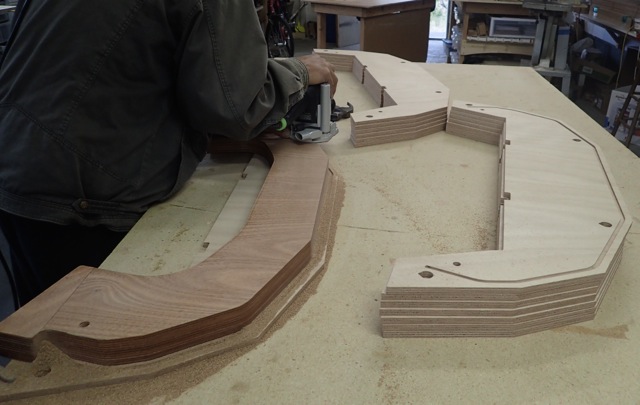
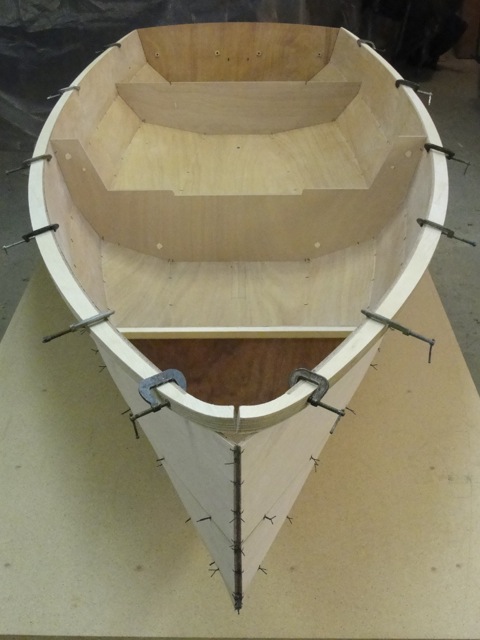
The machined gunwales (also made from 25mm plywood) don’t require handwork, (besides checking the joints and packing), but they do a very effective job.
Not only are these gunwales easy to join and install, but they lock the upper edge of the hull into its designed shape without having to laminate the gunwales and without needing much framing to support the upper hull panels (see photo).
The outer faces of the gunwales are “capped” with unidirectional glass to make them very strong for their weight before gluing on the bumper.
Making gunwales from plywood was not an inexpensive route for us to follow (we are the only kit company currently doing this) but the result has been worth it.
PT11 gunwale kits
The lumber kit unfortunately ends up hidden under the foredeck (mostly) in a finished boat. Unfortunate, because we use high grade Sitka spruce that no one but the builder gets to see.
We use Sitka spruce to keep the parts light and strong.
The foredeck stringers (the biggest of these parts) let us keep the foredeck thin and light, yet stiff and strong enough to be walked on.Joining the foredeck to the hull are machined 15mm plywood glue cleats. These are machined to the curve of the foredeck edge to make them easy to install and pre-beveled to fit the angle between hull & deck.
Our trunk logs (the spacers that separate the daggerboard trunk walls) are cut on the table saw from pre-fiberglassed stock.
Why do we pre-glass?, because if the builder were to glass these pieces it would be difficult to keep the edges square when trimming the glass. Square trunk logs help make square trunks, which helps the dagger board fit into the trunk, etc.Making our own mast sockets is necessary because the masts that we use are an odd outside diameter and the mast must fit into the socket without a lot of wiggle room.
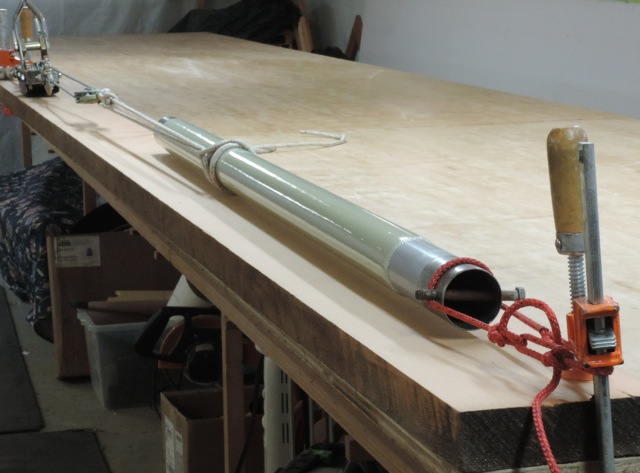
We found a steel tube the right diameter (after much searching) and use this as a mandril to make tubes long enough for 5 sockets to be cut from.
How we actually make these tubes is more than we want to show, but how we get the tubes off the mandril is interesting: The mandril is covered with adhesive-backed Teflon film (small photo), so after the tube has been laminated and post-cured (with heat), the tube is pulled off the mandril with a come-along.
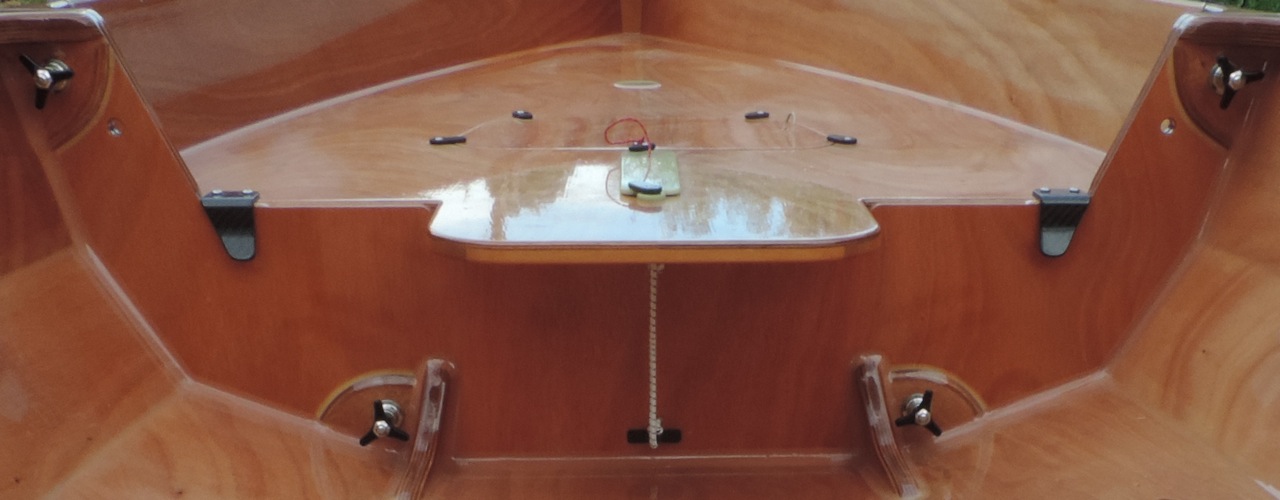
We used to do this between the shop truck and a tree (it takes a lot of pulling), but now have found that we can put clamps over the ends of a 2” thick plank and pull from those as shown.This photo shows the mast step assembly placed on the mast step bulkhead. These parts are easy to install (if one follows the manual) and easy to install accurately as there are scribed centerline marks on all the parts.
All bulkheads have tongues (visible in this photo) that fit into slots machined into the hull panels.How we make the alignment clips is also more than we want to show, but they are really a lot of work to make. We almost cry when it’s time to make more of them.
They are molded from many layers of carbon in a long blank and then cut into the shapes shown.The alignment clips are part of the joining system. They automatically (when pushing down on the forward hull-half), align and hold the two halves so that the threaded pins can find their sockets.
The alignment clips seat over small strips of filled epoxy (photo on left) that are glued to the bulkhead edges and then shaped level with the foredeck, where the clips are attached.
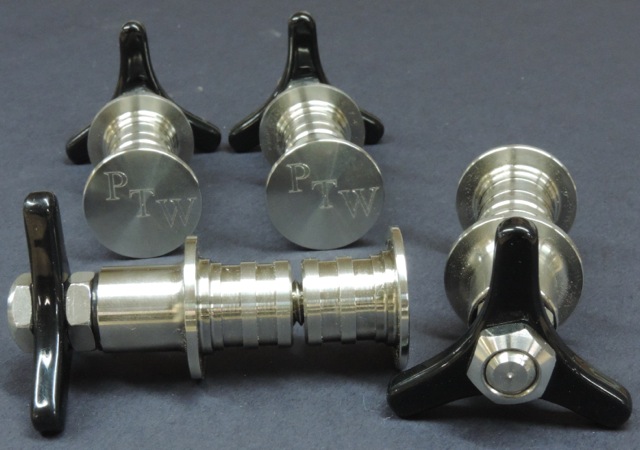
At the heart of the PT 11 is the connective hardware. This hardware has evolved considerably since our early prototypes.
Designed by Russell Brown and Paul Zeuche, this hardware (4 sets per boat) is very strong, easy to use, and maintenance-free.
Paul Zeuche machines these parts from 316 stainless steel and does so with a lot of care and pride.
We assemble these parts with the knobs and the custom beveled cap nuts and check tolerances, etc.
The knobs (star knobs, we call them), are machined from G-10 fiberglass plate.
This is a very dense and strong (similar to aluminum) epoxy and glass material that machines well and doesn’t corrode.
Unfortunately, G-10 is no longer available in black, but since the builder has to sand and coat the knobs anyway, they can just as easily be painted instead, even with enamel paint in a rattle can.
These are cut by the CNC machine, but we chamfer the edges on the router table and tap (thread) the holes.
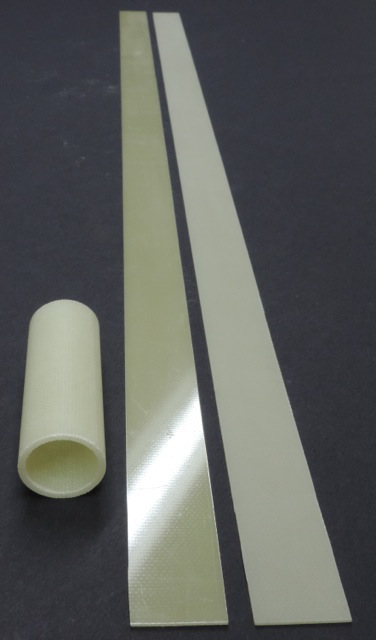
Also made from G-10 plate are the wear strips that are used at the upper and lower ends of the dagger board trunk.
Our method is a very effective and easy way to seal and toughen these damage-prone edges.
The towing hole is a piece of G-10 tubing that is bonded into the cutwater area of the stem.
A towing point should be strong enough to yank hard on the boat when it is full of water and this one is.
.
.
.
The PT 11 is covered in fiberglass cloth on every exterior surface (including the inside).
Glassing inside and out gives the boat a very long potential life span and it’s not hard to do.
The method we use is to pre- fiberglass and sand all inside surfaces with light cloth before assembling the hull, while the parts are laid flat on the table.
The outside of the hull is glassed with heavier cloth after assembly, and the bottom of the hull is glassed with even heavier cloth yet.
This takes a lot of cloth and three weights of cloth...And there’s peel ply for the chine taping.
The fiberglass types and weights used on the PT 11 are carefully chosen to make the boat as light and strong as possible.
Unidirectional fiberglass (additional to the 3 types mentioned) is used on the outside faces of the gunwales to dramatically stiffen and strengthen them.
We carefully roll the cloth onto tubes on our 24’ long cutting table.
.
The parts you have seen in this article are base kit parts. Several parts included in the kit are not shown here. See the kit contents photos.
In 2016, some of the parts that have previously been options will be included in the base kit.
The PT 11 (and Spear) foils are not the usual dinghy fare. Good foils are just as important as good sails if you want performance, especially upwind. Again, we went for something that we would want ourselves.
Sailing adventures on our multiple PT 11 prototypes while cruising have provided some of the highlights of our trips. Having a dinghy that really performs, especially upwind, makes it possible to explore farther and it is definitely more fun.
The accurate foil shape (NACA 0012 section) and high aspect ratio are what makes these CNC machined foils perform so well.
Machining them from plywood (instead of making them from fiberglass in a mold) is more affordable and there’s not a huge amount of labor involved in going from the kit to finished foils. The result can be really beautiful and tough foils that are lighter than most molded dinghy foils.
Unfortunately, the Okoume plywood industry has recently moved to using thicker veneers in thick plywood panels, so instead of the foils being made from 9 ply (12mm), they are now made from 7 plies.
The foils are machined in halves (photo below) and bonded together with vacuum pressure so there are actually 14 plies in a foil that is almost 1” thick.
Machining foils from plywood is the ultimate way to find defects hidden within the layers. All of our foils have some visual defects or slight waves in the veneer lines, but sometimes a whole batch of foils will become “paint grade” foils sold at a discount.
From one 4’x8’ sheet of plywood we can machine 12 foil halves, which sounds like a lot, but that makes only 6 foils, enough for 3 boats.
Vacuum bagging the halves together is a laborious process, mostly because the parts have to be held straight when being joined, but we have a new method to try, which could be better.
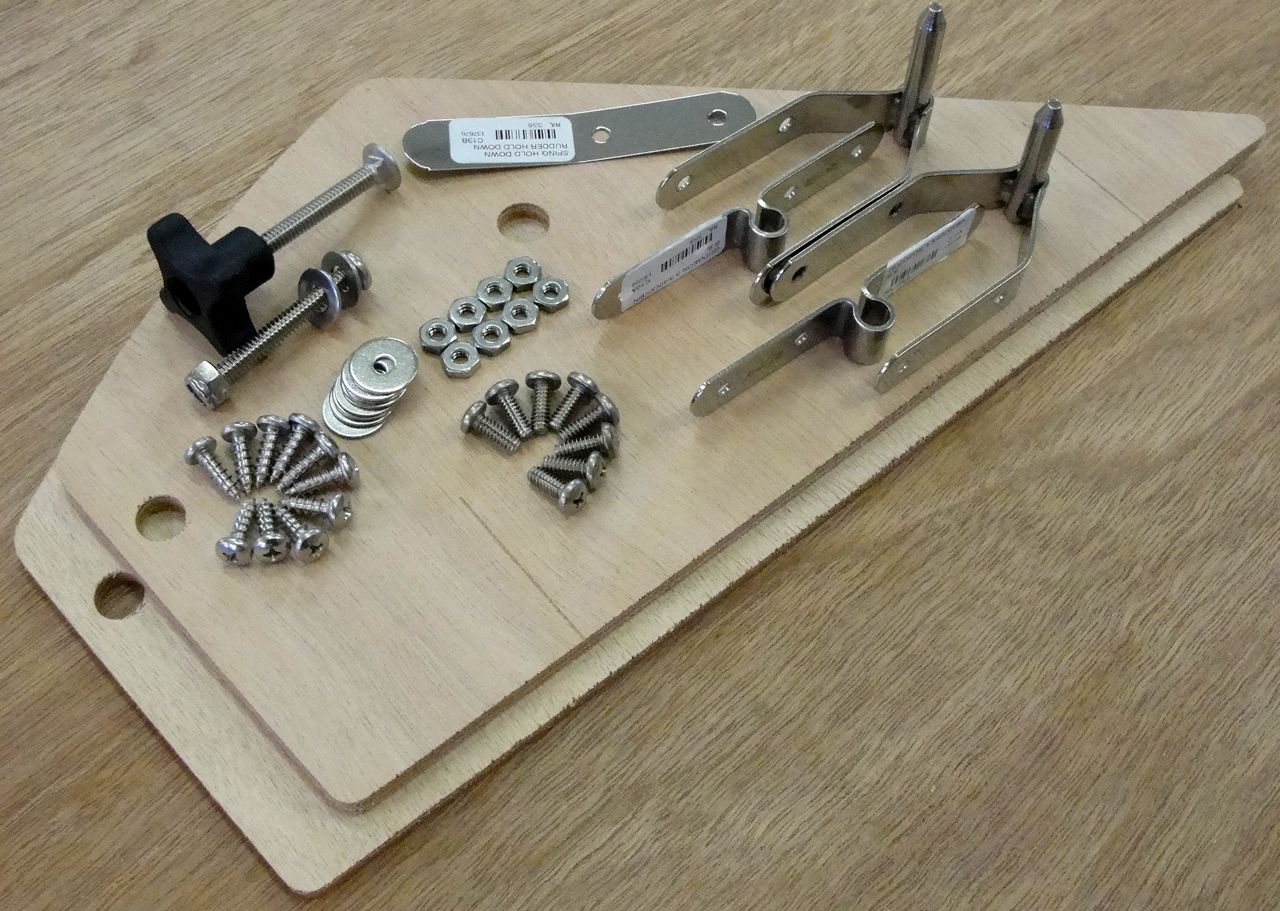
The machined surfaces of the foils are very accurate and fair, but we sand out the tooling marks after the halves are bonded together. We sand just until the tooling marks start to disappear, and then sand the edges and round the upper (rectangular) parts on the router table.The design of the foils parts is something we are proud of. The kick-up rudder is simple yet can be locked down or up and can be folded back to fit in a foils case.
The gudgeons are modified (by us) to be the right width for our rudder case and there are scribed marks machined into the case walls to show gudgeon location.
The tiller and hiking stick are Sapele mahogany. The tiller is tapered on three sides in a router jig and the holes drilled in drill press jigs, leaving just the edge rounding to the builder.
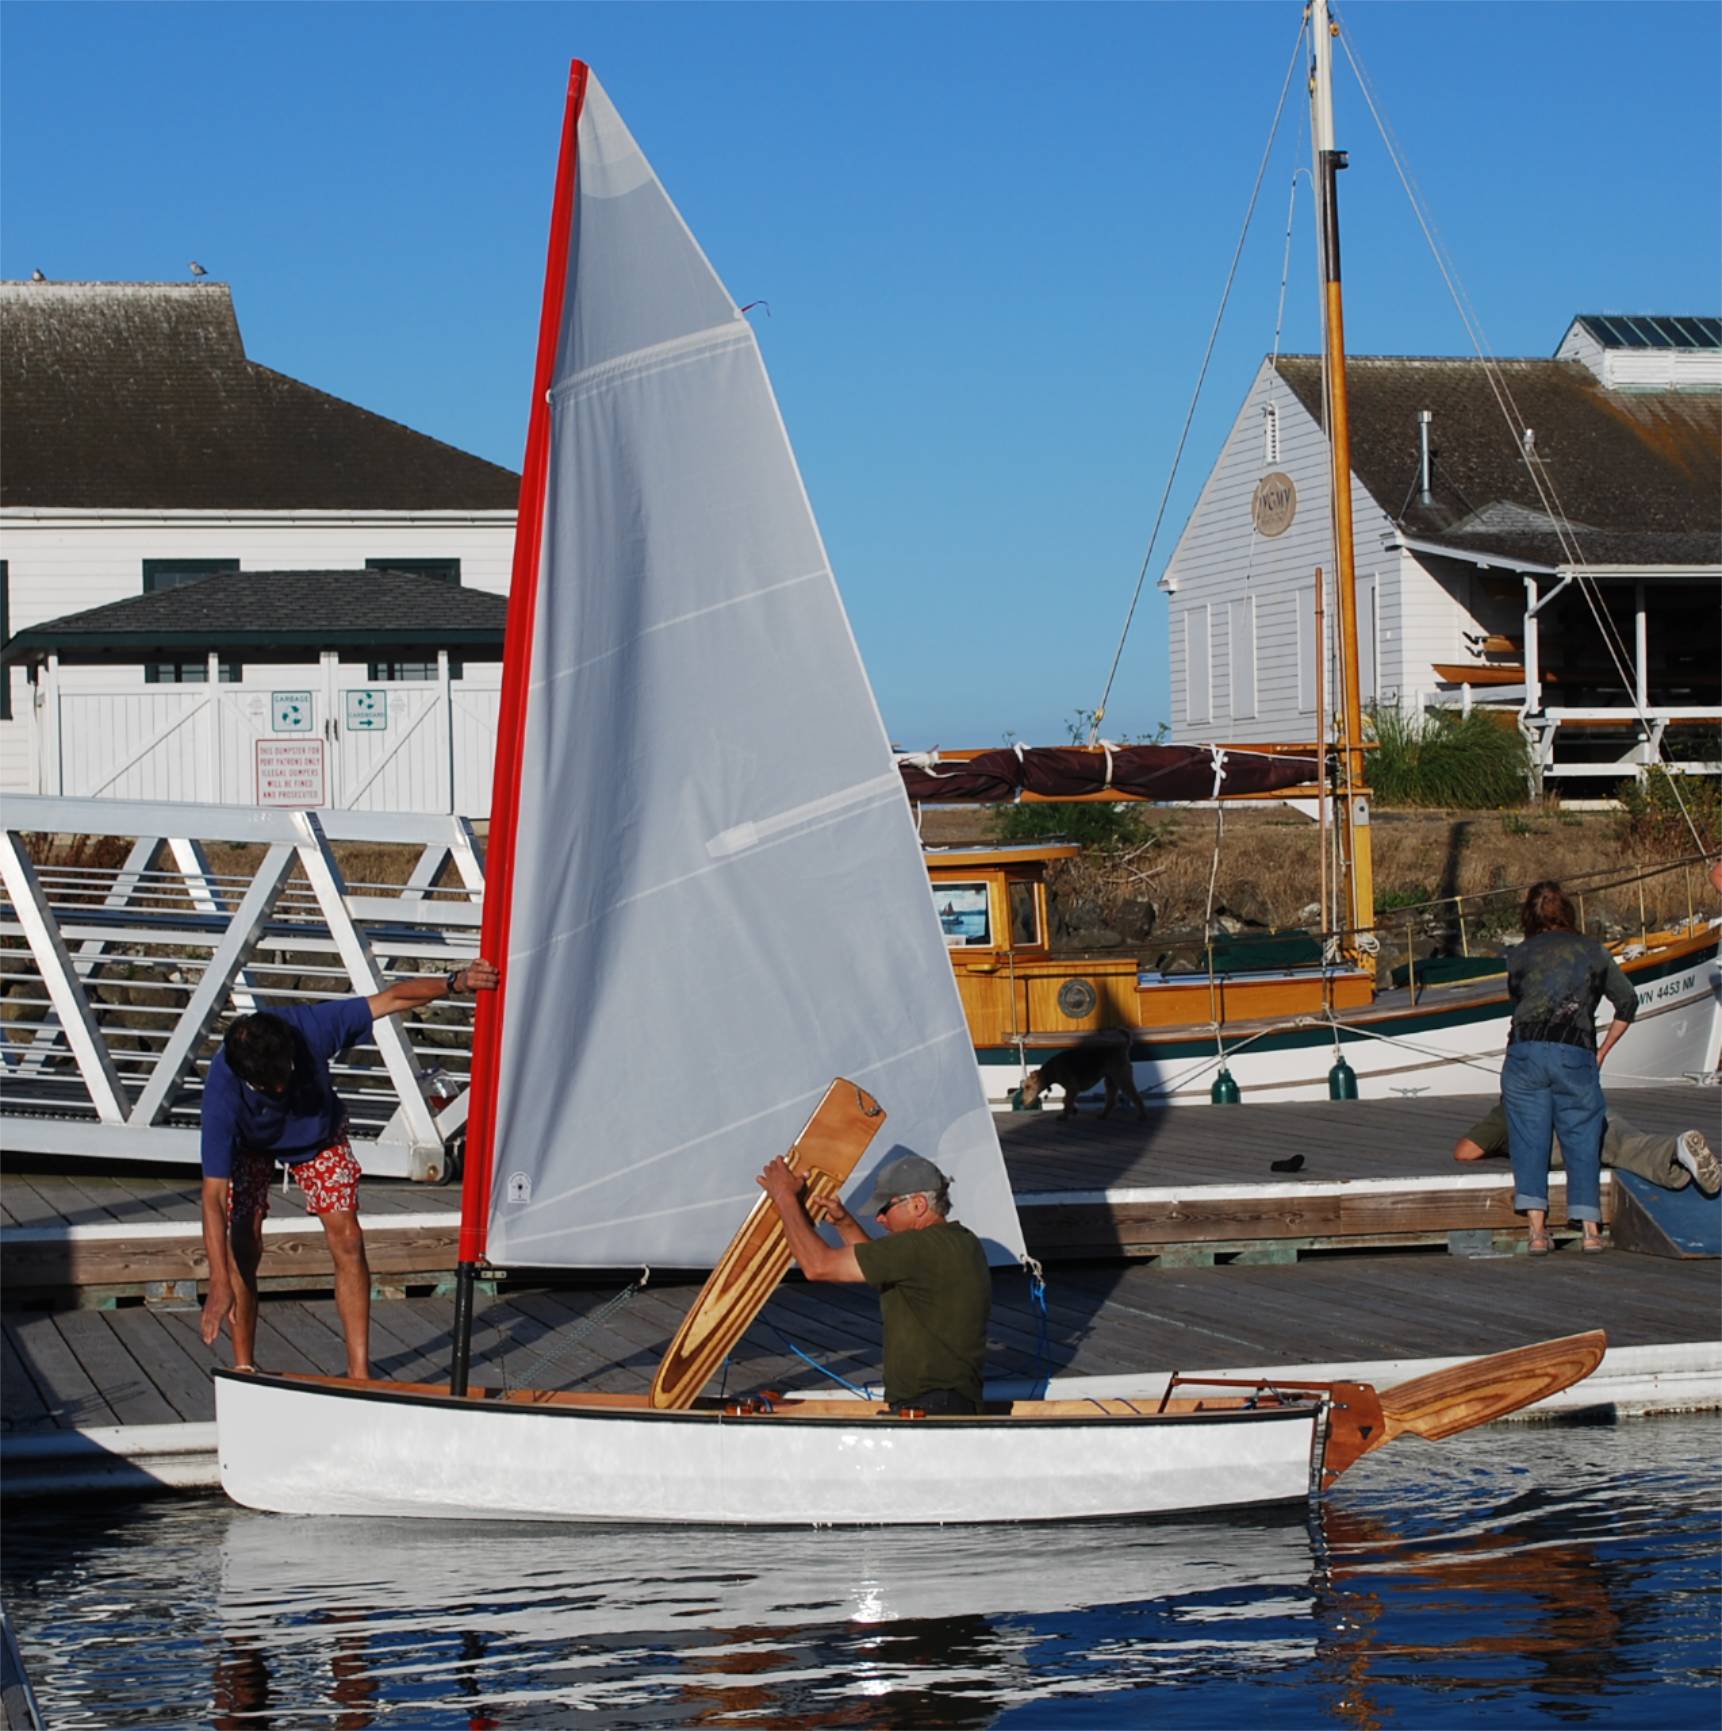
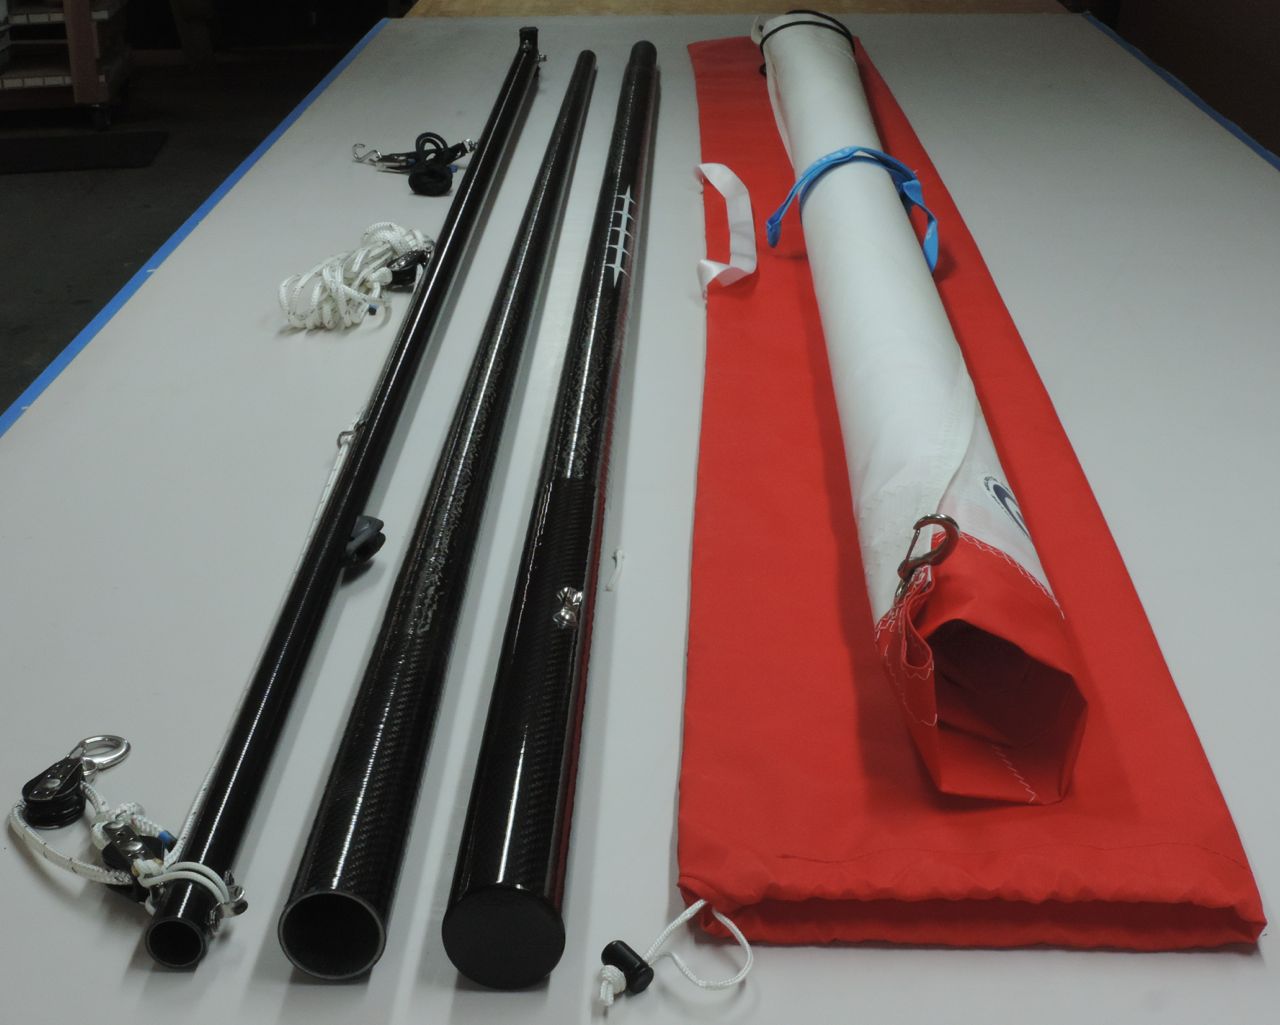
The rigs are an entirely different kind of work for us. The wonderfully lightweight two-piece carbon masts come to us through the windsurfing industry, but we do a large modification to the bottom ends of them to make them strong enough to be socket-stepped.
The boom tubes are made for us by ICE and they are so lightweight that adding the Harken and Ronstan hardware to the booms just about doubles their weight.
We build the rigs complete. They are ready to use when they leave the shop.
Having grown up dinghy sailing (from a cruising boat mostly), I knew that for our rigs to be successful, they had to extremely easy to use. Carbon fiber spars make it possible for us to build a 13 pound rig. That’s 13 pounds for the mast, boom, sail, running rigging, and the bag that it all fits into.
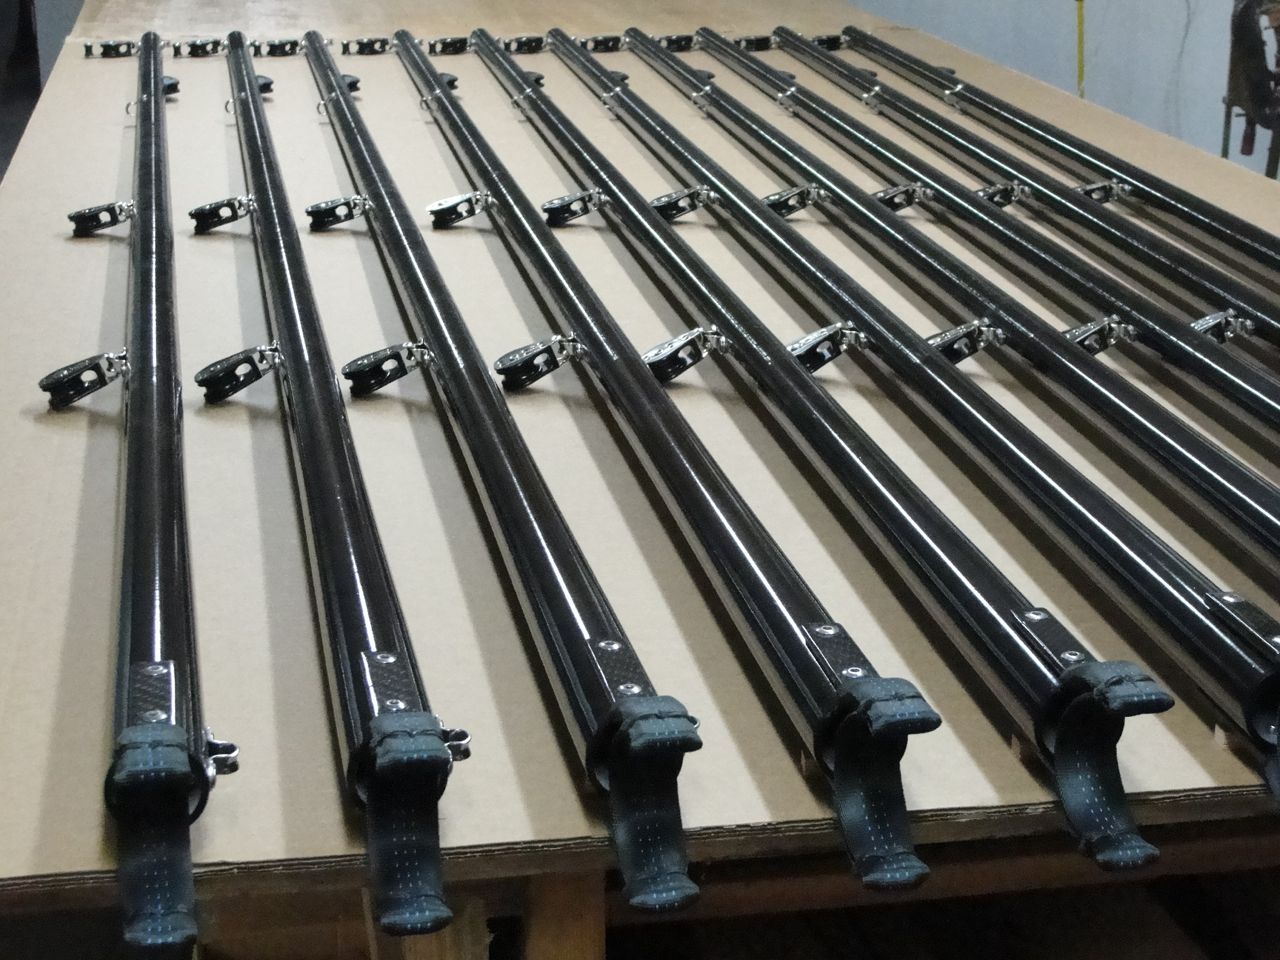
Set-up and break-down of this rig is fast and easy enough to make a “quick sail” something that one actually does, instead of just thinking about doing it.Like everything else we do, we try to build a lot of rigs at one time. Shown here are 10 rigs worth of spars. The upper mast sections (far right of photo) are the only part that isn’t much work.
The fatter sections are the lower ends of the masts, where all the hidden reinforcement happens.
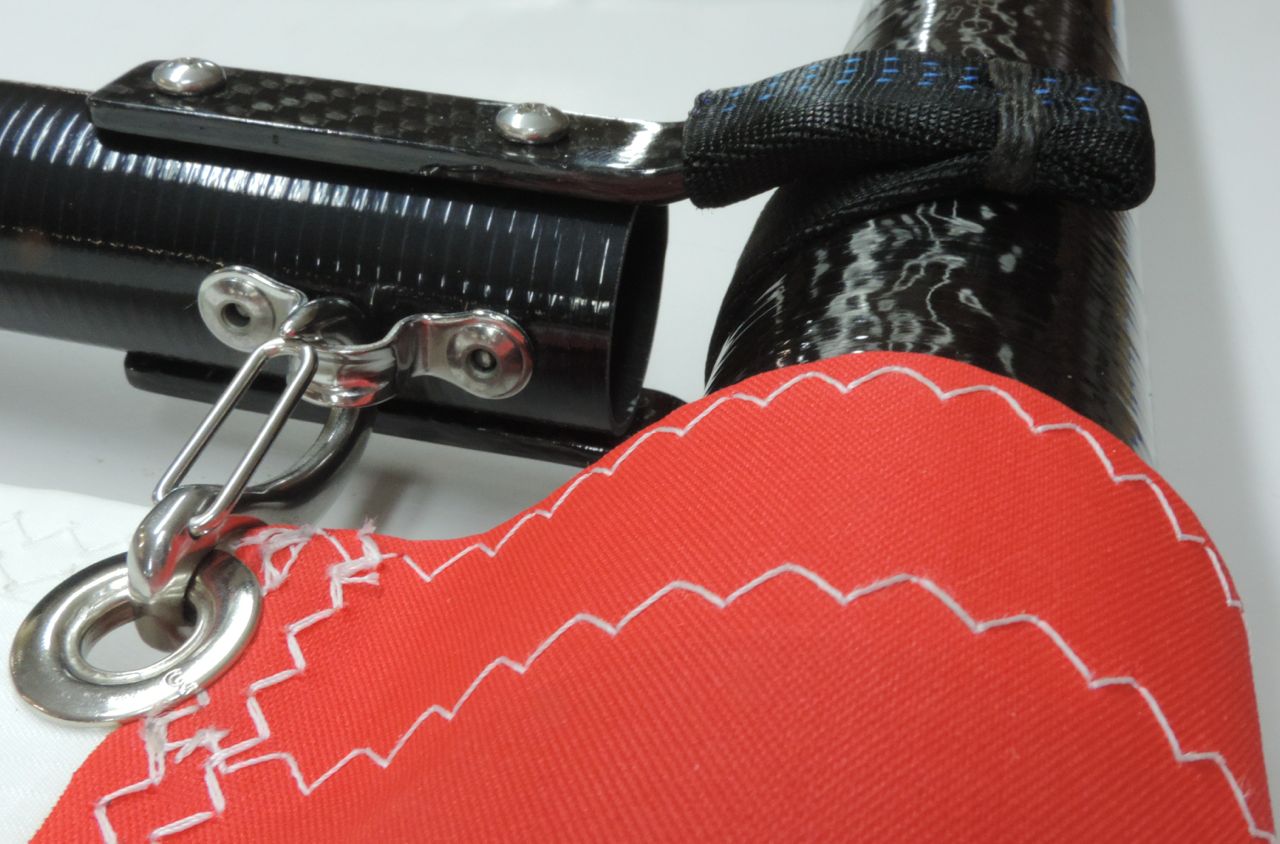
On the left are 10 booms just started, with only the gooseneck fittings attached.This kind of work can be stressful, as mistakes would be very costly (the tubes are expensive), but also quite rewarding. The process is refined with every batch we do.The gooseneck fittings are built this way for two reasons: # 1 is that assembly is so fast. Just plug the boom onto the mast and snap on the tack hook instead of fiddling around with fitting a gooseneck pin into the end of the boom. # 2 is that no hardware is bolted to the mast, which would weaken it. This gooseneck is strong and is very nice to the mast.
The gooseneck fittings are made of molded (vacuum bagged) carbon fiber in long blanks and then cut into strips on a table saw. All very easy until the corner and edge rounding, coating, and drilling, and of course mounting to the booms.All the hardware for sailing and all the running rigging is carried on the boom.
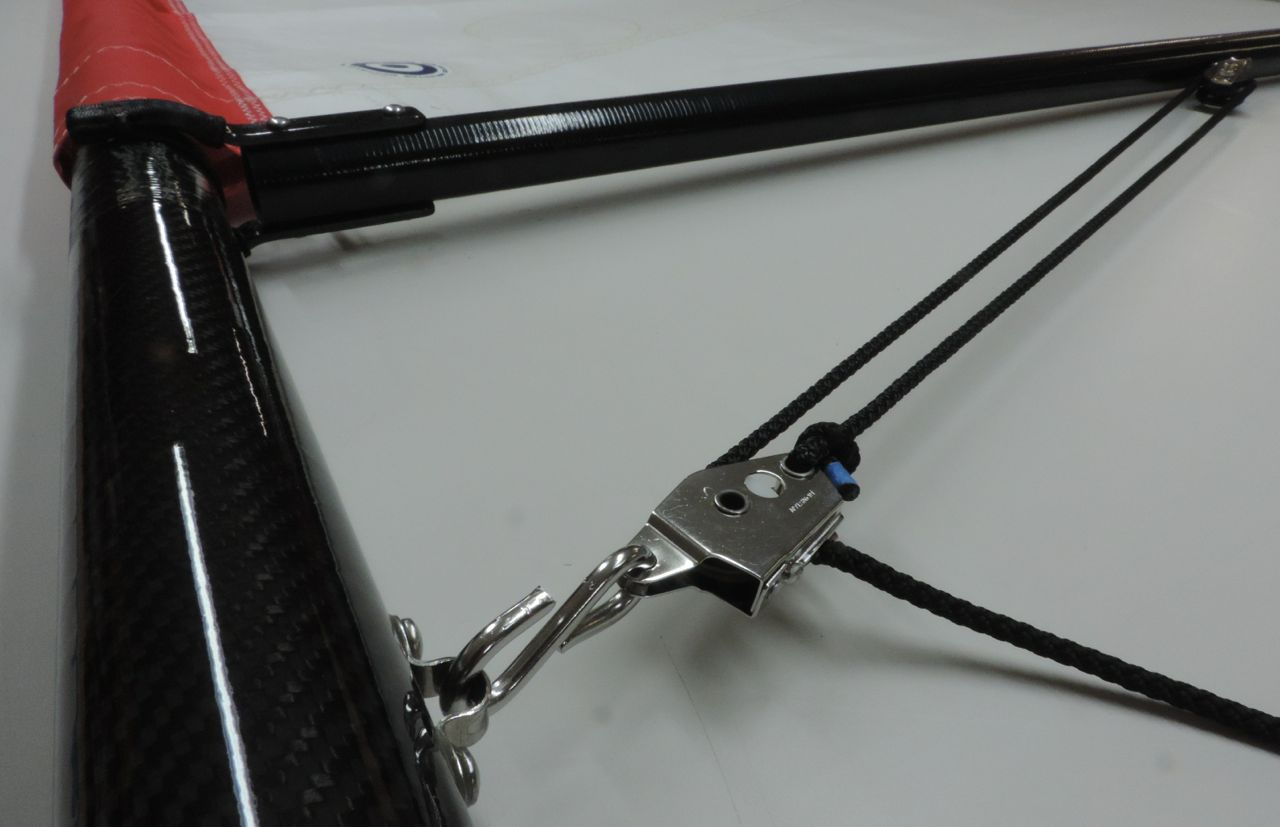
Sheet, vang, and outhaul all live on the boom.
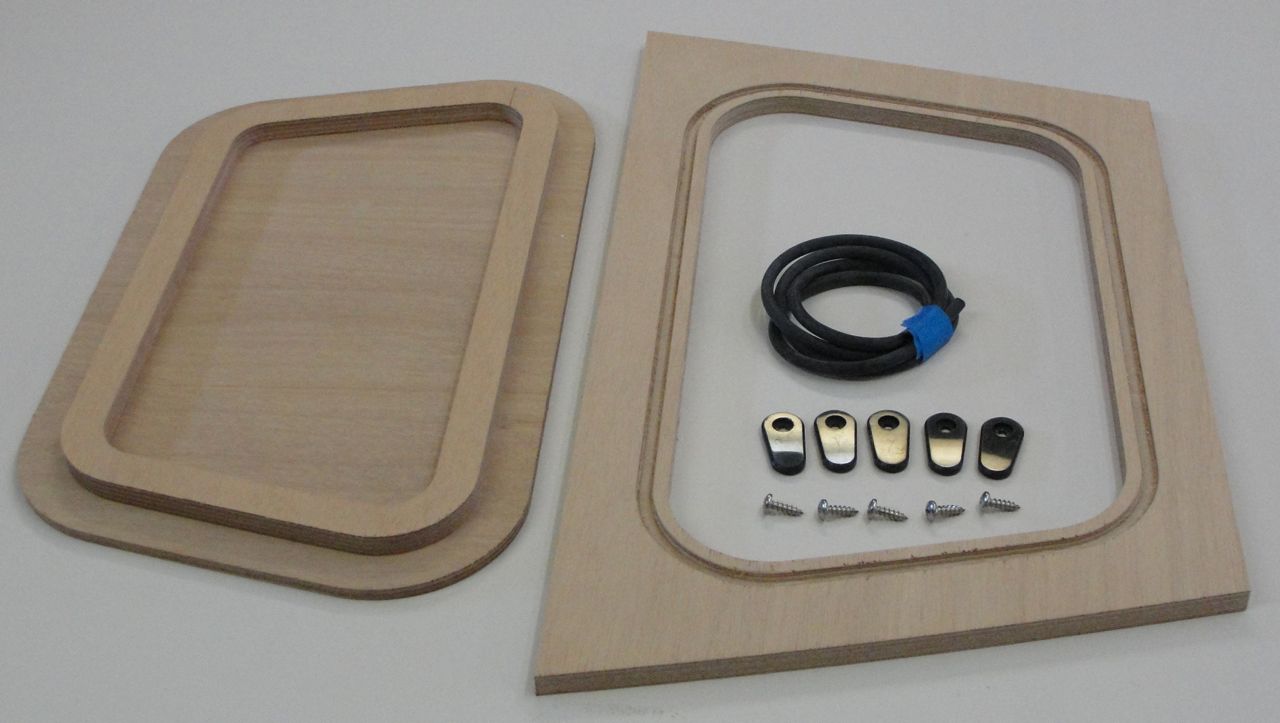
The quick disconnect vang set-up is shown here.The dagger board trunk caps are machined for us from 3/16” G-10 plate. They are machined with a gasket notch and now are machined with a recess for the mahogany stiffener. The recess makes it easy to bond the stiffener in place and also makes the cap significantly lighter.
A good trunk cap is a luxury if you like dry pants and a necessity for towing, and is now included in the base kit.
We sand and chamfer the edges of the caps and riser blocks and we make the stiffeners.The daggerboard trunk cap kit uses many of the same parts that the hatch kit uses, except that the cap uses riser blocks to lift the turn dogs to the level of the cap and custom washers to lift them just a bit more. One of the two washers provides a tie point for the lanyard (see both photos below).The hatch kit will be included in the base kit in 2016 because everyone purchasing the PT 11 has opted for the hatch kit.
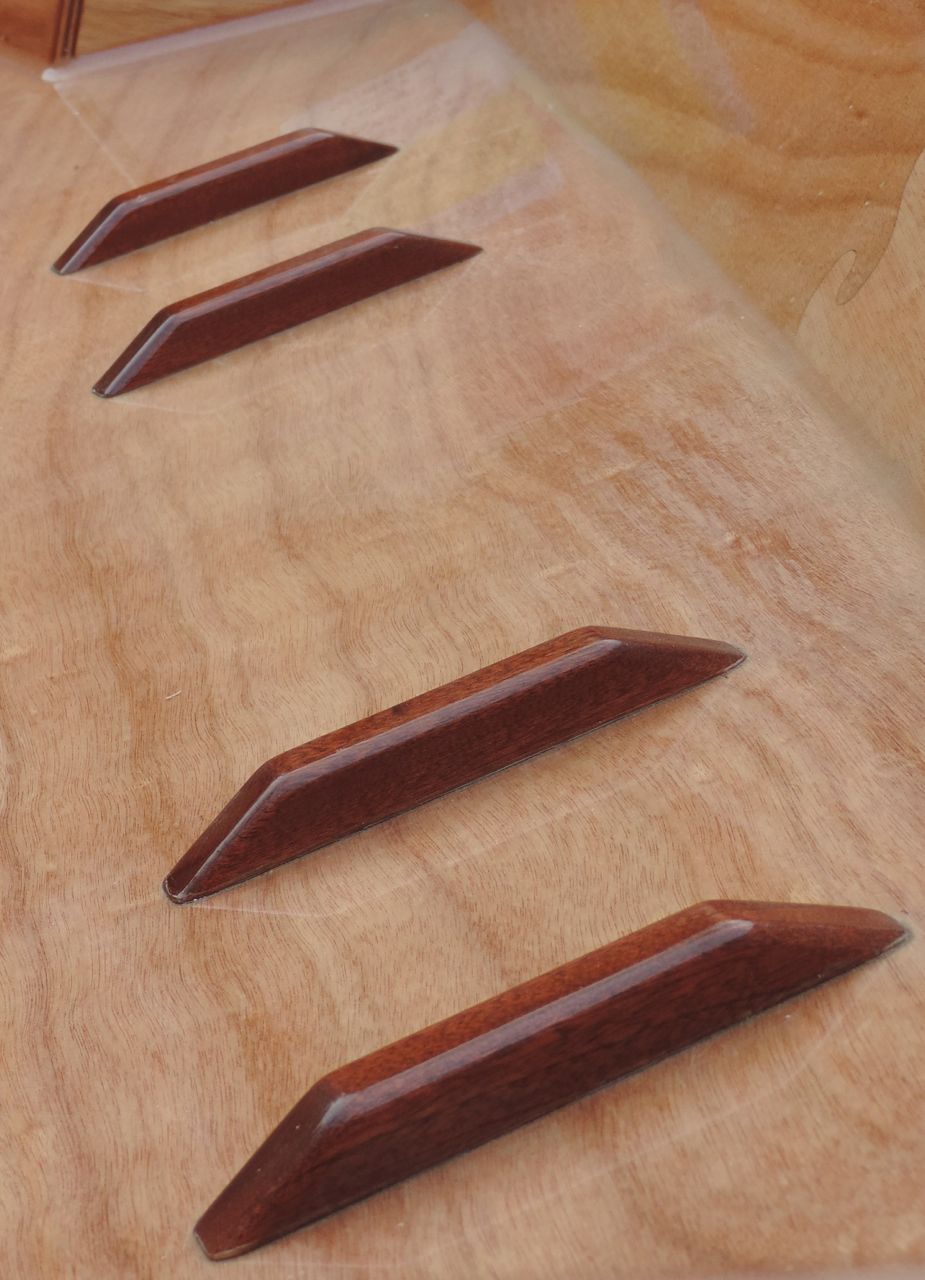
The hatch opening and turn dog fastener locations are now machined into the foredeck and we now pre-round the edges of the coaming opening and lid stiffener.The hatch is flush, which is necessary because it is sat on when rowing with two. It is also airtight (the gasket sits inside a machined gasket notch). How airtight? Removing the lid takes a good pull if the boat has cooled as the vacuum pulls the lid down tight.We machine a lot of small mahogany parts such as foot braces, back seat cleats, stiffeners, and oarlock riser blocks. We have gotten pretty good at producing parts that are basically ready to install and finish.Foot braces are almost as important as oars when it comes to rowing.
We have experimented with many different types of foot braces and keep coming back to these glued-on Sapele mahogany braces. They are easy to install (with the included template), lightweight, hard enough to hold a finish well, and made from a species that would hold up well even without finish.
The back seat cleats are also shown in photos above and below.
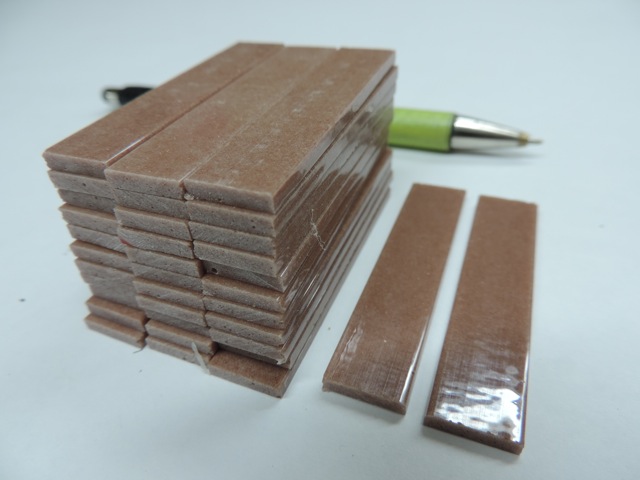
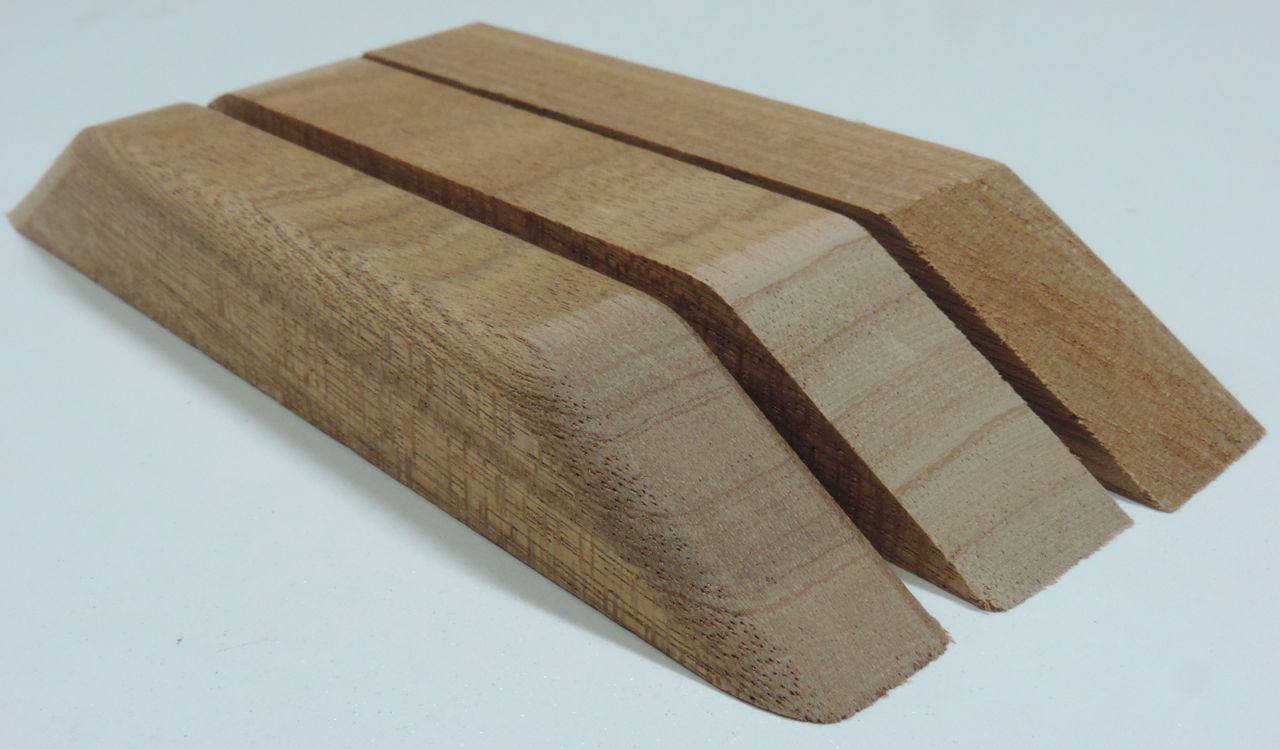
The photo below shows three of the finishing steps used on all the cleats, stiffeners, and foot braces.
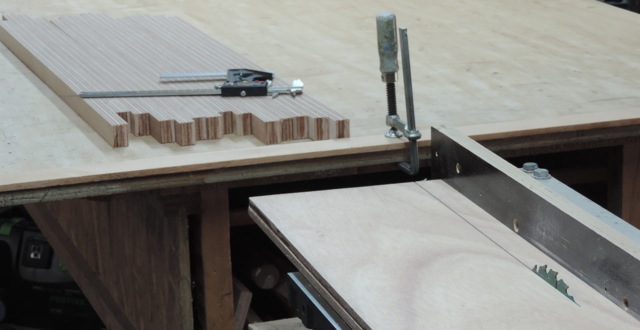
The piece on the right has had its ends cut to length and angle on the table saw. The piece in the middle has had its sawn faces sanded and sharp corners rounded on a table sander. The finished piece has had its edges rounded with a sharp round over bit in a router table.
All the stock for these parts is run through a sharp thickness planer after cutting to make all four edges smooth before cutting the individual parts.
To say that we make a lot of these parts is not an exaggeration.
Shown are foot braces and back seat cleats for only five boats.
.
.
.
.
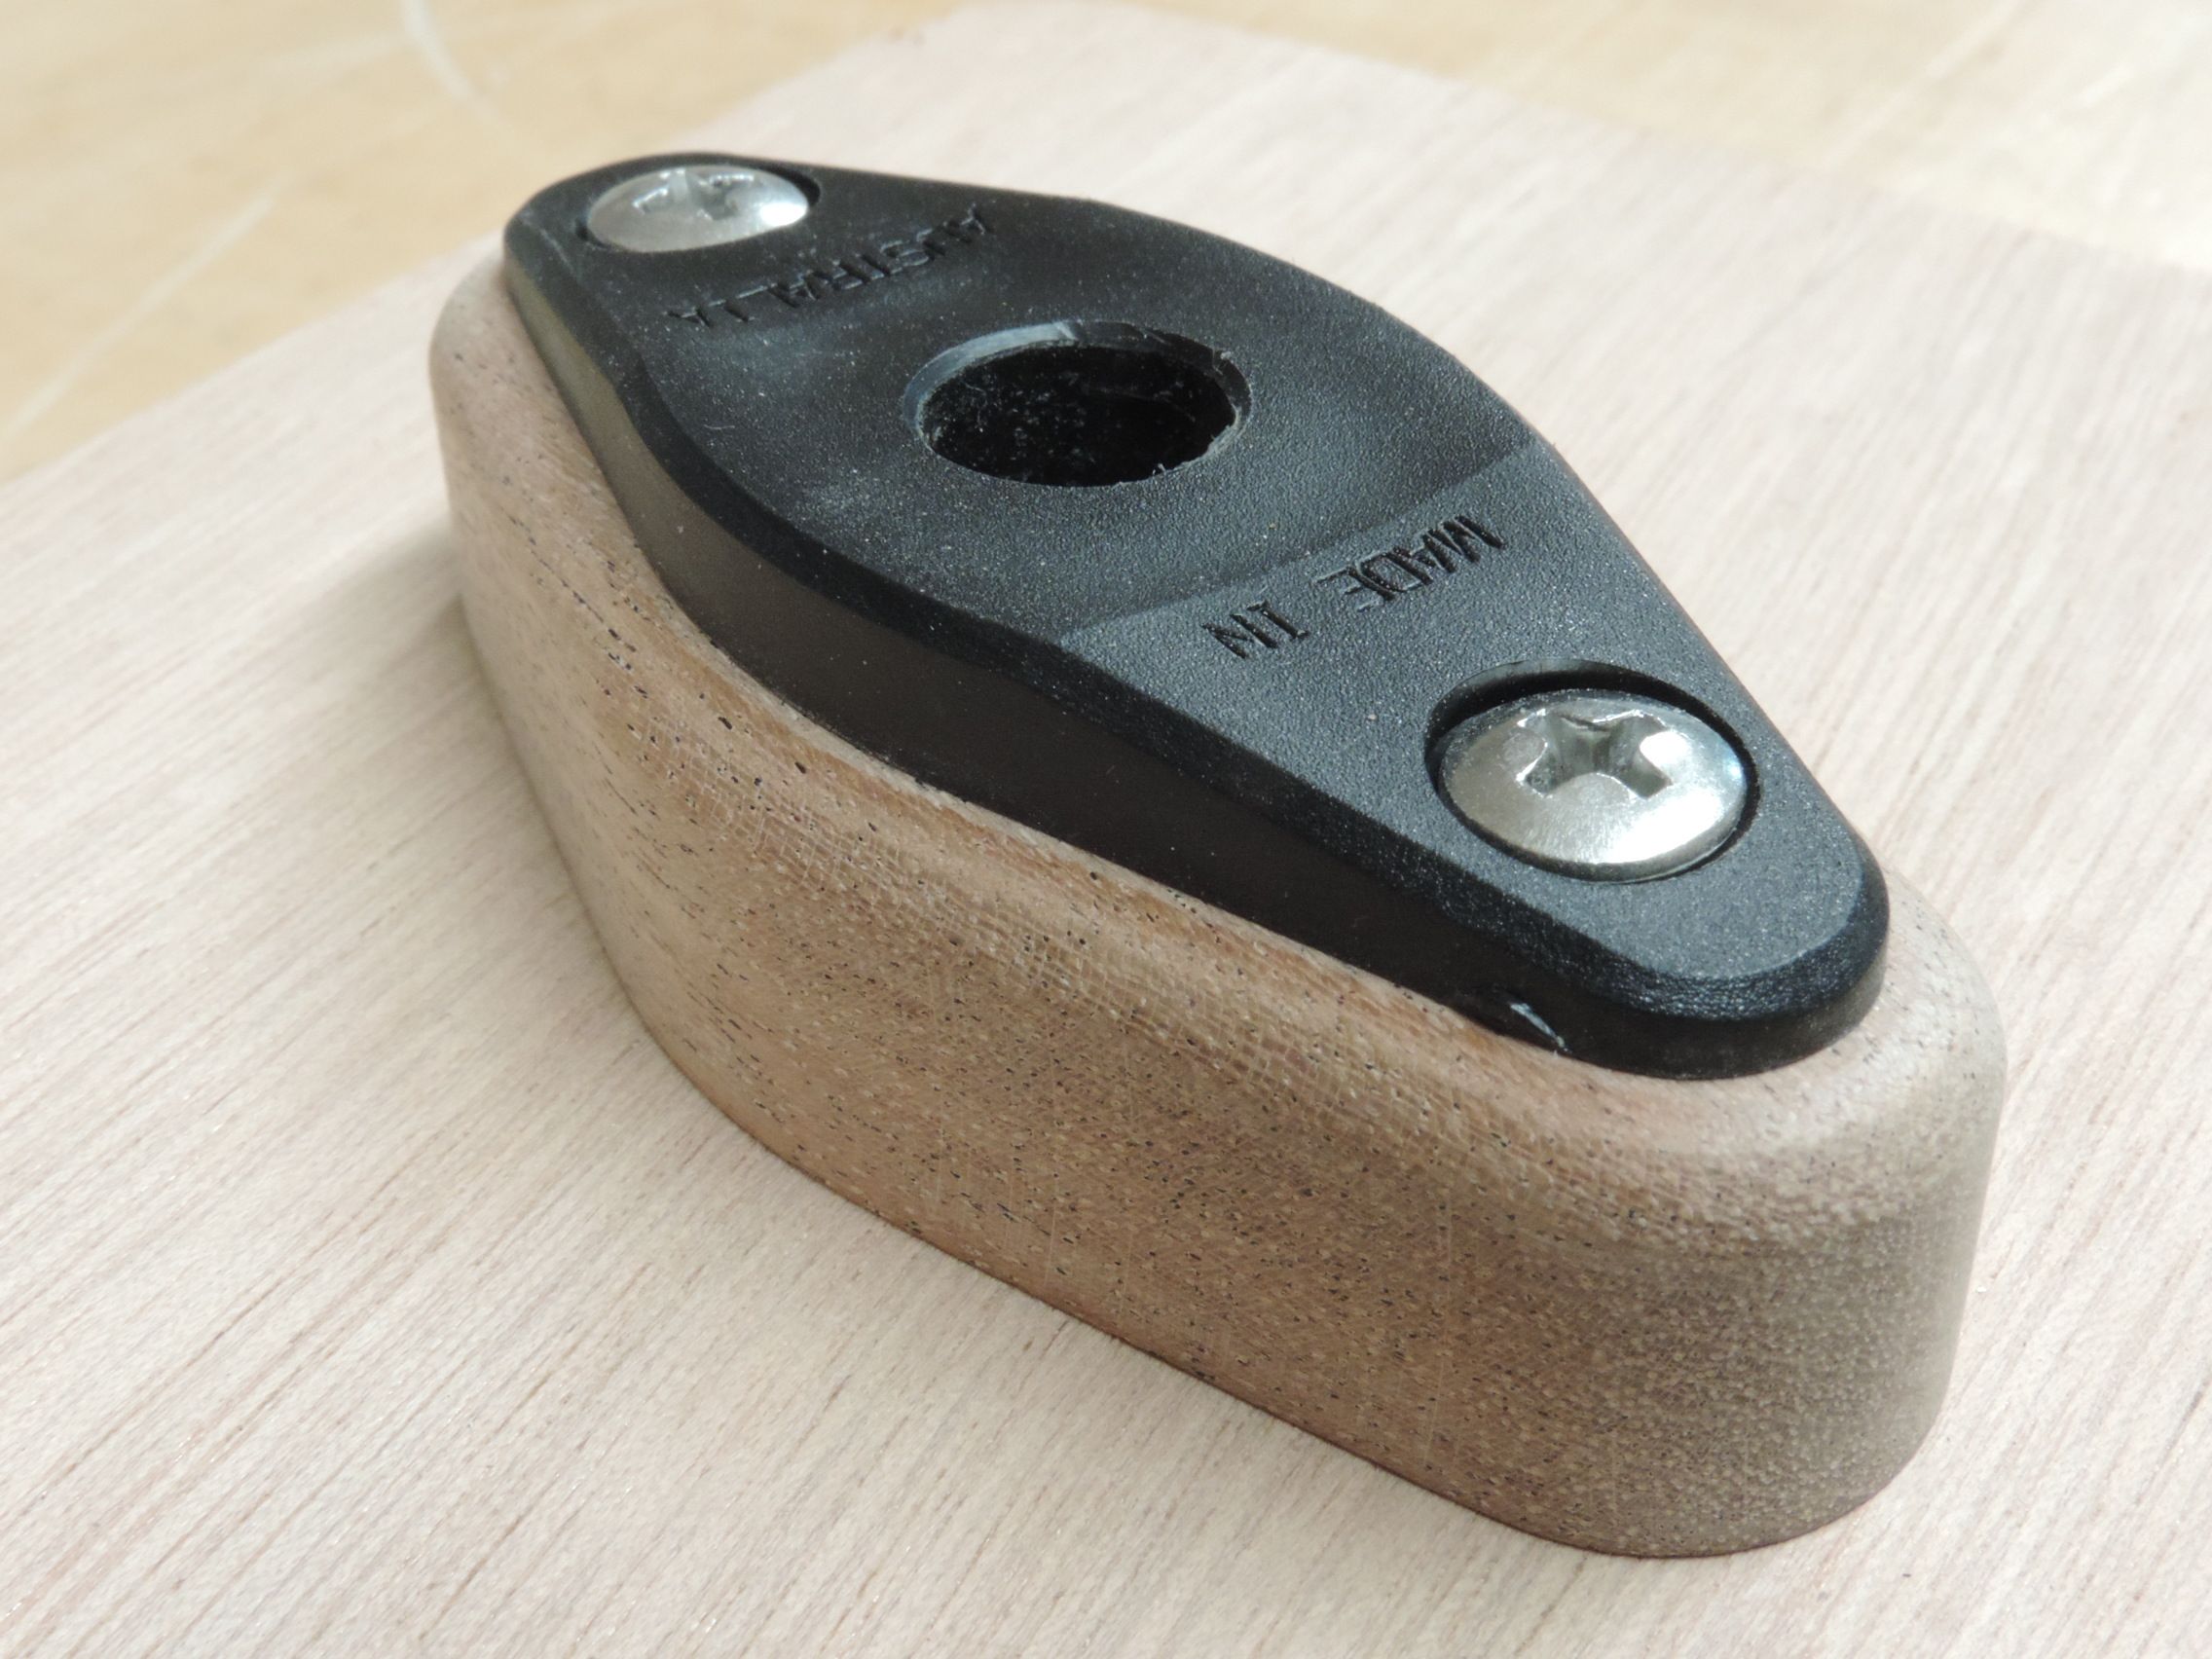
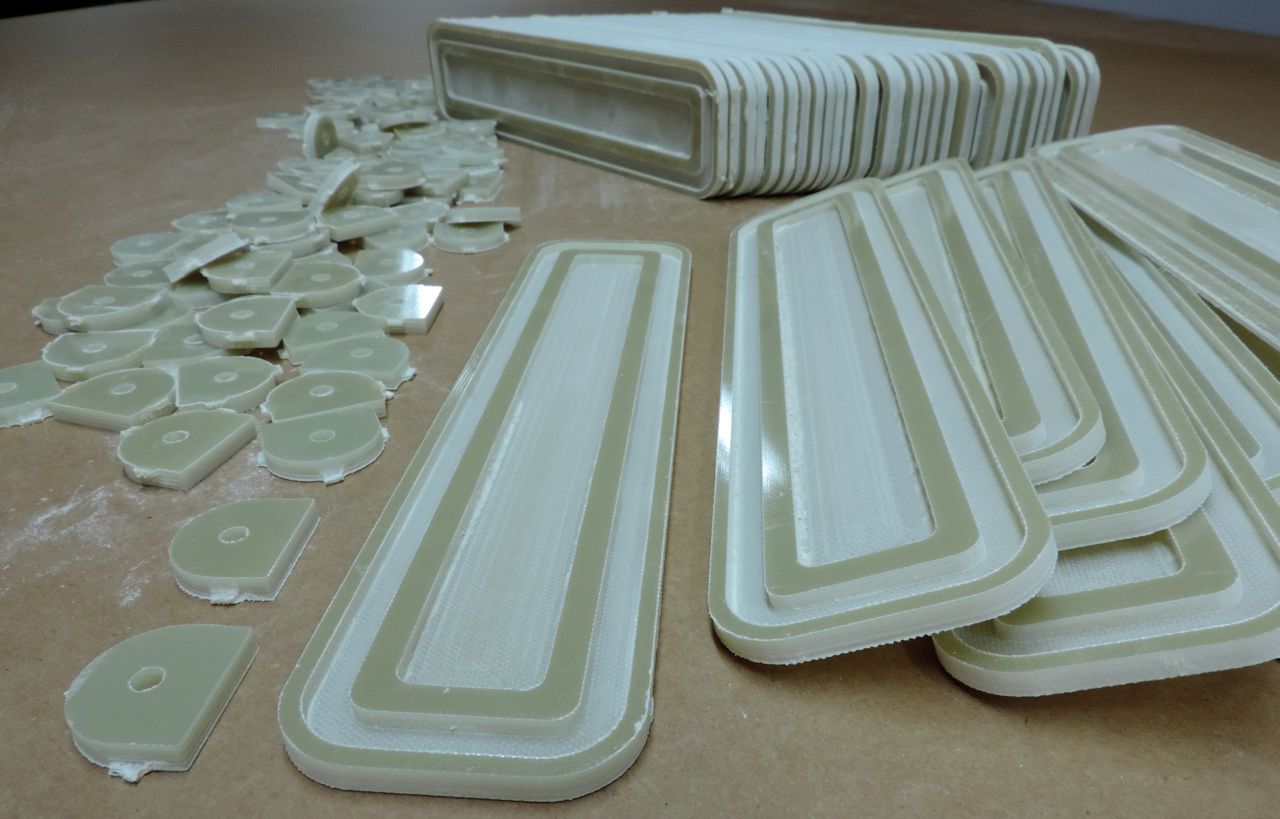
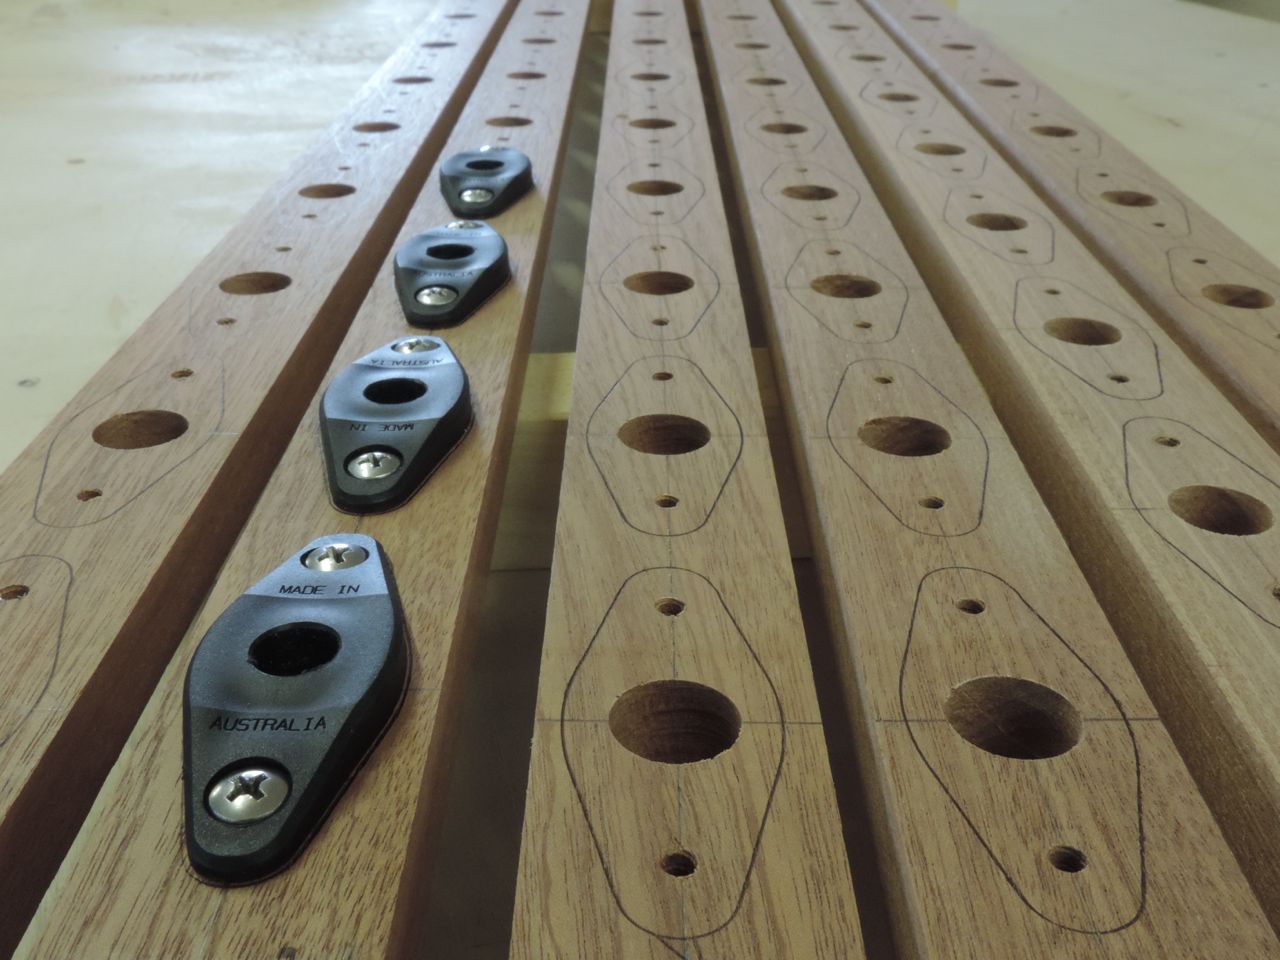
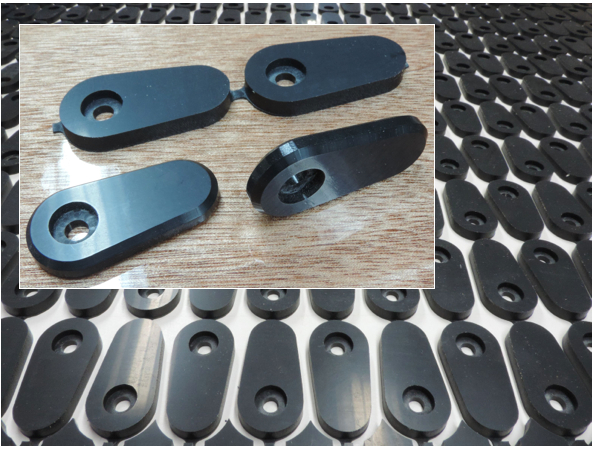
The oarlock riser blocks are not strictly necessary, but they give the sockets more support and give arguably better ergonomics, especially if you like to sit on a cushion when rowing.
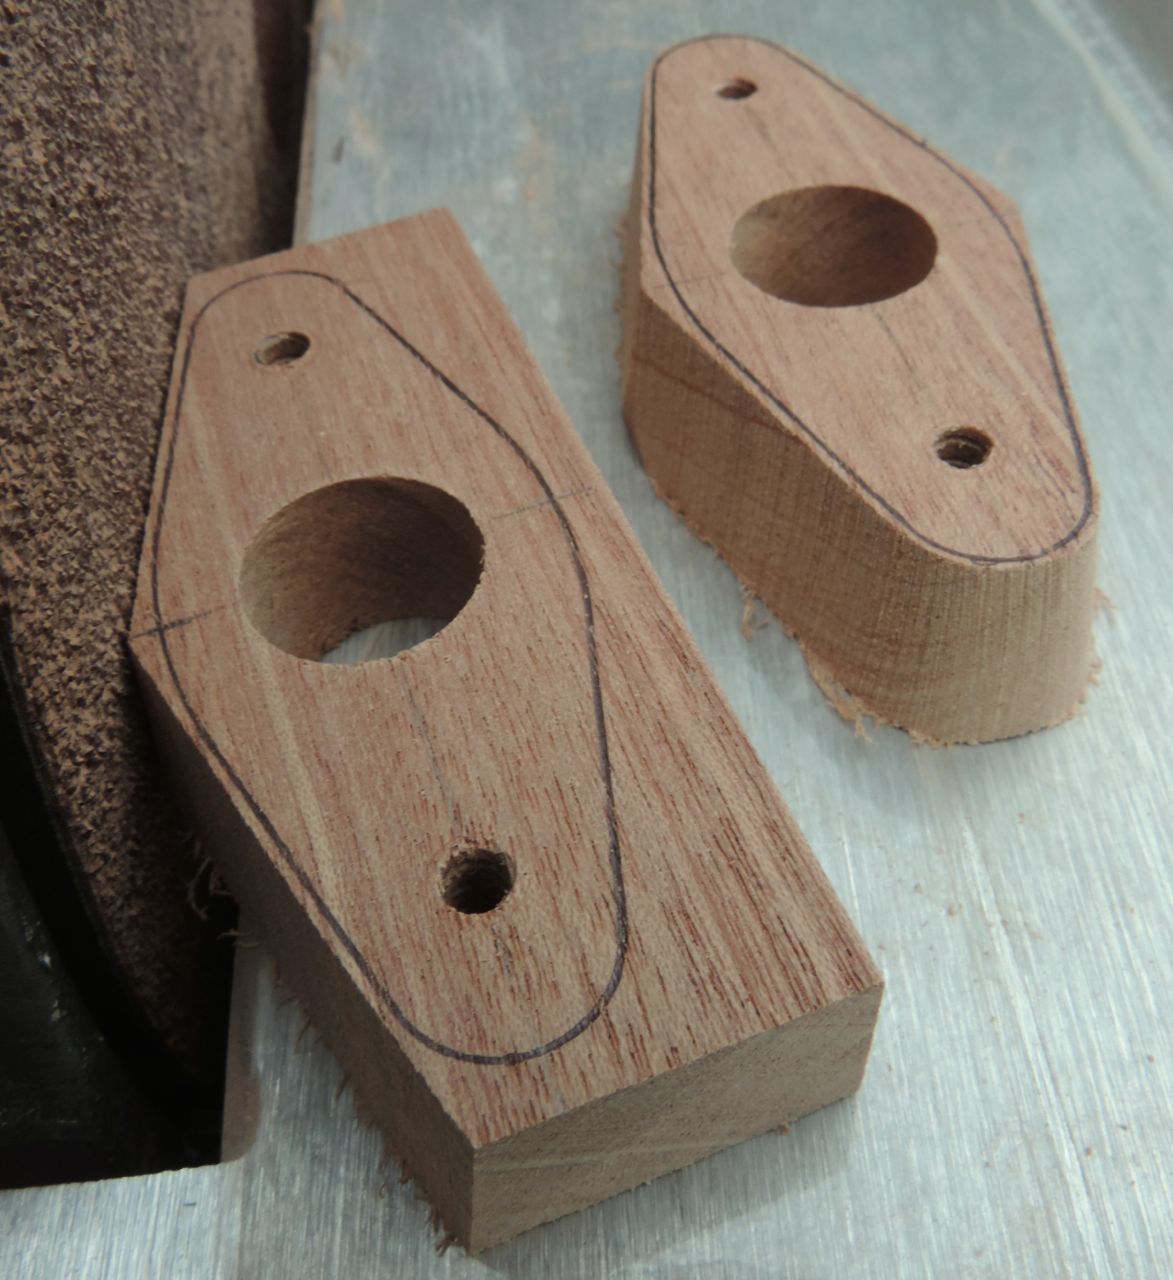
A block of wood with holes drilled in it would work fine, but we machine them to the shape of the socket.
Making these parts is laborious and makes sense only if a lot of them are made at one time.
CNC machining them is possible, but would be expensive (5 axis machine) and the parts would still need finish sanding.
.
.
.
.
The drill press is used with a fence to drill both large and small holes on center.
The sockets are installed with the screw size that will be used for final installation and marked around as shown.
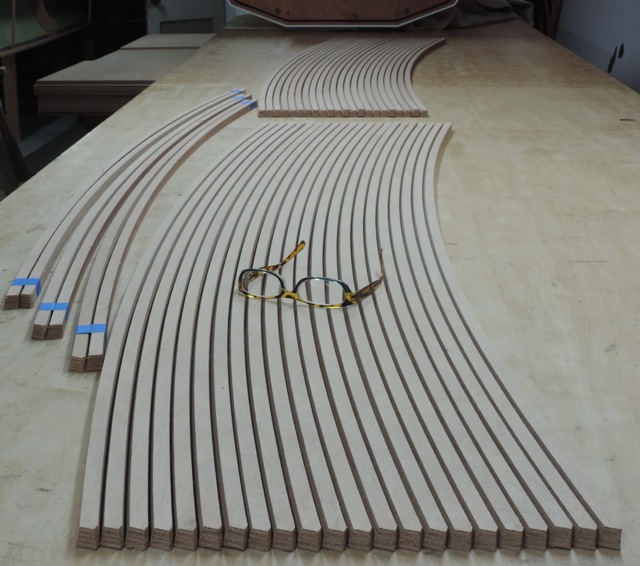
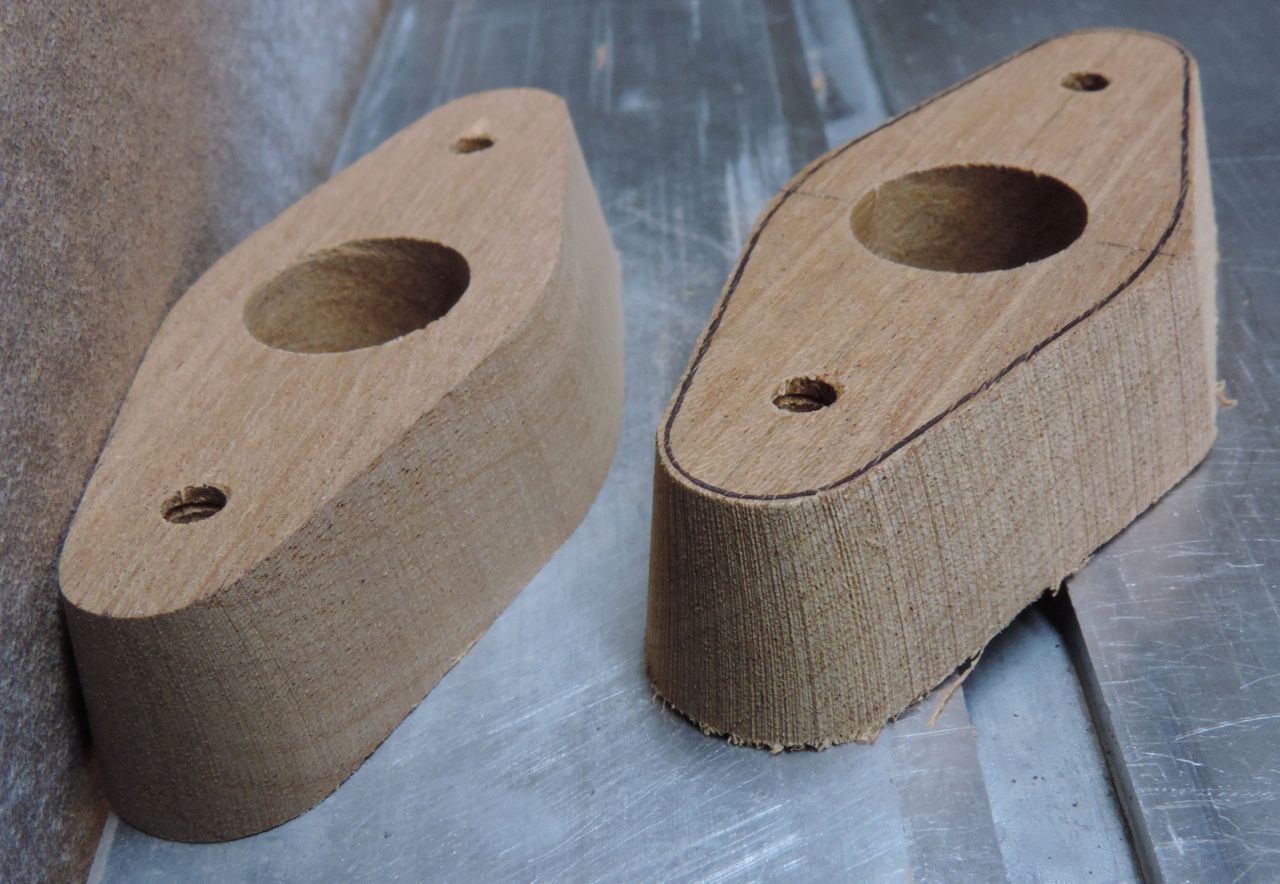
After cutting the strips into individual parts, the shapes are roughly machined very quickly on a large tilt-table sander. They are then finished on a smaller tilt-table sander with fine sandpaper as shown below.The back seat (also visible in photos above) is made from very tight grain Red Cedar which seems to be an ideal material for a removable seat. It’s very light, looks good, and doesn’t ding up the inside of the boat. We pick through piles of expensive wood to find the nicest pieces, plane them to thickness, and cut them with a template.The construction manual is what ties all the parts together.
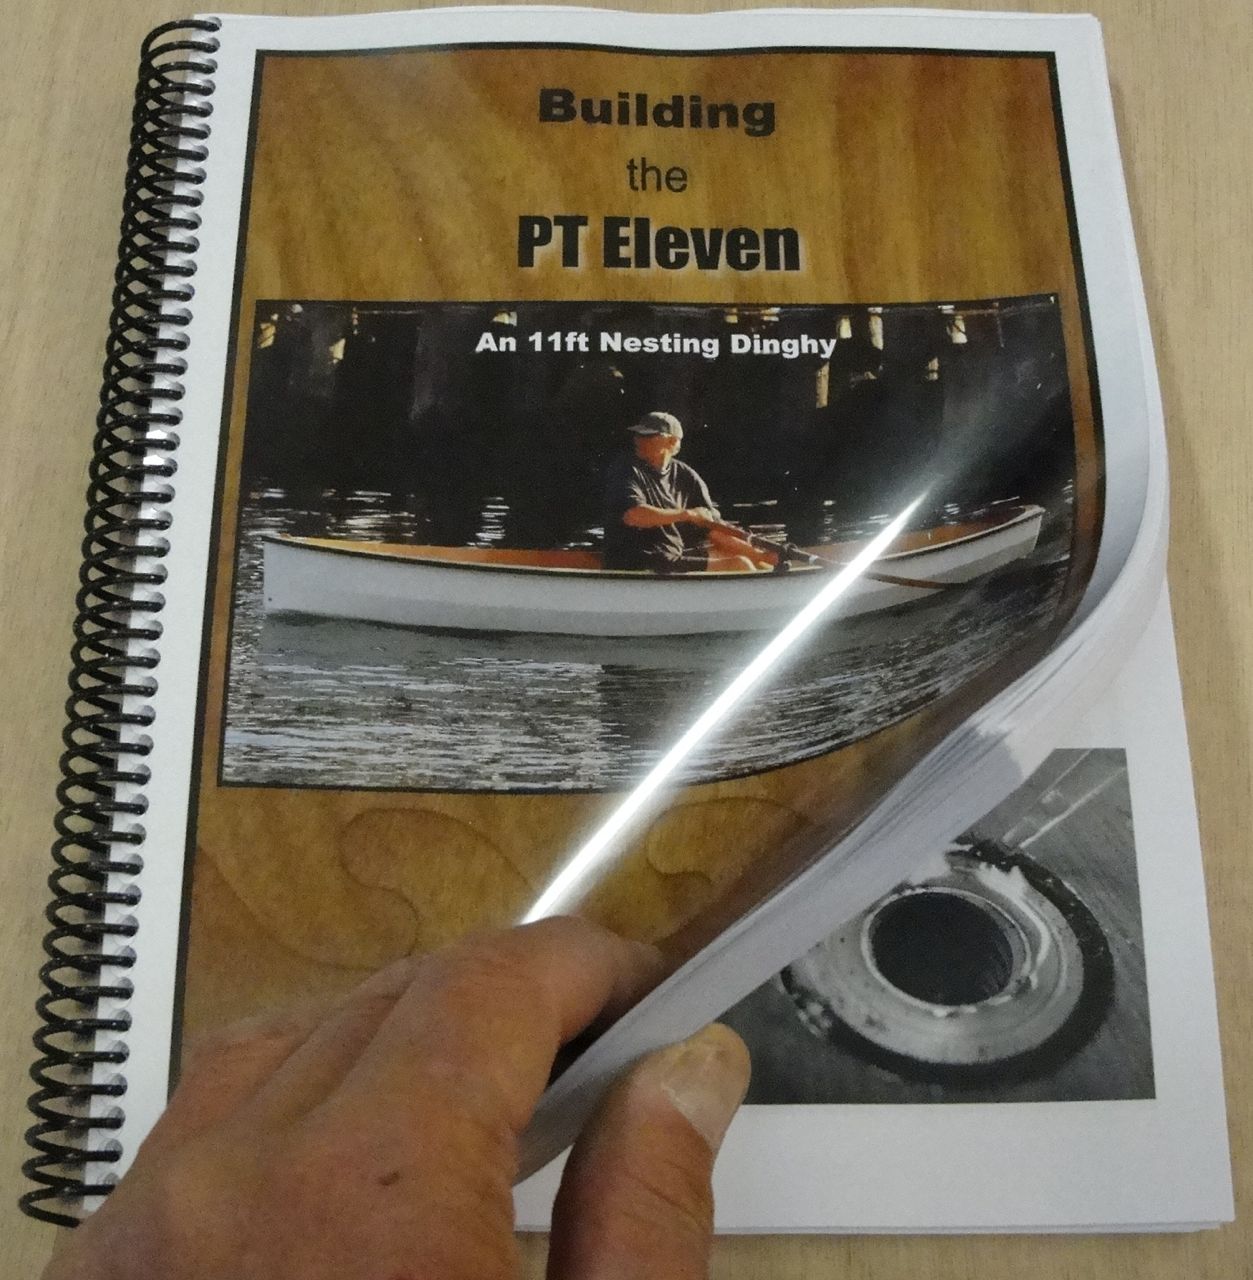
The PT 11 manual has been the largest single effort of this boat. It seems to be paying off as we get very few “tech” calls or calls from builders in trouble.
The only embarrassing thing about the manual is that it is so thick (306 pages) and some find that intimidating.
The reason it’s so thick is that we try to show more with photos than with words and there are more than 700 photos in this book, showing every step of the building process.
The PT 11 is not a simple boat and while the manual needs to be carefully followed, total amateurs have built very nice 11’s and had a good time doing so.
The manual has undergone multiple re-writings (even very recently), which usually involves building a new boat to use as a photo prop for design changes or changes in process or sequence. The result of all this is that the boat is now both better and easier to build.
What do we do with our “spare time”? We make other stuff, such as turn dogs and carbon eye straps. We make these parts for our own boats, but we also make them for our friends at Chesapeake Light Craft, who have managed to sell many thousands of these parts for use on their own kits.
The turn dogs are machined from sheets of Delrin(TM) and we bevel the edges on the router table, which sounds dangerous, but really it’s just mind-numbing (and finger cramping). Small fingers like Ashlyn’s are pretty much a requirement for this job.
..each piece has the upper & lower edges chamfered on a router table...
The carbon eye straps are popular because they look cool, but also because they can be glued to a surface (such as a kayak deck) without fasteners. We make long blanks in a two-part mold (long enough to make 80 eye straps). After trimming and finishing the blank, the eye straps are cut, beveled, and finished by hand. Both the turn dogs and eye straps were just an idea (floated with crude samples) to our friend John Harris at CLC about 5 years ago. These parts now are a small industry and can be seen on boats far and wide (including our boats).What’s next for us?
Kit sales in 2015 challenged the production capacity of our shop so the thought of someone else taking over PT Watercraft has crossed our minds more than once. This would allow us to develop other boats and write about building techniques.
For the present, however, we are happy to keep producing the best kits we possibly can.
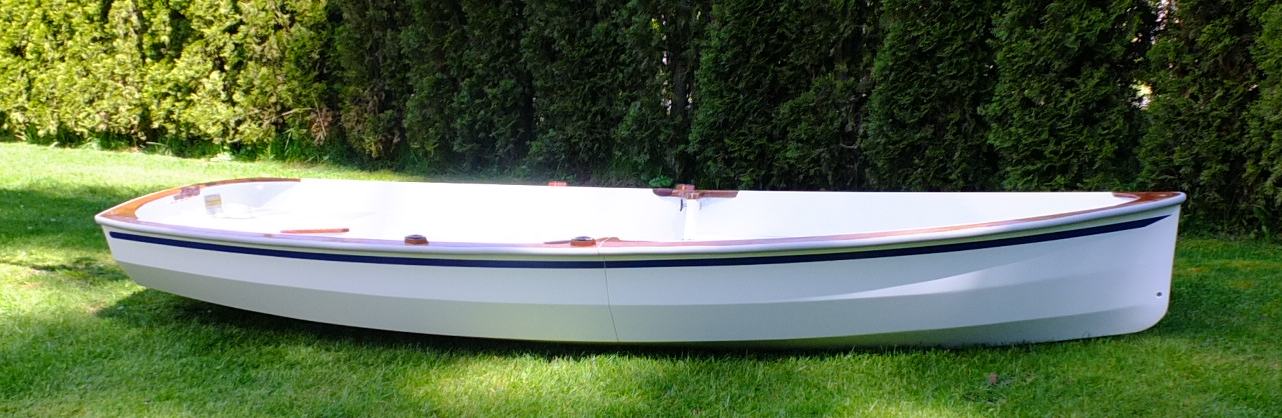
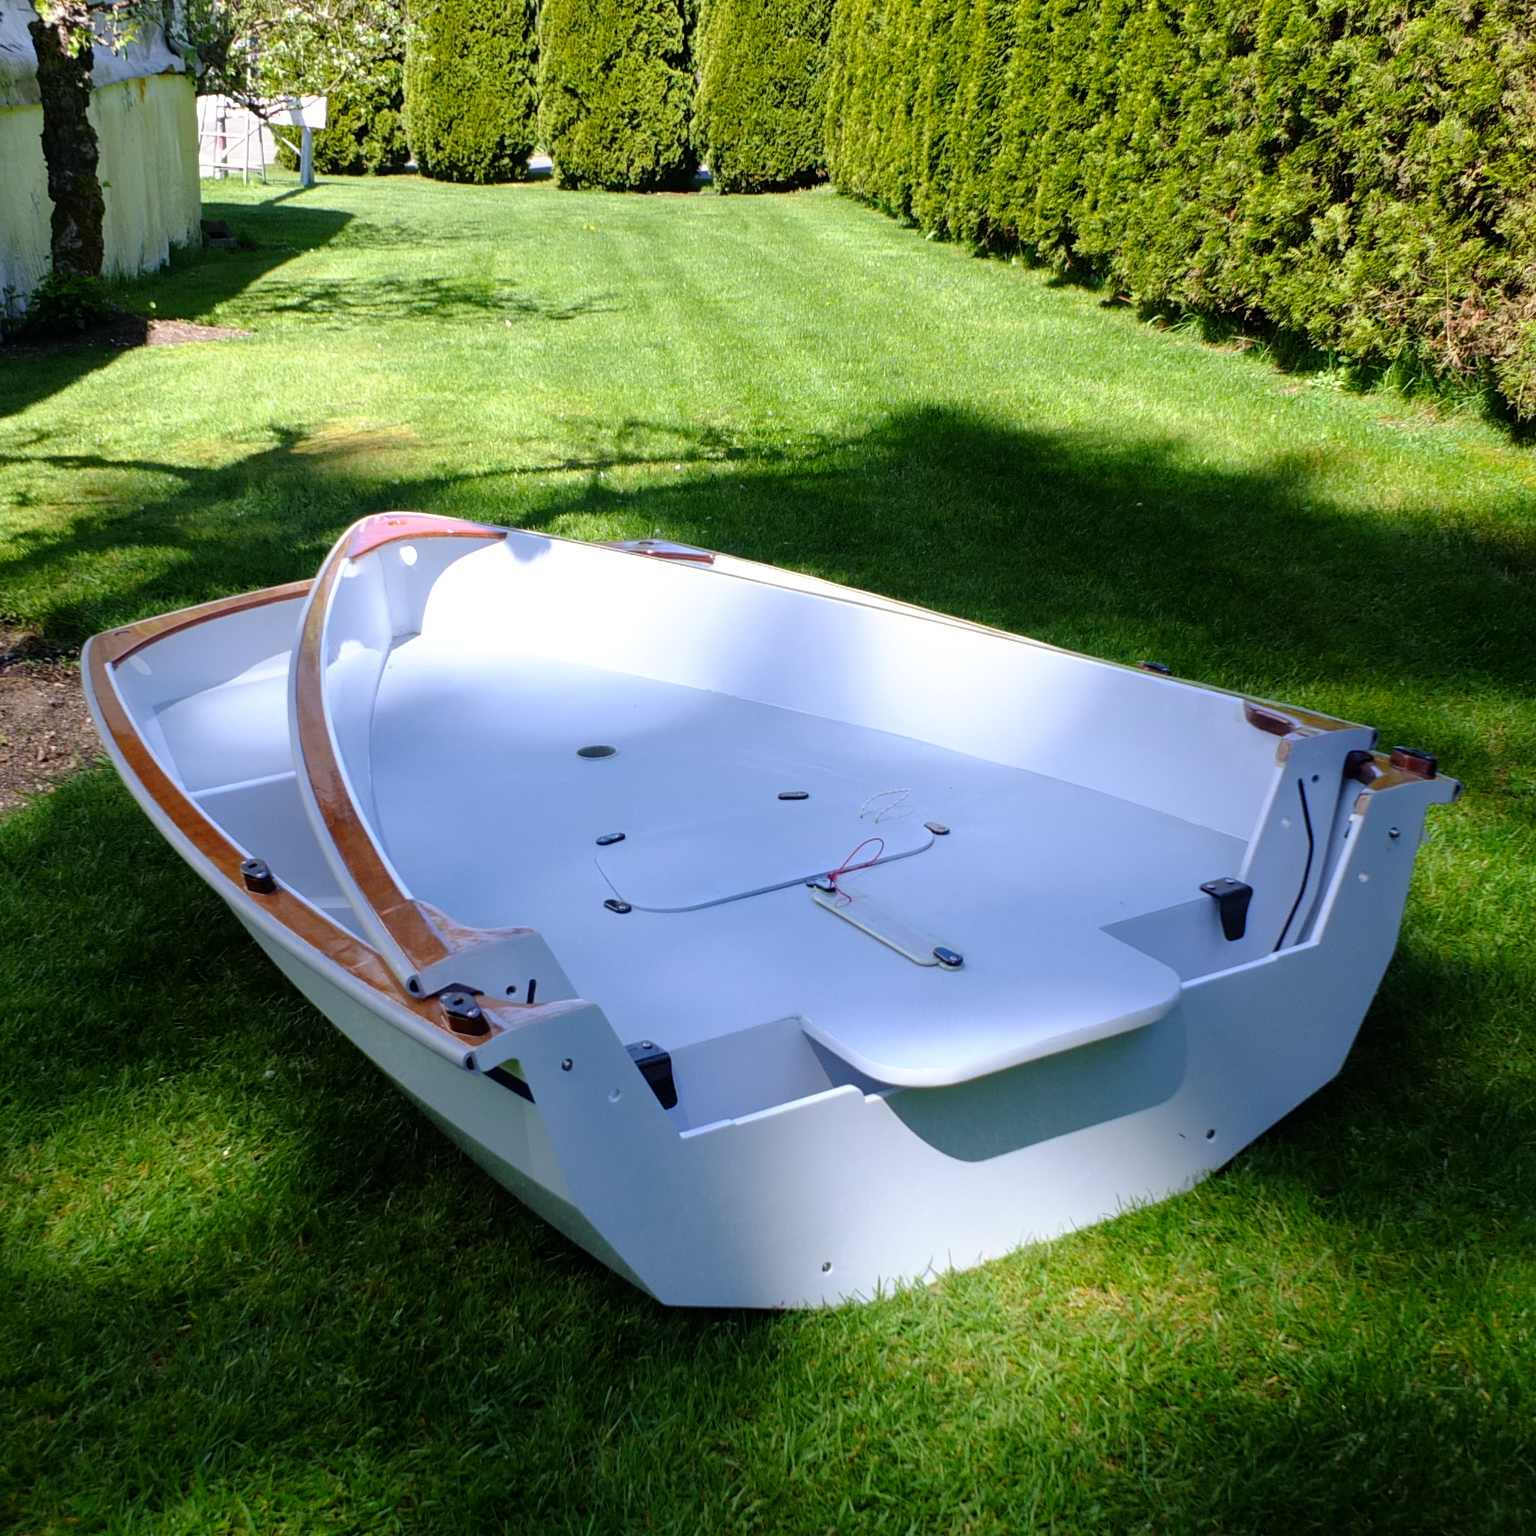
As beautiful as clear coated Okoume is, a couple of builder's have chosen to paint their dinghy interiors. They have also added non skid. I have to admit, I think these boats look super smart!
exterior paint job on Sadee Ann includes a nice racing stripe.Sadee Anne PT 11 nesting dinghy nestedSadee-Ann with painted interior and clear coated accents.A PT 11 in Holland with paint over non skid on the interiorThis PT 11 in Holland matches the 'mother ship'
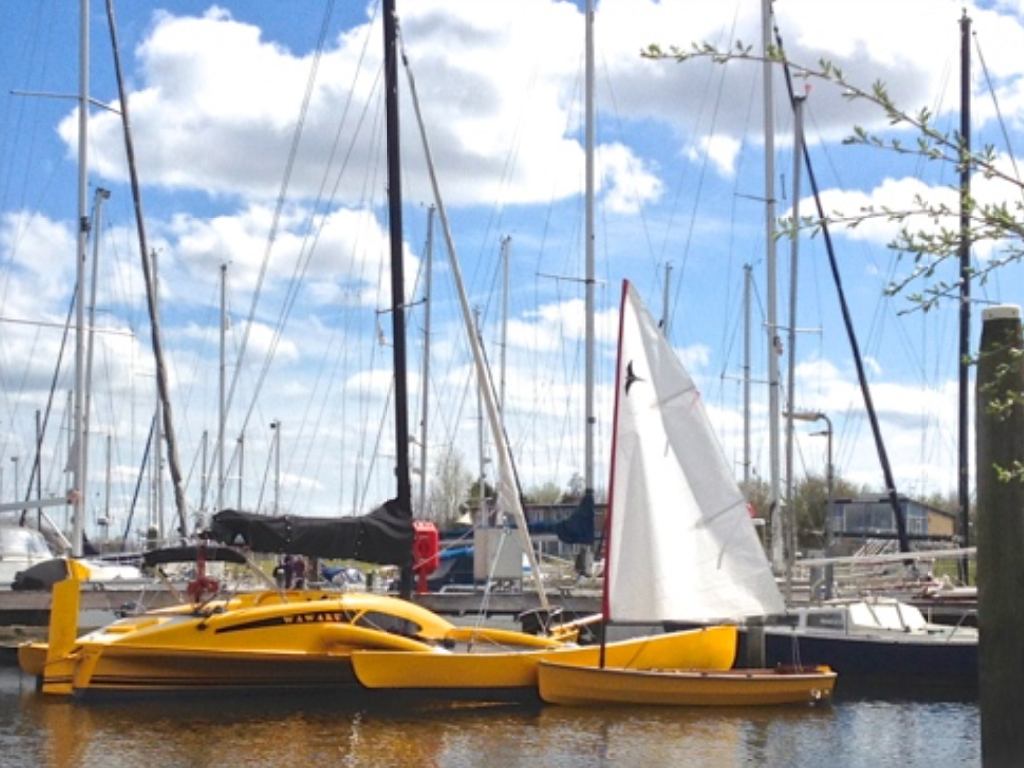
I want to share this PT Spear with you. Built in Texas and transported to the East Coast, the builder has done a great job and customized the boat to hang just right on the mother ship's davits. The custom cover they had made is also very attractive and functional. See the photos below.
And..of course... the following comment was very happily received! 😉 "...We have been using the dinghy for nearly two weeks to get to and from the boat and the beach/dinghy dock. So far, we have not splashed so much as a drop of water onto the crew or passenger (other than what I splash up with the oars - I’m still learning to use these long babies), despite rowing ashore and back in up to 20 knot winds and fairly choppy conditions. It rows like a dream and I get an upper body workout for no extra charge. We could not be happier with the finished product."
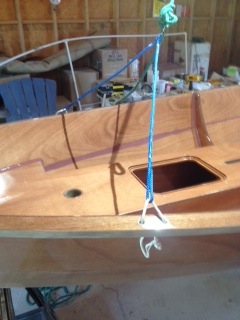
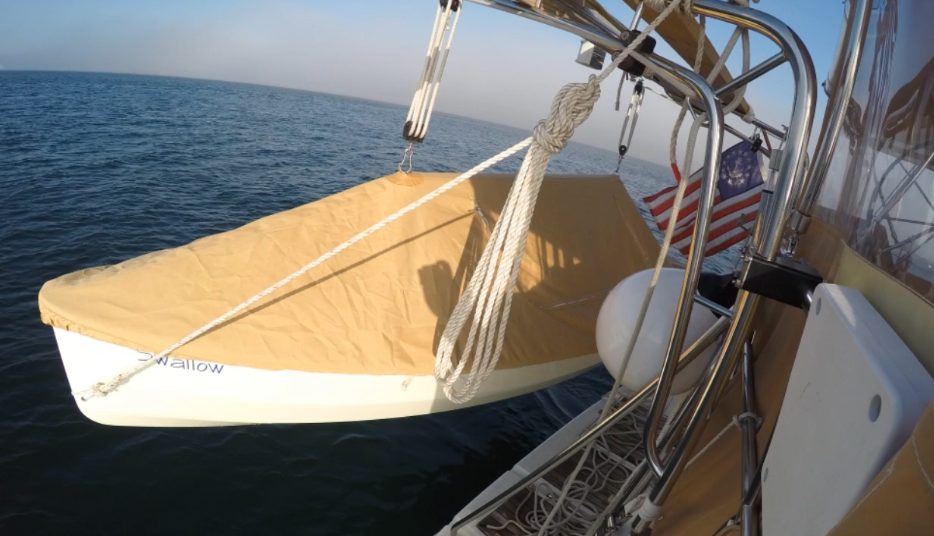
Creating protected holes for a bridle.Mock up of lifting the boat to create the bridle.Swallow in place on the 'mother ship'..Rain cover for Swallow, a PT Spear
Construction pictures of PT Spear, "Swallow", and current adventures can be seen on the owner's blog HERE>
I know ...it took forever! I will just say that I am a MAC person and if I never have to use a certain MS word processor again, I will be happy. After a lot of tutorials and finally formatting the book, the version I used did not allow active links even for the table of contents. I scratched it and went back to my free word processing program. It took a while to get over the lost time.So now you can get the DIGITAL version of SCARFING BASICS HERE.
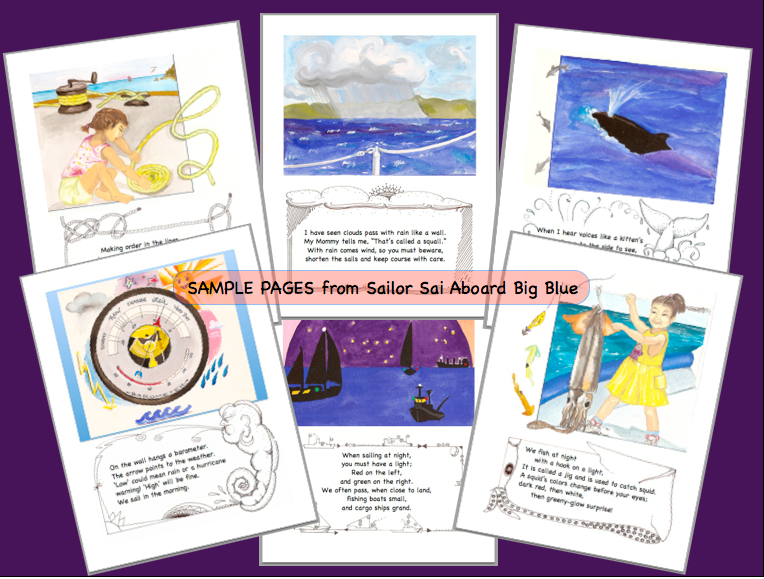
I have also just published a children's book.
I created this book when I was cruising with my daughter many years ago. Sailor Sai Aboard Big Blue is a little tour of life living aboard a sailboat from the eyes of a child. The book hosts rhyming verse, a colorful illustrations and colorable line drawings. Each page is a sampling of living on a boat and the nature seen while cruising. The story was inspired by the real life of a little girl named Sailla who sailed many of the worlds oceans before her 10th birthday. Best suited for ages 2 to 10.
I have it priced at $12.95 (26 full color pages) and can send it postage included for that price anywhere in the USA. You can also buy it from AMAZON.com HERE. Amazon.com likes to play with numbers and they offer the book at a range of prices. Thank you! (Ashlyn)
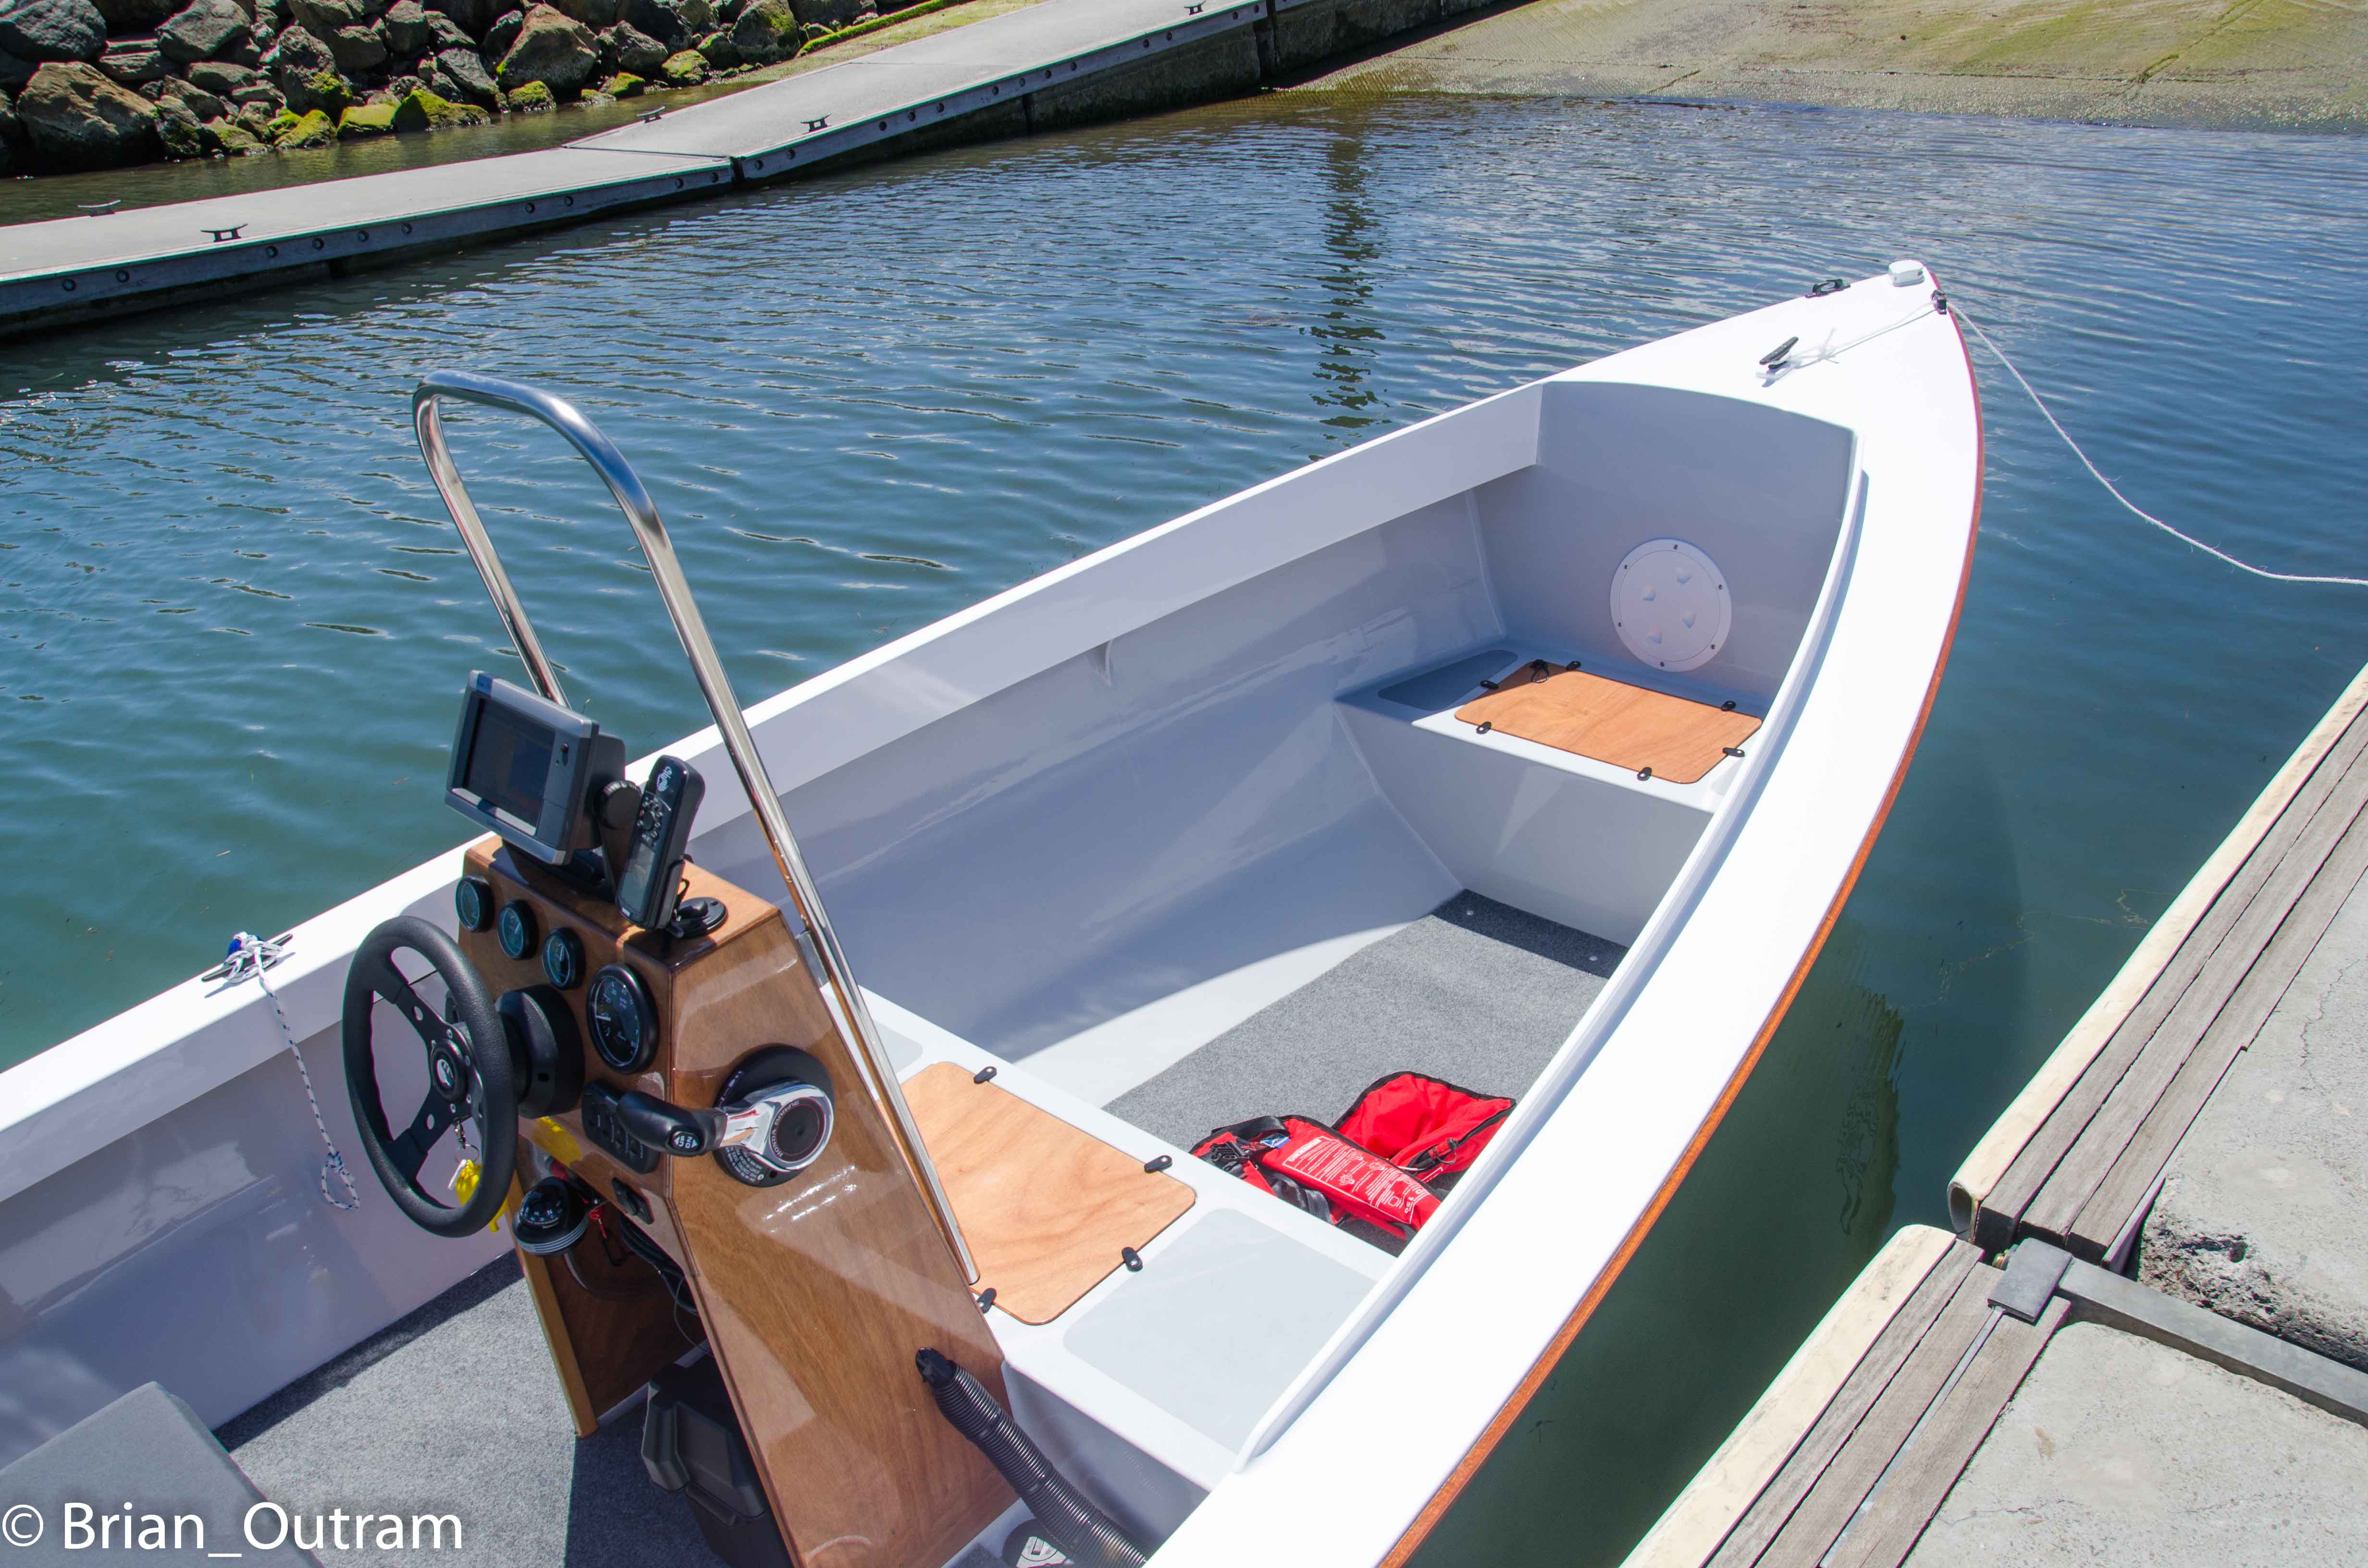
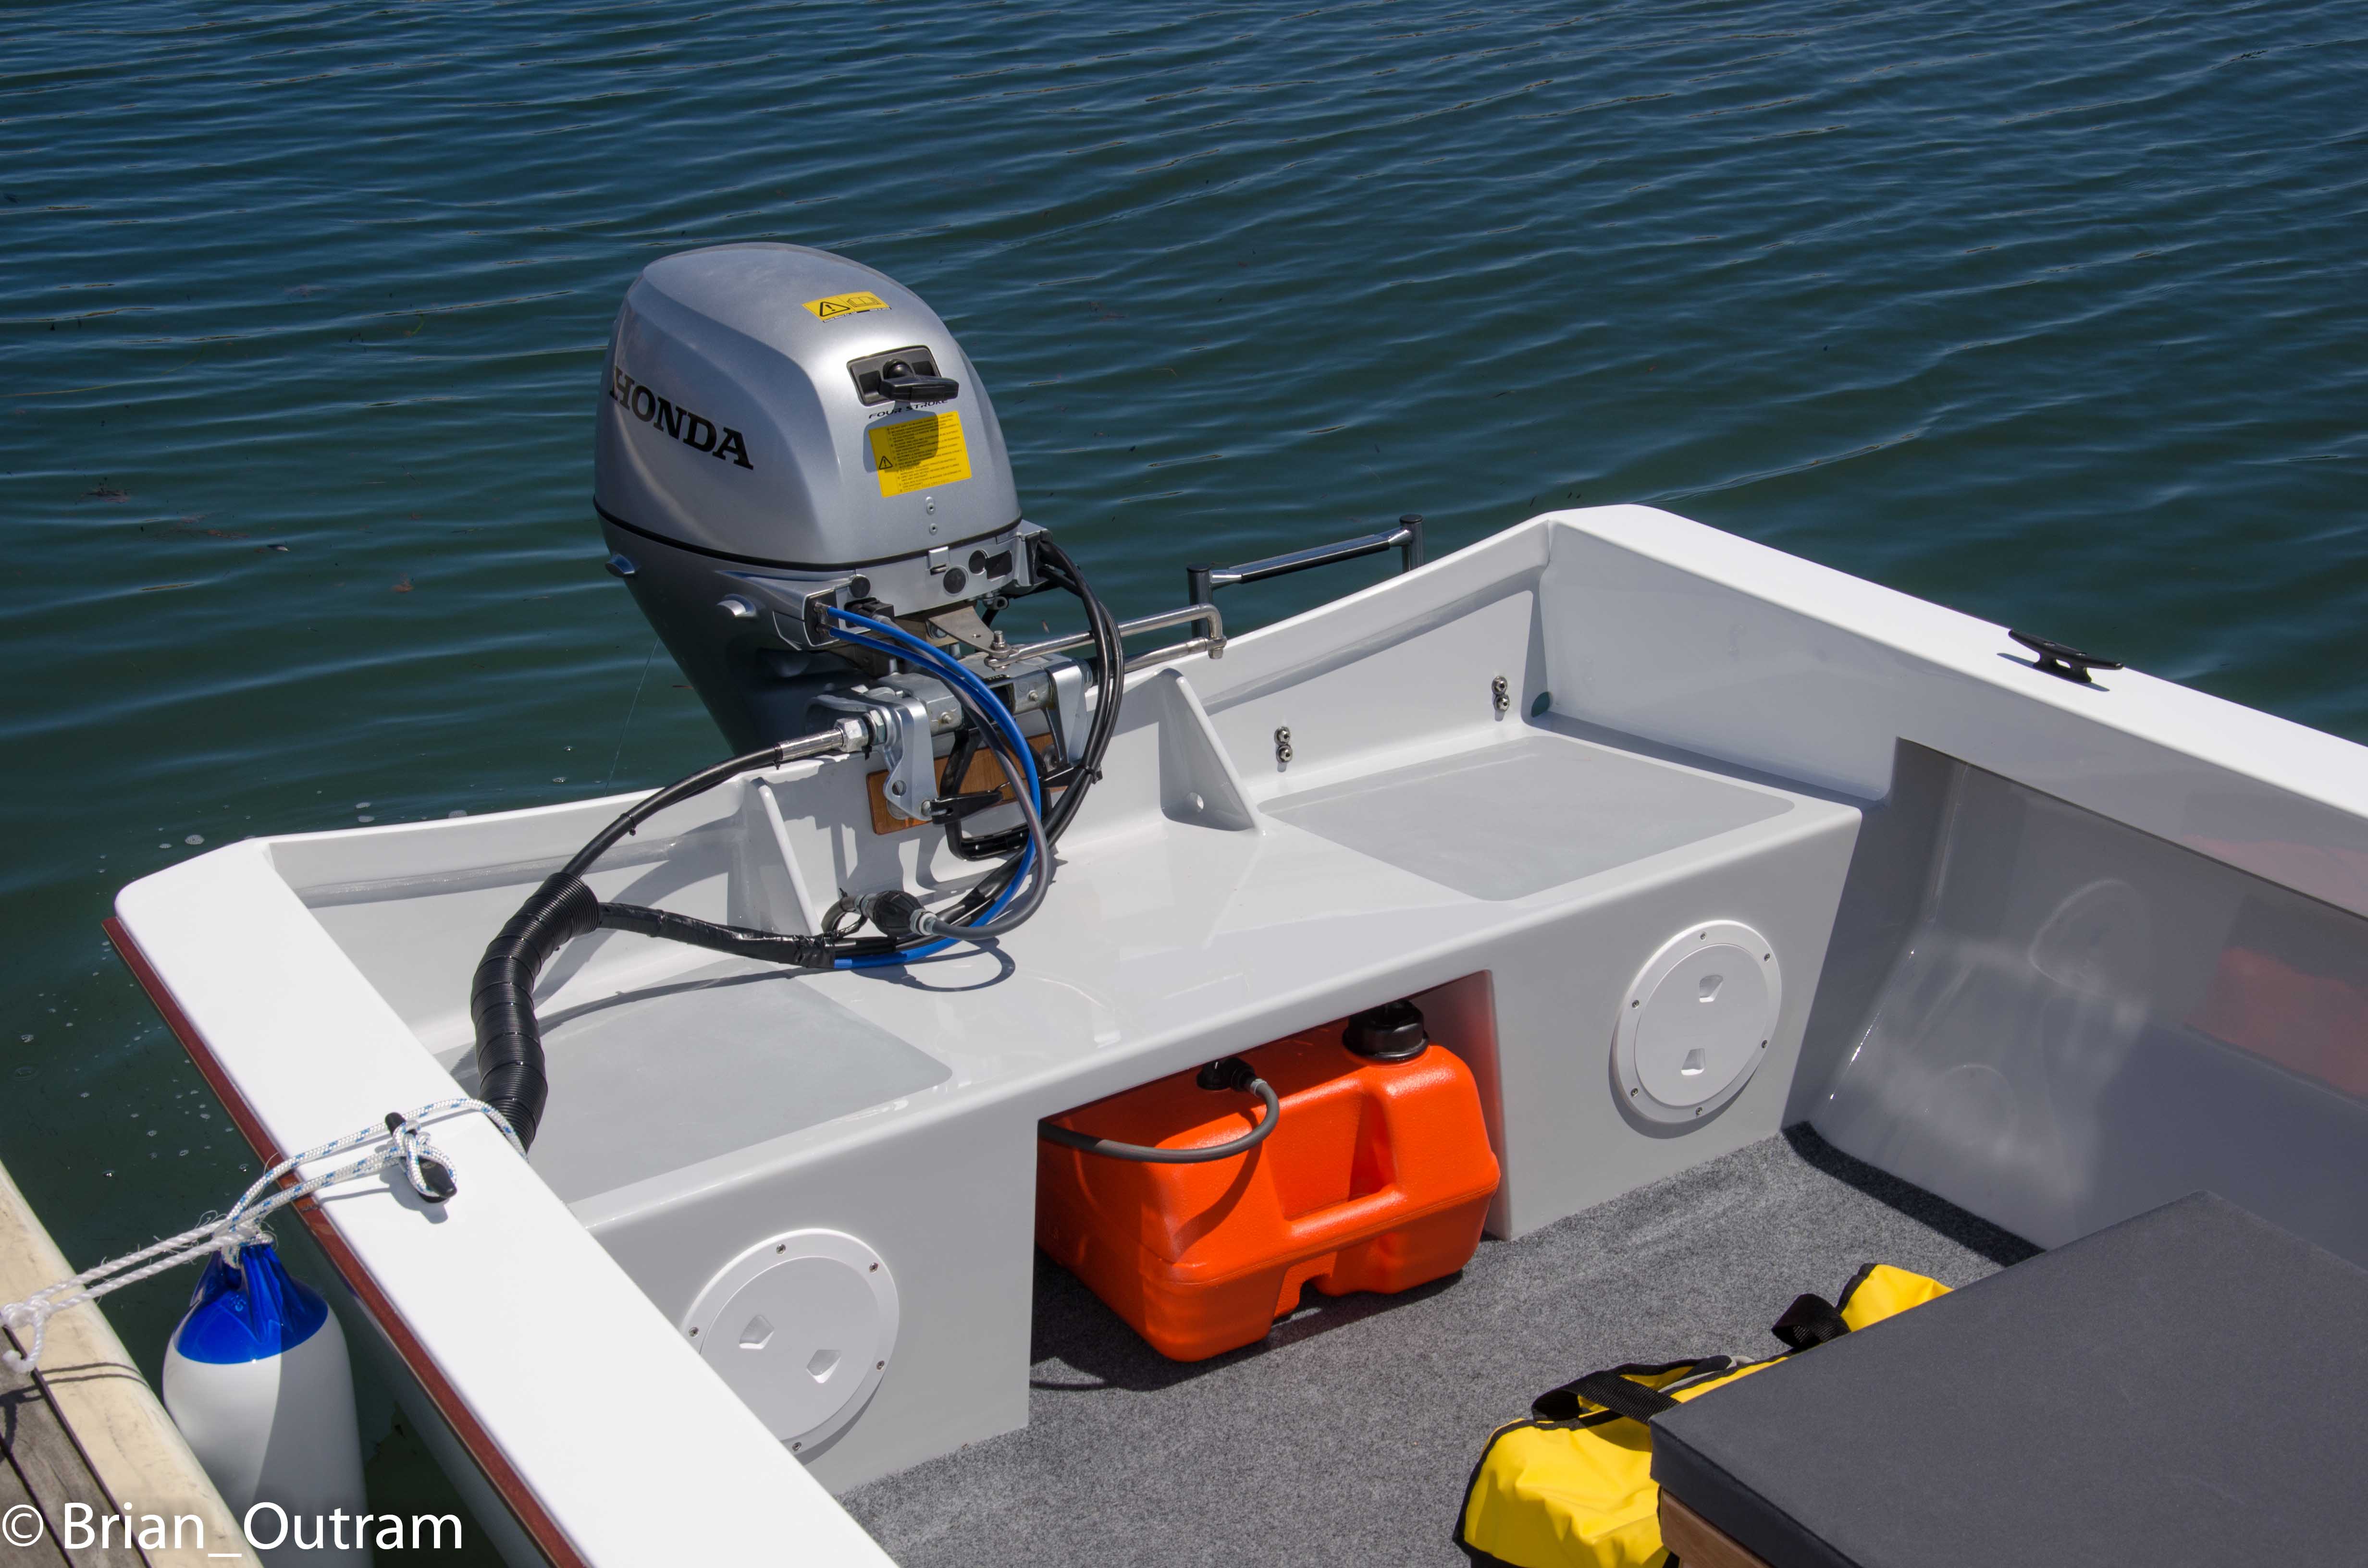
Brian in Australia has completed his PT Skiff and I think there is much to consider about what he has done with his boat. After developing sensitivity to epoxy, he had to hire help to finish the boat and we tip our hat to his perseverance. Clearly Brian is a stickler for detail and he has maintained a clear vision for his skiff. He sent a detailed account of his choices for outfitting the boat and it is this account that I want to share. I have put it together as a PDF document (HERE) that you should be able to download or read online. It is filled with photos to compliment his notes. If you are currently building a PT SKIFF, these notes will be informative. If you are thinking about building one, this should wet your appetite! His boat is very impressive!
In addition, the following photos arrived with this 'Launch report"
My PT Skiff launch went extremely well today. Everything worked. The photographs attached were taken during the initial 15 minute warm-up of the motor at the boat ramp at Adelaide Sailing Club. Whilst it looks very calm at the ramp (large breakwater), we ventured out into wind waves up to 1 metre in St Vincent’s Gulf. The wave fetch here is approximately 38 nautical miles from the other side of the gulf with the wind in a WSW direction. I have checked our weather website tonight and the wind was 11 knots gusting to 14 while we were doing stage 2 of the motor run-in (2000 to 3000 rpm). The boat was lively. Whilst it is quite tender at the dock, once you understand that you can deal with it. We went upwind for about 20 minutes. The boat was reminiscent of a lively sailboat. The boat was bouncing around a little into the wind waves, though it was dry. The boat was very pleasantly quiet even in the one metre waves. After flooding the water ballast tank, the boat was a little more stable, but did not show any significant loss of speed into the breeze. Running downwind (again limited to 3000 rpm) the boat started surfing the waves. It was fun. The first 1 hour of run-in is now complete and I can now use the boat at weekends without causing queuing problems at the ramp.
September 5-7th were the days of the 38th Annual Port Townsend Wooden Boat Festival.
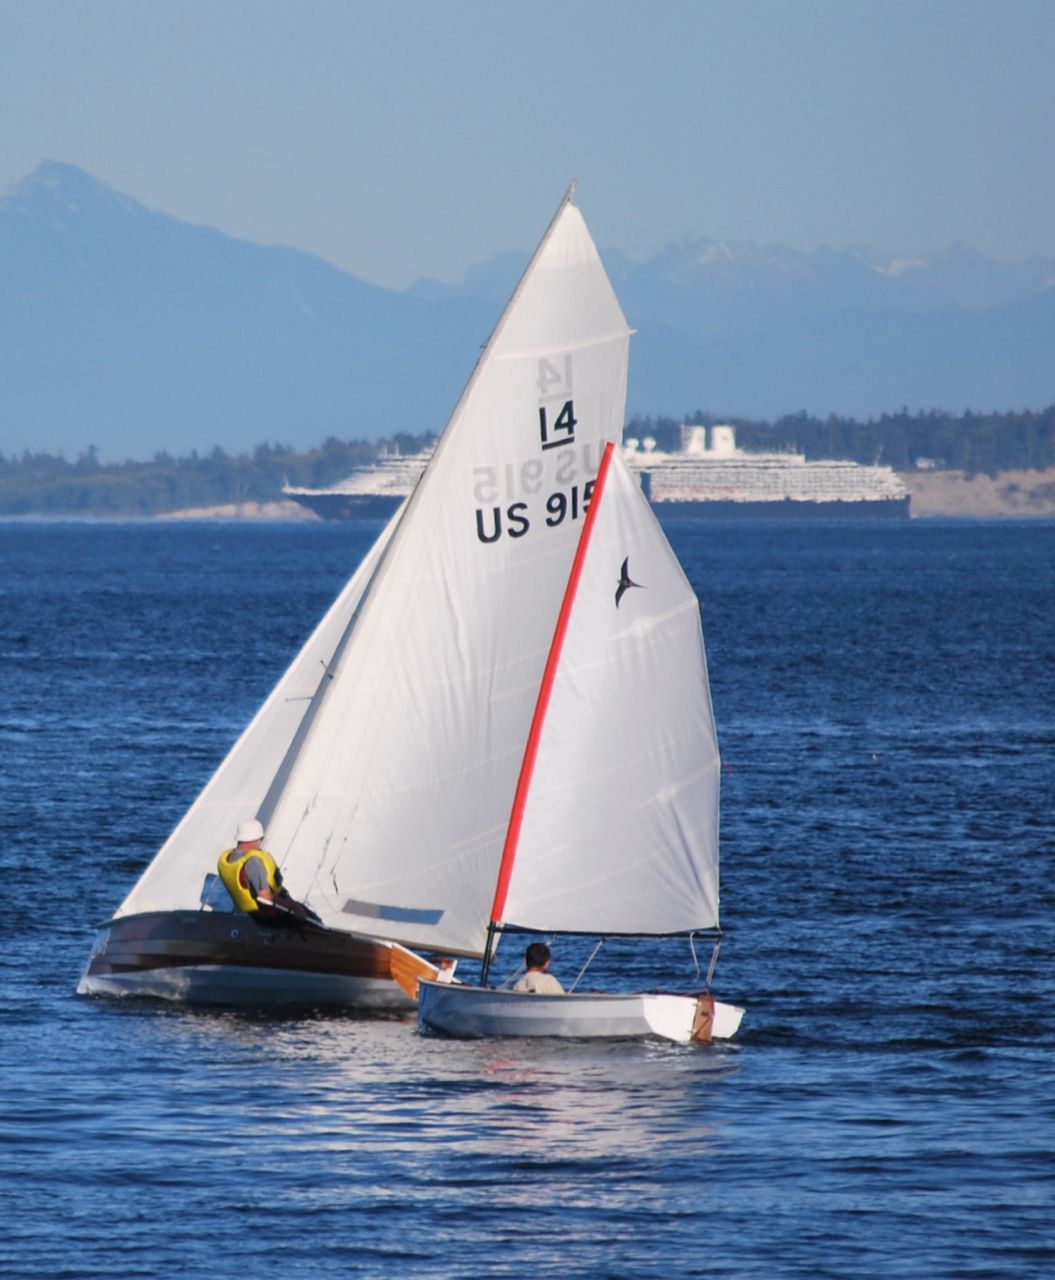
This year was unique for us due to having a relative fleet of PT 11s on hand; 8 or 9 PT 11 dinghies could be seen over the weekend of marvelous sunshine and sailing breezes, tethered behind their "motherships" in the harbor or out in the bay among so many beautiful boats!
A PT 11 chasing Vito Dumas and sister dinghy the PT Spear on the leash..
Joining them was our own PT 11 captained by Cooper Parish.
Cooper in our PT 11 chasing Scott in his International 14
Cooper (who currently works for Scaled Composites) has built a PT 11 at the NW School of Wooden Boat Building. Many of our friends and customers share our deep appreciation for innovative aircraft as well as boats. We love the following picture Cooper sent to us earlier this summer, (wearing a Port Townsend Watercraft hat!) and we love having his help at the festival!
Cooper in..."one of the rocket motors from Space Ship One... Representin' PTWatercraft!"
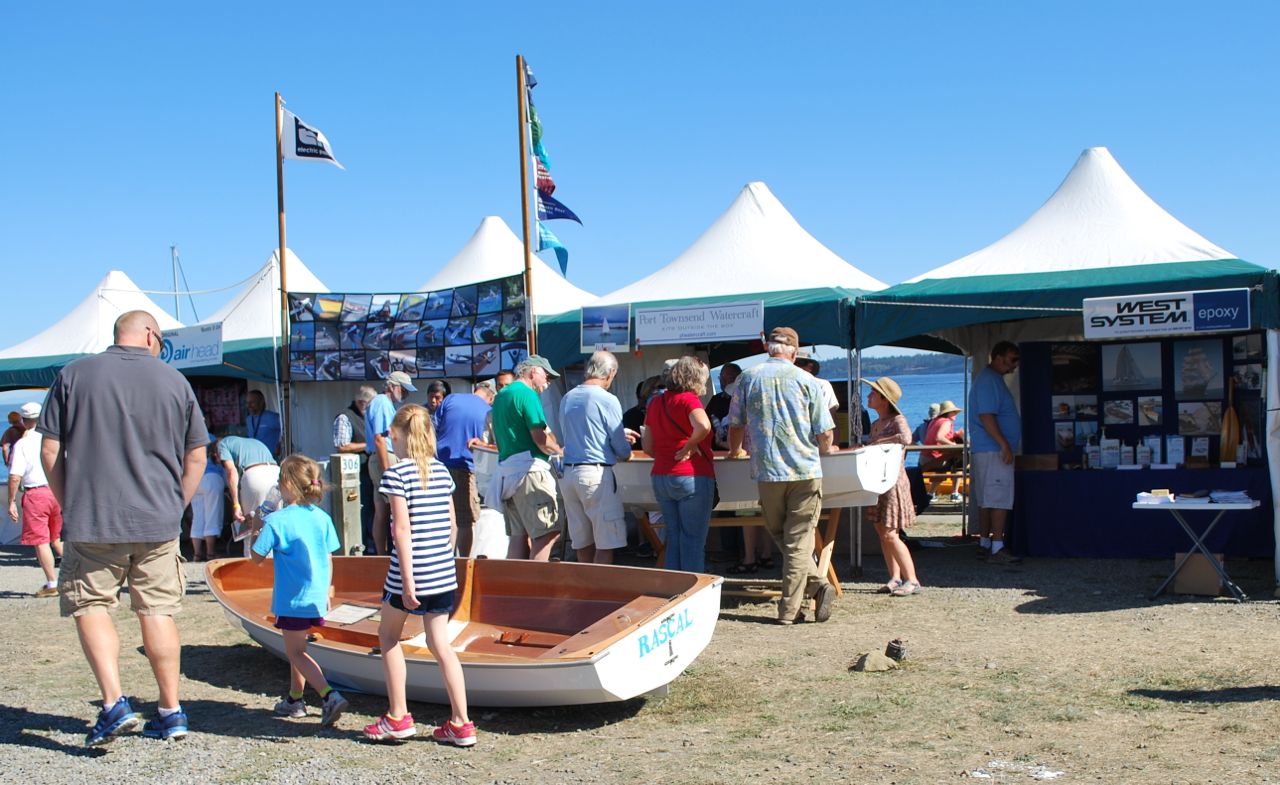
As usual, I did not get out and about to take more pictures. The reason, I am pleased to say, is that our display maintained a virtual flood of visitors and our team (including my wonderful sister, Dana) was happily kept busy showing off 2 PT Elevens (one on the stand and one for rowing demos), and a PT Spear, (generously loaned by Mr. Swantner).
Our display next to WEST SYSTEM
Our tent hosts, the smart folks from WEST SYSTEM EPOXY, were on hand with expert epoxy advice, interesting props and informative booklets. This year’s festival was also special and memorable due to having our dear friends, Kathy Massimini & Steve Callahan here. Steve was a guest speaker for the festival. If you have not read his book Adrift or don't know about Steve, you've missed out. See his website HERE.
Steve & Kathy
You might already know about Off Center Harbor, and all of the really well done, interesting videos they offer on a wide range of boating topics. We were honored (and pretty camera shy) to receive an interview request from the OCH team. Filming took place right after the festival and the video will be available sometime in the future. Thank you Steve Stone and Off Center Harbor!
The fine weather inspired more boats to be out sailing for the entire three days than I have ever witnessed in my 5 years of attending. The final ‘Sail-By’ was quite spectacular. If you missed it this year, mark your calendar for the first weekend of September 2015 and keep an eye on the NW Maritime Center website for events over the year.
Please enjoy a small album of pictures I took during the Festival.
Layers of boats in the harbor at Point Wilson
Visitors study the PT 11 nesting dinghy
Capt. Cooper in PT 11 chasing Vito Dumas and sister dinghy the PT Spear on the leash..
Virginia V joining the sail-by.
rowers in the longboat from the NW Maritime Center.
PT 11 keeping up with SV Vito Dumas
Outrigger Jr chasing the PT 11
longboat hoists sails
Cooper in our PT 11 chasing Scott in his International 14
First sail for Mr. Kuntz and a friend at the Wooden Boat Festival in Port Townsend
Painted sail from the Community Boat Project (http://communityboats.wordpress.com/)
visitor taking the PT 11 for a row
On the water and on the beach
Maneuvering in a full harbor,
perfect ‘still-life’ opportunity
wood and flowers
There be treasure at the festival!
we know who is in charge on this boat
Off Center Harbor filmmaker, Steve Stone films the PT 11.
taking a boat wake in stride
Some videos of this years' festival are on You Tube. This is a particularly artistic slide show. HERE
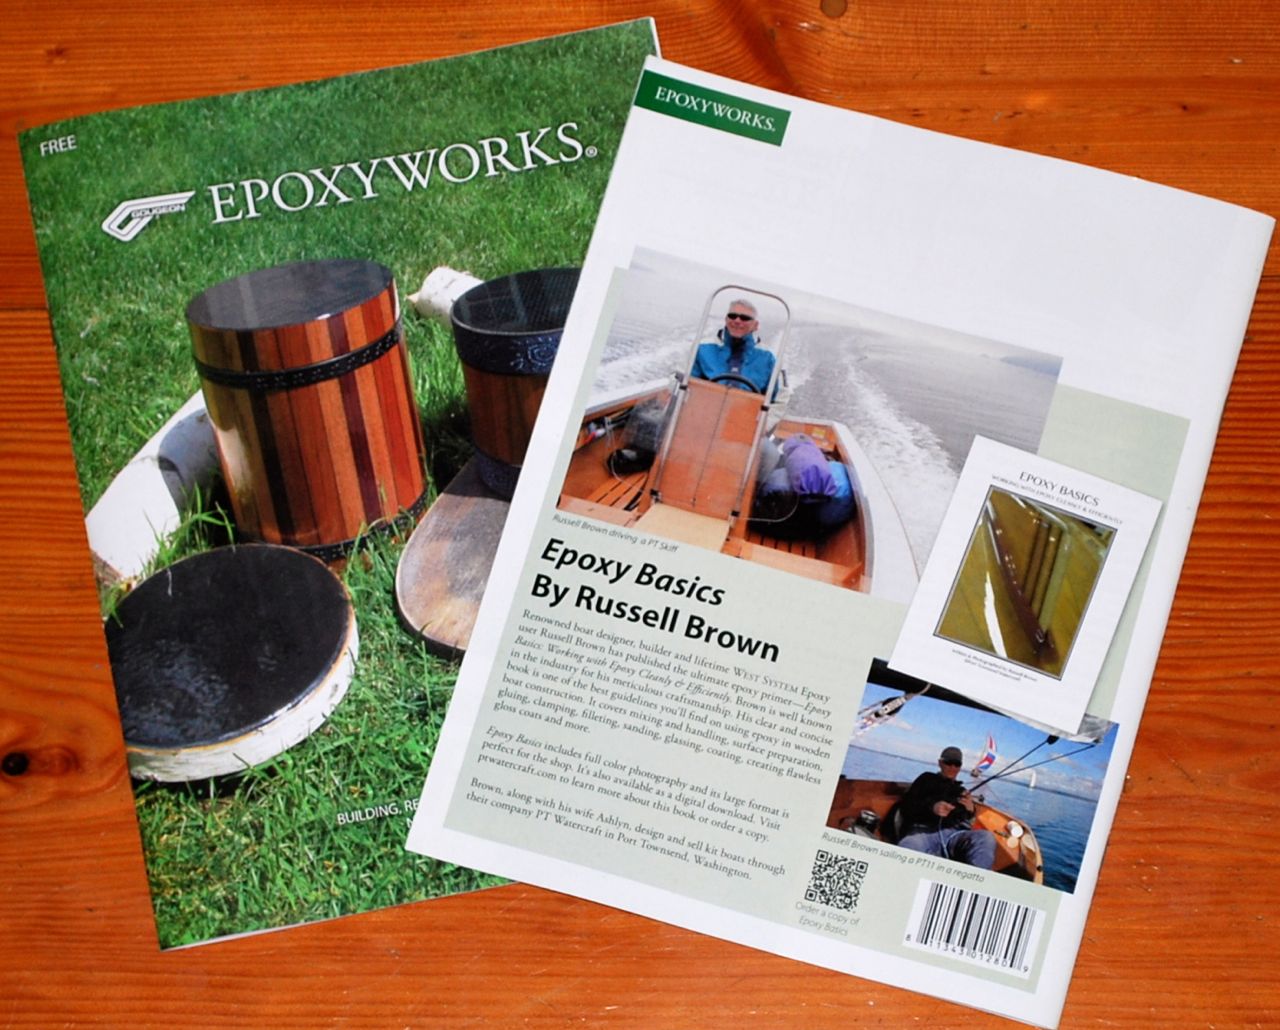
Many of you already know about EPOXY WORKS magazine, a FREE publication from Gougeon Brothers Inc, that is sent out twice a year. Issue #39 for this Fall of 2014 reviewed Russell’s EPOXY BASICS on the back cover!
Issue 39 of Epoxy Works
This is a huge bonus for us and many of you have proven that! We had such a run on books within days of the magazine landing in mailboxes, that I have been kept busy sending them out. I want to thank those of you who had to wait with faith and patience for your back ordered copies. THANK YOU!
So why did Gougeon Brothers do such a nice thing? All I can say is that we are thrilled. Our relationship with Gougeon Brothers/WEST SYSTEM, is based on our long history and trust of their products, through which a lasting friendship has emerged. Russell’s nearly constant work with epoxies over the last 40 years has given him many opportunities to try various brands. His livelihood has depended on very refined composite workmanship and building lightweight, tightly engineered parts and craft. Many experiments, challenges, and successful projects have lead him to trust in one epoxy in particular; WEST SYSTEM.
The Gougeon brothers have an fascinating history and the company maintains an expert team unafraid to ask questions of themselves and the products they represent. In the spirit of doing what is right, ( yes, they do carefully consider environmental impact), full time scientists continually test every imaginable epoxy related scenario and tweak their products to best serve their customers of many industries. Their loyal customer base depends not only on having the best physical properties and workability in their epoxy, but also on knowledgeable customer support. The full time tech support staff at WEST SYSTEM are, in that down-to-Earth, humble, mid-western way, generous with their knowledge. If they don't have an answer for you right away, they will find out, and get back to you, even if it takes lab testing. All this greatly benefits the casual epoxy user as well.
Calling the company during business hours (phone #1-866-937-8797) will not reach an automated phone system.... Nope, a real person will answer and politely direct your call... I know... hard to imagine these days.. Can you tell we like these folks? I hope so. We have the highest respect for the people in the company and the principles on which they base the production of excellent products; integrity being far more important to them than fancy marketing. Working with the folks at Gougeon Brothers/WEST SYSTEM, is always a pleasure. Such person to person relationships, with friends, customers, and business associates, rank high on my list of things that make life meaningful. For a well written article about the Gougeon brothers, see: GOUGEON. G-O-U-G-E-O-N GOUGEON by Dan Spurr in Professional Boatbuilder Magazine Issue #125, beginning on page 36. You can buy the issue HERE: Also, coming soon in WOODEN BOAT MAGAZINE ; an article by Jim Brown called, "Catching Up With Meade Gougeon".