About

PT Watercraft designs dinghies that are efficient, functional, modern, and attractive—available as kits you can build yourself. We also carry small boat parts and instructional books.

Quick Links

Connect

Explore

By Category

By Date

Category: Instructional Clear

Manual updates 2019

Transitioning from 2018 to 2019 has had its challenges for PT Watercraft. One of the big issues for us has been to update our builder’s manuals. The PT 11 manual has just endured a big rewrite while Russell built another boat following the existing manual. This was something we had been working on for a while. We felt the final push to finish it when a customer asked a simple question about screw size. The realization that we had been instructing builders for the last two years to use a screw size that was inappropriate,  was a shocker. The size screw we called for on the gunwale reinforcement, #12 instead of #10, would have worked but could have caused some serious hydraulic pressure issues (when installing with epoxy) considering that the hole size we called for was based on #10 screws.
—This PDF — has some updates to the manual including that new section.
Over 100 PT 11 nesting dinghies have been built with our ever evolving manual. To console ourselves, we prefer to credit the ‘quiet-type’ builders with seeing our errors and correcting them on their own. We hope so. For those who blamed themselves thinking, “I must have done something wrong,” we humbly apologize.

ptwatercraft.comWe have created a fairly technical boat. To get the most out of our kit, the builder really has to follow the manual. To get the most out of our builders, they have to have a manual that really does the job.  We feel very strongly about our designs and we want the boats built to be the best examples possible. For Russell personally, he puts so much effort into producing the kits, and has built one every time he felt the need for serious revision of the manual, that if the manual falls short, or has real errors, he feels like he is falling down on the job.

A good manual also reduces the number of questions for our limited capacity to respond, but without feed back, we might never have known where the problems were. Thank you. We are humbled by our inherited family of kit builders; the novice in particular who takes on such a big commitment with enthusiasm and dedication.

In general, we want to congratulate every, single, one of our builders. Our kits are not the simplest or easiest to build. So many of the technical steps are geared toward longevity, the potentially extreme conditions of use, and the intention that your investment of time and money has resulted in a worthy boat. The new manual may not produce a “better” boat, but, it will make it easier to get the most out of your kit.
 Please check in with us by email or follow this blog. There will be more updates coming soon, (also regarding kit availability and what other interesting projects are happening.)
For those of you currently building the PT 11 Nesting dinghy, view the PDF here and/or contact us. We want to know where you are in your project. Many of you should get a new manual. We expect they will be available in February. It is a big hit for us to send everyone a manual at our expense so we need to charge for printing and shipping.
Another note to our builders; We have been doing a lot of gasket testing but are still puzzling over our options. Please give us more feed back. We’d like to hear from you if your gaskets are working fine or if you have had issues and if so, what have they been?
For those building the PT Spear, updates are coming. If you get stumped, do not hesitate to ask questions.;-) AEB

ptwatercraft.com

Painting a PT Spear

…a video opportunity…
We recently had the opportunity to document painting a PT SPEAR. I put together a video of applying the first coat and some highlights of the third coat. The video is not a “how-to” but rather a demonstration that may be most useful to those of you preparing to paint your own home built boat with Interlux Perfection 2-part LP paint. The book, Rolling Perfection, really shows the technique Russell uses, from mixing, thinning, and applying onto a variety of surfaces, including non skid. You might note that we do not use a primer. Our boats are built using WEST SYSTEM resin and 207 Special Clear Hardener; saturation, fill, and gloss coats. This prepared surface has been perfectly suitable as a base for applying this paint (and its Interlux predecessors) on Russell’s boats over the last 30 years.
So here is the video. We hope you find it helpful. 😉 AEB


Off Center Harbor epoxy series

Off Center Harbor has launched a video series with Russell and his techniques working with epoxy.

Here is the teaser introducing the series!

OCHepoxy1

https://www.offcenterharbor.com/videos/mastering-epoxy-russell-brown-part-1-introduction-filleting/


Proboat Magazine article

Russell was recently featured in Proboat Magazine. Have you seen it? The article details some of his methods for compression molds and making small parts and custom hardware. It is a bit of a preview to a book he has been collecting material for. We have been fans of Proboat magazine for a long time.
Check out this article and consider subscribing to this informative publication!
https://www.proboat.com/2018/09/carbon-from-the-coop/

ptwatercraft.com

Gasket feedback

The PT 11 and Spear are very dependent on gaskets. The 11 has a hull gasket, a hatch gasket, and a trunk cap gasket. The Spear has two hatch gaskets and a trunk cap gasket. ptwatercraft.com
We are fairly proud of the gasket systems we have developed, but nothing is ever perfect. The latex tubing gaskets set in notches of the correct depth work amazingly well, but we have had some trouble with two things:

One of the issues is that gluing the latex gaskets is difficult, so they can come loose.
We have tried just about every adhesive and have finally found one that works much better than the contact cement method described in the manual. More about that in a soon-to-come blog post.
The other thing we have recently had happen is the outer face of the gaskets becoming stuck to their mating surfaces. This seems to be a problem mostly with the trunk cap, where the gasket is pressed much more firmly, due to the gasket notch depth being limited. We tried coating the outer face of the gasket with a few different lubricants, Vaseline being the one that seemed to work.
We will do a blog post about gluing in new gaskets with the adhesive we have found to work, but first we would like feedback on gasket issues from our customers. -What issues have you had?

-Do you need a new set of gaskets for you boat?

-If your gaskets are working fine, consider rubbing a light coat of Vaseline (or maybe you know of something that will work better) on the outer face of the gaskets, especially if your boat is being left assembled for long periods of time.

Thank you!

RB

A review of the EP CARRY

This September we had the opportunity to play with an EP Carry electric motor for the first time.  Dinghy owners often ask about an outboard for the PT 11.
Our preference is to discourage outboards on our dinghies because good rowing and sailing boats never make great motor boats. But some people really want to be able to use an outboard. That’s understandable, but the fact is that the smallest gas outboard motors currently available are really too big for our boat; too much power and too heavy.

Now there is an option we can support; the EP CARRY electric “outboard”. All of the  technical information about this innovative little motor can be found on the website ELECTRICPADDLE.COM. Though it is compared to a 1HP on their website, it has sufficient power to get the PT 11 up to a cruising speed of about 4 knots. The USCG however, considers all small electric outboards as “2HP”. Based on that formula, the PT 11 and PT Spear are rated for “2HP” so, the EP CARRY aligns with the Coast Guard figures.  The amazing thing about this motor is that it weighs only 14.4 Lbs. This makes it very easy to mount and remove. The battery pack weighs 6.3 Lbs, making the total package less than 21 Lbs. There are several design features that add to the ease of handling as well. ptwatercraft.com
(At this years wooden boat festival, Russell showed up with the motor in his bicycle bag.)

Our recent experience with the EP Carry was very positive and to my surprise, I caught Russell grinning after speeding off to visit other boats in the anchorage. “Mr. anti-outboard” was actually having fun and we enjoyed it further by taking a friend on an evening “cocktail” tour of Reid Harbor, a deep bay with lots of shoreline and  many boats to observe.
We spent a couple of days, driving along the shore of Sucia in the San Juans,  in Shallow Bay making watery doughnuts, backing up, going forward, generally goofing off, and then venturing out to ‘Danger Reef’ to “brave” close proximity to a group of Stellar Sea Lions. We were pleasantly surprised by how far the battery went on one charge. You will notice in our video that we carried our oars with us but we did not need to employ them. ptwatercraft.com
This motor is not silent. Neither is it loud. Our lightly built plywood boat seemed to acoustically amplify the sound a little. Even so, there was no need to raise our voices for conversation. In fact, we could almost whisper and still communicate. This was a plus to me. Loud outboards in quiet anchorages are, in my mind, a real nuisance and many of us are familiar with boaters talking in their loud dinghies barely hearing each other and assuming no one else can hear them either…but of course we hear every word. Sound is a funny thing. With the EP Carry, the birds, seals, and sea lions were undisturbed by our passage. It made it a great modus for exploring the nature around us.ptwatercraft.com/ashlyn E Brown
Another thing that is really attractive to us about this motor, is that even with our limited house battery power, we could re-charge the EP Carry Battery. It does require a 150-200W inverter, but this lithium battery requires a third of the power than comparable models to recharge. At home, it is simple to plug it into a normal outlet. Beyond charging the battery and rinsing the unit after use in salt water, there is virtually no maintenance. Yet another plus.
(see our video exploring Sucia with the EP CARRY)
When our EP Carry arrived at the door, unpacking it was quite amazing. The care taken to pack it and the detailed contents made for a well thought out and complete package. It was a positive reflection of Joe and Linda who have spent  years perfecting their product. They, like us, had a vision that they worked and reworked in every detail. In fact, the original mount did not fit the PT 11 and now it does.  Further, the EP Carry, designed right here in WA State, is assembled in the USA. It is yet another example of admirable American ingenuity with style and a small business making a positive difference in the world. Of all the outboards on the market, we feel confident that the EP Carry is a good fit for the PT 11.

USER MANUAL PDF
ptwatercraft.com

PTWatercraft.com Ashlyn E Brown


PT 11 Inwale Doubler – update

Sometimes things look right until you try to match the parts. For example, we check  puzzle joints on every kit before shipping. However, it is easy to assume that a really simple little part is right. This is what happened recently when a customer in Australia wrote saying, after everything else being so perfect in the kit, the mismatch of this one little part, the inwale doubler, had to be a mistake. Well, he was absolutely right and we really do not know how many kits went out with this little part that does not fit correctly.  I can only imagine that quite a few of these kits went out and quite a few builders just dealt with it quietly.

ptwatercraft.com
The curve does not match and it should.

How did this happen? We used to cut this little doubler on the router table with the nesting notch that matches the notch in the transom inwale. Then we started having it CNC cut. I guess we never really checked.
So, we now have a stack of correctly cut inwale doublers. If you are not yet at this point of your build, please contact us to get the new piece. If you had to adjust or re-cut this little piece, please accept our apologies.

If you have a part that looks wrong or does not fit, we count on you letting us know. Thank you for choosing a PT 11 nesting dinghy kit!

AEB 😉

Toti Bleu is a land boat

I am pleased to be the editor of a special book now available in full color print. Toti Bleu, dream of a gypsy wagon, is the journal of how a horse drawn gypsy wagon ‘became’. It includes modern logic behind the design, material choices, gear selection, horse breed and care. It also includes the lack of logic involved in jumping into the unknown to realize a dream, the magic of friendships both human and quadruped, and the emotional ups and downs of a long term project.

What really makes this book so beautiful is the author, Suzanne, who strikes a balance between practical and poetic thought, and, the many photos taken on location in Se France. Yes, France.  I may be biased, since Suzanne happens to be my mother, but this project has allowed me to get to know her in a way few children get to know their parents. I initially thought her idea was a little nutty given the lack of money to do such a thing, but following as it evolved, I am now even more inspired by her.

See Toti Bleu on Amazon available worldwide.

This journal was originally a blog and the story continues. The book is edited from the blog format and the 2 venues compliment each other.

Be inspired to create your own ‘land boat’, dive into any seemingly impossible project, or simply connect more closely with flora and fauna, and especially horses. All proceeds from the book go to the author and continuing the Toti Bleu Project and message.

ptwatercraft.com
front and back cover
ptwatercraft.com
colorful happiness – Toti’s front door.


New Riser Blocks Available!

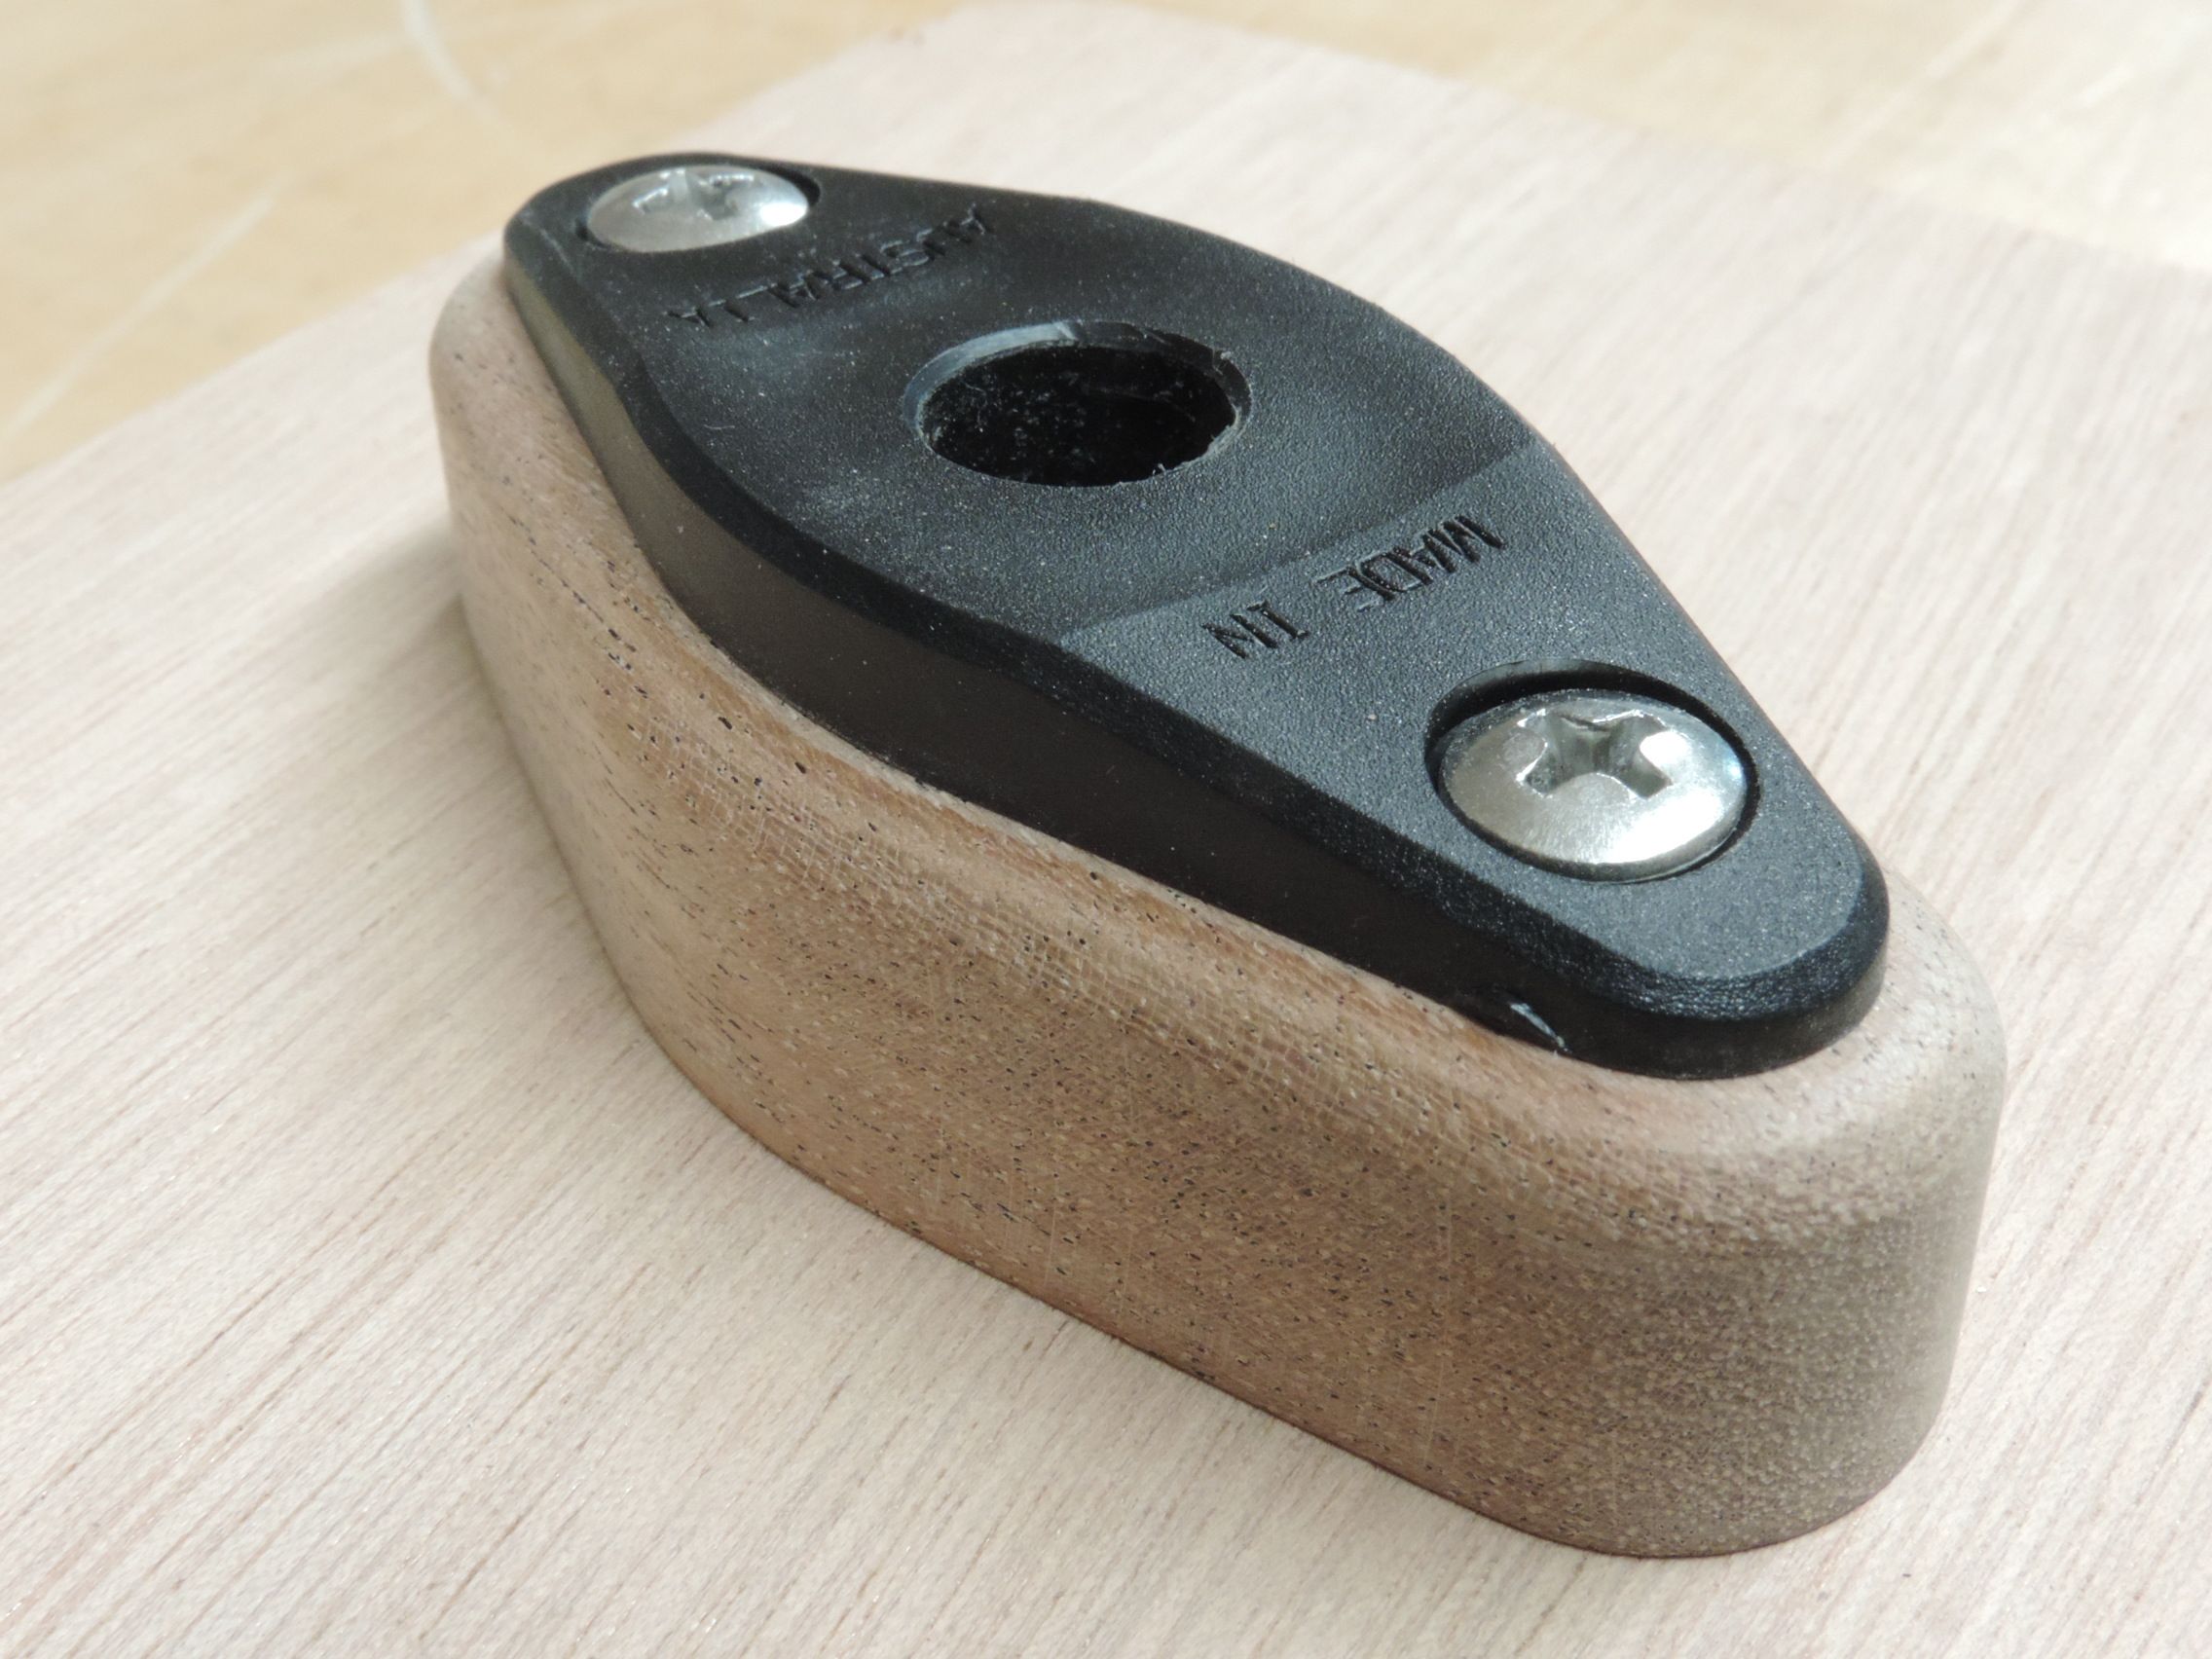
Our mahogany riser blocks of the past were beautiful complex shapes that performed a nicely functional duty; to give the oarlock socket more bearing and to offset the height of the seat relative to the height of the oarlocks. They were, however, rather beastly to make in the quantities we have been needing.

To improve production, Russell took the design to Turnpoint Design and figured out how, with minor changes, they could be machined on the CNC router. The remaining labor, (sanding out the tooling marks and rounding the upper edges ) is a great deal less time consuming than the previous version.

ptwatercraft.com
Comparison photo, new style left, previous version-right.

They are still made out of Sapele Mahogany.  For those of you who wanted riser blocks this Fall when they were not available, this is our new product. Please let us know what you think. We have them IN STOCK! 😉 AEB

ptwatercraft.com
Now available as of December 20 2016


Important UPDATE for the PT 11 Nesting Dinghy

It’s time for us to admit it, our boats seem have a weakness. We may just be treating our boats  poorly, but it’s more likely that there is an issue that PT 11 owners should be aware of.

Owners, please check your gunwales for cracks.

ptwatercraft.com
Beginning the repair…

Builders, there will soon be an added step in the building manual to prevent the problem. If you haven’t glued your bumper on yet, the fix is easy.  This printable PDF informs for both a fix or the added step in the build process.

We have seen this failure three times now. The first, when one of our boats got driven over (just the edge) by a truck. We thought that was unusual punishment, fixed the boat and forgot about it.
The second time was a boat that got beat up by solid water while lashed to a foredeck. We didn’t really know what happened there.
The third time it happened, it was our newest PT 11 (3 years old now) and again we don’t know exactly why, but here is our theory:
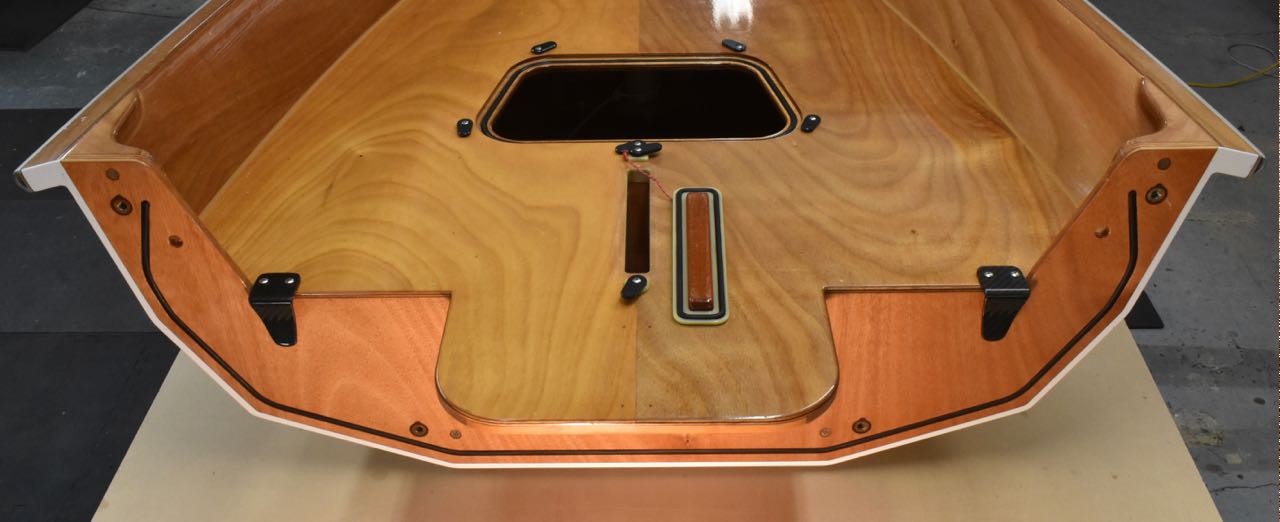
When the boat is upside down in the nested position and somebody walks on it (or a bunch of people sit on it), where does that weight go? It goes onto the very ends of the gunwales on the fwd hull half.

ptwatercraft.com
photo shows where the load goes, (the aft corners of the forward half).

The failures we have seen have always been in the plywood hull skin (right where you would expect it).
Fixing the break and the weakness that caused the break are both pretty easy and important. The first is done by injecting epoxy into a carefully drilled hole to fix the crack, the second by putting screws (with epoxy) into carefully drilled holes.

Please click here to see the printable PDF with full instructions with photos.