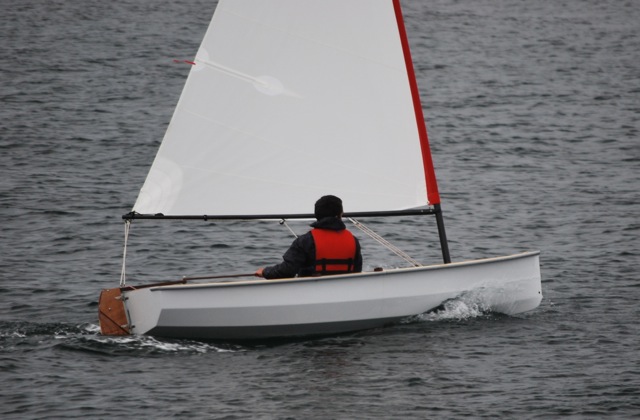
Since we first started selling kits for the PT 11 we have been continually updating the kit, building process, and the boat to make it better.  It's in our nature to do this and it means the boats get stronger, lighter, easier to build, perform better, etc.

ptwatercraft.com
click the photo for a detailed post about our rigs.

A good while back, through friends in the high tech world, we developed a connection with a company called Innovative Composite Engineering, a renown carbon tube company in Washington state. They now make our lightweight booms for the sailing rigs.

The 7 1/2' booms are incredibly lightweight. The tubes start at 20 ounces each. With the gooseneck, hardware, main sheet & vang tackle, they weigh 40 ounces.  No one is likely to get knocked out by one of these booms in a gybe and so far they have been strong enough (remember not to over-do the boom vang).

While the masts we sell have been extremely reliable, we knew they could be lighter. After a year of bugging I.C.E. to come up with a mast for us, we finally got a prototype.

The masts that we have been using are modified windsurfing masts. We have to modify them because they are stepped in a short socket and the loads where the mast comes out of the socket are quite significant and different than the loads applied to a windsurfer mast.
The new masts have extra layers of carbon at the lower end starting just above deck level and ending just above where the boom connects to the mast. These extra layers of laminate mean that we will have to do less work to the lower end to make them strong enough.

How light is the new mast? It’s light! The current two-piece masts weigh 104 ounces (2937 grams); already impressively light. The new mast weighs 69 ounces (1950 grams)!

We stress tested the prototype mast as shown on land (and on the water) using two 180 pound people on the rail and the mast was fine.
Having two people on the rail is strongly discouraged by us because of the twisting loads it puts on the boat, the very high loads at the mast step, and finally the mast.
In other words, what we are really after is a feather weight mast, not a mast that could break the boat.

The weight of the rig is directly related to ease of use. Our theory (and it seems well proven now) is that the easier the sailing rig is to use, the more it will be used. Our rig was already the lightest, easiest to use, and most power-per-pound dinghy sailing rig out there. Now it is significantly lighter.

We will pay quite a bit more for the custom masts, but because they will be less work to finish we will likely be able to keep the complete sailing rig cost the same.

ptwatercraft.com
Ashlyn can't get much mast bend.
ptwatercraft.com
Russell and James hike out with approx 360 Lbs.

ptwatercraft

We did a load test on the ground, tying the mast to a building and getting two people hiking out on the rail. This was a little scary, but a very effective way to see if the mast was strong enough. (RB)

Ashlyn's footnote: Our ballast assistant in these photos is a local luthier. Here he is holding the 15' 1" mast up by the tip to see how it sounds as a Didjeridoo.

PTWATERCRAFT.COM
What sound can it make?

See this silly video to hear....

I had him lower the tip for the video because, in the camera, the green house behind appeared to dominate. I regret this now since it would have looked fine. It was impressive how easy it was to keep it up in the air. (AEB.)

There is no doubt about it...We are R2AK junkies...

This year we did not have a sailboat in the water so we launched the Waterbug and followed some of the lead boats to Victoria.

I have put together a little video (HERE) of our outing, from the start of the Race in Port Townsend, crossing to Victoria and cheering many of the arriving boats. They trickled in all day. (and in the morning on Friday as we left) The very best way to follow the race is on the r2ak.com website.

Below is a slide show as well. Unfortunately, I had a hard time getting many good pictures with the equipment I had and in the rain. There are some very good photos being posted on Facebook and other places online. See Jan's Marine Photography on Smugmug.com

Port Townsend Watercraft will be closed for the first 2 weeks of July.

Other dates when we will be hard to reach will be June 22 thru 25th. We plan to be part of the welcoming committee in Victoria for the Race to Alaska participants. Hope to see you at the pre race Ruckus in Port Townsend (June 22) or in Victoria on the 23rd!

We hope everyone has something beautiful and fun within nature in their lives. Get out on the water, take a hike, lay down in a field of flowers, grow a garden...

Happy Summer everyone.

AEB 😉


As more PT Spears are built, the question of an ideal dolly has been asked. Recently, Russell and I joined friends in Port Townsend for a day of sailing. Our friends both own PT Spears; the one-piece version of the PT 11. Each are transported differently. ptwatercraft.com"Pato" arrived in this truck. This is actually an older photo on a day when we left from the launch ramp.

"Rascal" has its own little trailer.

ptwatercraft.com
Rascal has a small trailer

Both PT SPEARs have dollies since their humans often launch by themselves. One uses a kayak cart purchased from our local Pygmy Kayaks. We found that the kick stand on this particular cart was a little tricky to get to and adjust with the dinghy being wider than a kayak.

ptwatercraft.com
using a kayak cart
ptwatercraft.com
tipping into the water..

ptwatercraft.com"Rascal's" human, being a plumber by trade, created his own sturdy dolly.

PVC pipe with a fixed "kick" stand. Sturdy and always in the right place so no need to access to raise or lower.

ptwatercraft.com
Made from PVC plumbing- support stand visible here.
ptwatercraft.com
eazy-peazy
ptwatercraft.com
getting ready to splash

I also found while writing this post, that there are thousands of images online for kayak and dinghy dollies. It is important to note that the PT SPEAR, at 85 pounds, is easy to manage with a very simple dolly (like a kayak dolly) compared to most of the more complex dinghy dolly designs shown online. UPDATE: One customer has offered his design and details for a PVC dolly he uses for his PT SPEAR: PDF HERE

ptwatercraft.com
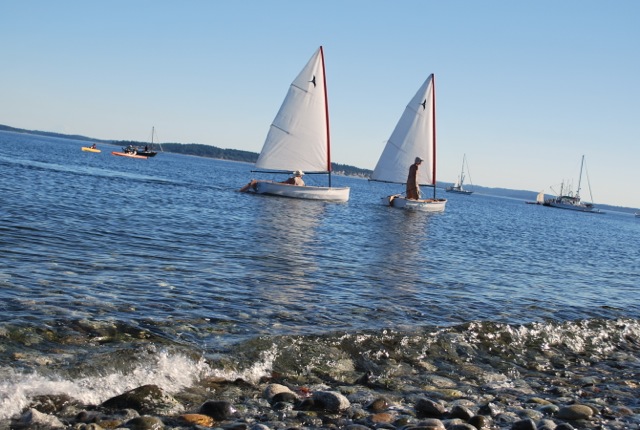
getting ready to sail away...
ptwatercraft.com
The perfect day for a dinghy sail...
ptwatercraft.com
beach picnic

A brief clip using the PVC dolly:

AEB 😉

I feel very fortunate to have such an interesting and creative family. I am taking this opportunity to share links to my mother's current project. Now in her seventies, she has been building a horse drawn gypsy wagon with little or no resources. The magic of those resources appearing when most needed has been a recurring theme and creates inspiration for anyone wishing to launch a seemingly impossible project.

Toti Bleu Gypsy Wagon project. Blog - or - PDF book of blog posts Purchases of the book help fund this cool project. Suzanne is also a painter. In contrast to the whimsical watercolor illustration below, she also works with acrylics, capturing the beauty and essence of the French country side, as well as home and pet portraits. The sale of these lovely paintings that are way under priced in my opinion, also provides funding for her continued creativity. AEB 😉

totibleu.wordpress.com
Toti Bleu, a project starts with a dream and an idea envisioned.


Now available, Project Cheers is a candid tale of single handed Trans-Atlantic racing in the 'early days'. (ON AMAZON - Or directly from PT Watercraft)ptwatercraft.com

Project Cheers is a narrative by the late Dick Newick, Tom Follett and Jim Morris about their American entry into the 1968 OSTAR (Observer Singlehanded Trans Atlantic Race)  Things were very different in 1968 in the world of yacht racing. Newick's unusual design, Cheers, a proa, shook things up a bit and forever changed certain ideas about ocean racing.

See our new website to compliment the book.

The book was only ever published once in England in 1969 and original copies are hard to find and precious. With multihulls in the spot light in the America's Cup and breaking records at an astonishing pace, we wanted to honor Cheers and the three men who created and raced the boat, for their vision and perseverance. The story is an inspiration to anyone attempting the "impossible".

ptwatercraft.com
In St. Croix after the race..

Over the last 2 years, I have acquired permissions from the publishing house of the original book, and worked with the copyright heirs to obtain original photo scans and feedback on what direction we would take in re-publishing the book. (Nothing about the book had ever been saved digitally) I also nearly checked myself into a loony bin trying to work on MS WORD but was saved by MAC's Pages to format the book. Many pictures were not found in originals. It took a special scanner to get scans of them that did not produce Moire distortion when printed. We even had the photo curator at the Mariner's Museum in Newport News VA looking for original pictures. The museum hosts an extensive multihull collection.

While I would have liked this to be a glossy hard cover, my budget did not allow it. If there is interest, I can work on it. I did choose to print it with slightly larger print, and created a new cover to distinguish it from the first edition.

Profits from book and poster sales will benefit the Newick family.

Special thanks to everyone who participated in this republishing project. You know who you are. Besides the unusual grammar in the book, (we left all of that as per original text) any major mistakes can be corrected if you find them. I almost published the book with a super big boo boo (thanks to MS WORD auto format) but that was caught, (Thank you Katrina for your expert proof read!) just before going to press. Yay!

Finally, I have digital videos produced in 1968 by the BBC and CBS. (Not to mention reels of 16mm film!) Permission to upload these to the internet is still in question. These would be extremely fun to share and it seems like after more than 45 years, it should not be a problem to do so. I am working on it and if anyone has connections to those agencies, that could be helpful.

Please check out the book, poster, and website!

Enjoy a little clip that I think is from the 1960 (first) OSTAR race. The BBC has been very reserved about releasing such features to the public domain.

Thank you!! Ashlyn Brown 😉

info @ ptwatercraft . com


Does your rudder not stay down? ...Your back seat slip off? ...Your knobs tight and your leather pads  loose? Maybe we can help.

We have used our PT 11’s hard enough and long enough to have had some issues and it seems like it’s time for a maintenance discussion.
Also, there were manual updates that earlier builders didn’t get to see that we will show here.

We would like to hear from you as well. If you have had issues or failures with your boat, we want to know. Sometimes really bad things happen to boats, such a backing into one with a truck, (which we did) and sometimes the repairs are actually quite easy, so let us know if something like this happens to you.

Does your rudder kick up when you don’t want it to? If the rudder rotates back just a little bit then the pressure on the tiller increases dramatically. We’ll talk about how to fix it below.

How many of you have used the self-steering feature on the 11?  The hiking stick is of a length that if the tip is placed in the aft corner (as shown below), the boat can be steered by shifting weight side to side. This only works if there is pressure on the tiller (usually when going upwind or reaching), but one can go for hours in steady breeze without steering (even without shifting weight) or this feature can just be used when needing two hands for something. ptwatercraft.comptwatercraft.comThe traveler line can be short to make it less in the way when not sailing. We drilled holes about 14” apart (7” either side of center), ran the traveler line through those holes and used stopper knots underneath.

The holes should be about 5/16” diameter and be sealed carefully with a couple of coats of epoxy. The traveler line can be 3/16” or 1/4” diameter.


ptwatercraft.com

The hiking stick can still pass through if the rudder is fitted to the boat with the stick facing aft.

As we indicated, having the rudder not stay down all the way can mess up a good sail.
Usually this is caused by corrosion forming in the brass insert inside the plastic knob, reducing the force that can be applied with the knob.

Cleaning out the threads and applying a bit of grease should solve the problem, if not, try applying strips of tape to the rudder as shown.
We’re not sure which type of tape is best. Electrical tape smears, but sure does make the rudder stay down.
Plain masking tape or plastic tape may be better.

ptwatercraft.comIf you have one of our boats, you know that the hiking stick is attached with a piece of bungee.PTWATERCRAFT.COM
This works amazingly well, but the bungee should be replaced every couple of years, especially if you like to scull with your rudder.
We just found a source for Dyneema (Spectra) covered bungee and will now be providing this with our kits. If you would like a  short piece for your hiking stick, let us know.

ptwatercraft.comWhile we are on the subject of rudders, the rudder will only fit into the foils cases that we sell if the knob is on the port side as shown in the photos.

As described in the manual, the port side is good if you are right handed, but we never realized that putting the knob on the other side would restrict the fit in the case. If you are set up left handed, we have one left handed case in stock.

The rudder should be folded as shown to fit into the foils case.

The forward leather pads had to be replaced on our older boat. It seems that there is a lot of sideways force applied to these pads when the boat is nested and tied down tightly or if people sit on the boat when nested.
The adhesion of the contact cement to the boat can be improved by sanding the epoxy with coarser sandpaper (100 grit, or so), instead of just using the 3-M scrubbie. This is challenging, of course in such a tiny, taped-off area, but still easier than replacing one “in the field”. ptwatercraft.comptwatercraft.com

The manual now shows glued-in hardwood dowel pins keeping the back seat from sliding forward.
If your seat slides off and you want to do something about it, we will e-mail that part of the manual to you and can send the pins as well. ptwatercraft.com


Not included in older manuals is trimming the width of the seat to allow wedging it between the bungee eye strap and the cleat that supports the seat.
This can be handy to keep the seat out of the way when nesting. It is not a very positive way to hold the seat, but it works with no extra parts or steps.
The width of the seat should be trimmed a little bit at a time with a table saw or block plane until it just wedges in place. ptwatercraft.comAlso missing from older manuals is the dagger board hold down strap. It is a loop of line that just fits around the aft turn dog base as shown.ptwatercraft.comNotice the tether on the trunk cap? it is glued into a hole drilled in the cap but tied to a custom washer that we now include in the kit. If you didn’t get one, let us know.

The connective hardware now uses 316 stainless C-clips that fit into notches in the pins to make the pins captive. Older boats have O-rings that serve the same purpose, but the O-rings & surrounding areas require cleaning and greasing to keep them from getting stiff and hard to use.
If you want to change O-rings and didn’t get extras with your kit, let us know and we will mail you some. Remember to use just a small amount of grease after cleaning all the parts well.
The pins can be removed with two 9/16” (14mm may fit) box wrenches as shown. The nuts, knobs, and washers are removed before pushing the pins out forward. ptwatercraft.comThese bailer photos have appeared on an earlier blog, but a good bailer is an absolute necessity and showing this again seems important.
This half-gallon laundry product bottle has had it’s bottom cut off and has a long tether attached to one of the eye straps placed above and below the bailer. We used carbon fiber glue-on eye straps,  for tying the bungee to, but small stainless eye straps would work fine using  3/8” long screws installed with epoxy.ptwatercraft.comptwatercraft.comPlacing the bailer in the location shown keeps it out of the way and also allows nesting the boat without removing the bailer, as long as the bailer is not too big.

If you capsize, sweeping the water out with your arm or sloshing out the water before getting back in gets much of the water out in a hurry.
Have you seen our capsize video?

Oars need collars (or stops) to keep the oarlocks from sliding off the oars. Hopefully your oars came with collars that work with the large Gaco oarlocks and are adjustable.
The collars should be adjusted to fit the boat, so that when rowing the oar handles almost touch each other on the centerline of the boat.
The collars should be adjusted to fit the forward oarlocks because they are closer together. Measuring  from the outboard edge of the collars to the inboard tip of the oar handle, 22 1/4” should work fine.ptwatercraft.comThe collars shown were made from contact cementing a long length of 3/4” webbing around (and around) the oar.
This is not the easiest thing to do and hopefully you have oars with collars that work well. The diameter of the collars shown is not large enough, as the collars can get wedged in the oarlock, restricting rotation.

If your PT 11 or Spear is damaged, even if it happened in an embarrassing way (such as backing a truck into it), we want to hear about it. Take careful photos and send them to us. sometimes big repairs can be quite easy to do.

One repair that would not be easy to fix is what could happen if your mast was not seated all the way down in the socket and you went sailing. The socket itself is not very strong, it’s the upper and lower mast partners that spread the considerable mast loads out into the boat.
If the mast wasn’t all the way down, the bottom end of the mast could break the socket and a very ugly hole in the deck would result.

pt11-seated-mastA mast hold-down is not very convenient, but could be just an eye strap mounted to the deck just aft of the socket. A bungee or lashing to the boom vang eye strap would hold the mast down. A wrap of colored tape on the mast to show when it is fully seated is another idea.
Remember to check that the mast is seated after a capsize.

Speaking of the boom vang, don’t over do it. The sail is most powerful if it twists a bit, and the boom could be broken if you used way too much tension, so go easy on the vang.

ptwatercraft.com

Also, remember that dinghy sailing takes a lot of skill and should be approached cautiously. Going for your first sail on a gusty day is not a good idea, even if you sailed dinghies as a kid. Ease into it by starting in light and steady wind. build your skills in stages. If you are serious about it, do a capsize and self-rescue test, but do it with help nearby and don’t forget the bailer. PDF version of this guide HERE.ptwatercraft.com

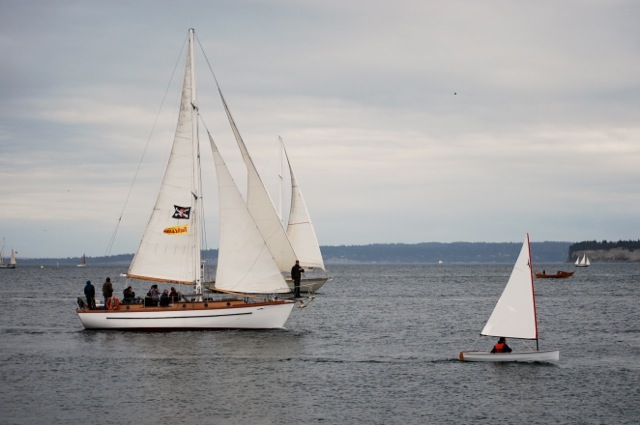
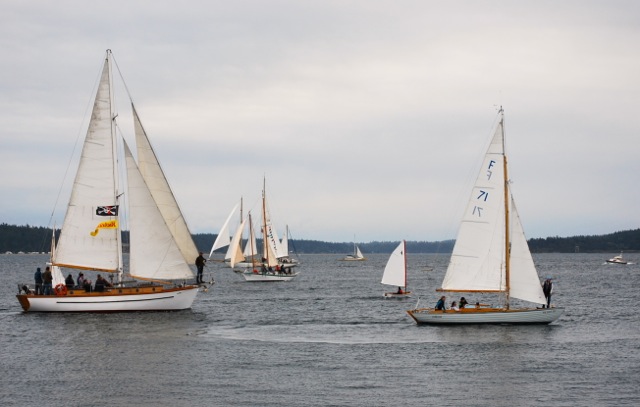
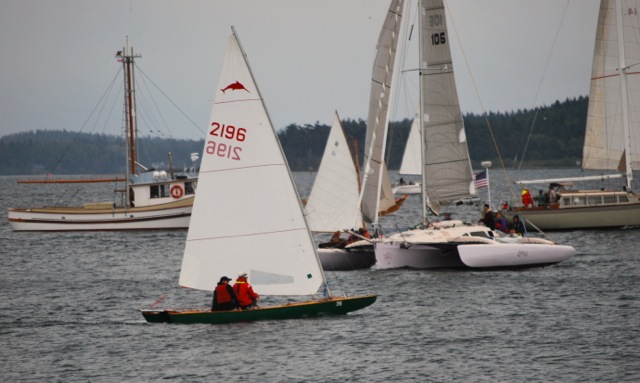
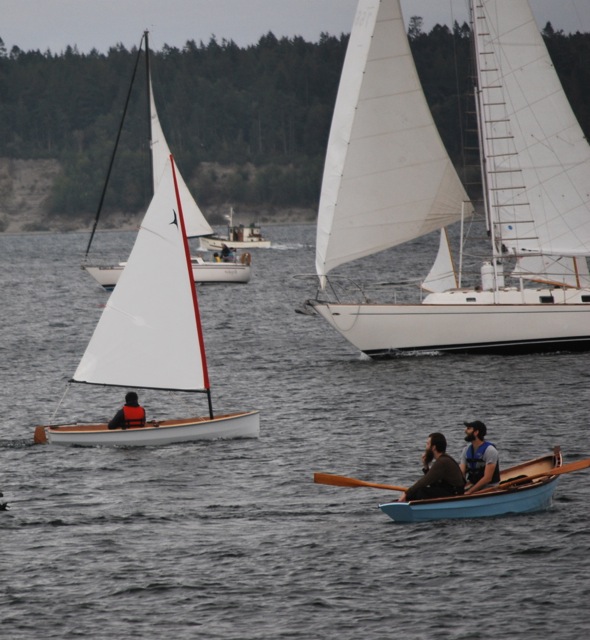
Fun! For the second year we had a blast in our PT 11 as the smallest entrant in the Shipwright's Regatta hosted by the Port Townsend Sailing Association. Russell was at the helm and I was ballast, chocolate dispenser, and "kite" handler,  .... hmmmm... maybe we have some work to do if we are going to get real about racing...

ptwatercraft.com
My little kite... 'I think I can, I think I can...' photo by 'Ace' Spragg

Of course Russell would have been much faster by himself but no fun without me! Kidding aside, we didn't do all that bad (13th out of 19 boats in Class B) since our competition was all multiples of us in waterline. (except for Simeon in Noddy, his SCAMP)

PTwatercraft.com
Lil B is our PT 11.

It was a beautiful day, perfect breeze, sunshine, and little chop. I took some photos and Ace managed to capture a shot of our "kite" on the down wind leg... yes, it really was a kite. I could not get it out from behind the mainsail but it actually did have some pull to it. The one time I got it up higher, it nose dived into the water and became an instant drogue. A funny experiment that confirmed we could come up with an 'itty bitty' spinnaker and make use of it. We shall see...

Oddly, for Russell and I, it takes more discipline to actually get it together to participate in our local sailing events than to work in the shop and office every day! Gotta work on that... 😉 AEB

Pictures follow.

What is different about kits from PT Watercraft and why do they cost what they do?

To start, we produce the kind of kit that we would like ourselves, something more advanced. Advanced from the perspective of functionality, performance, longevity, and good strength to weight ratio, etc.
This approach seems to be working as our nesting dinghy kits (our most complex kit) has been selling very well.

Most kit companies avoid hand-made parts when possible, and for good reason; they take a lot of time to produce and they increase the cost of the kits.

How can we afford to have so many custom and hand-made parts in our kits? Because we have no real employees and a very low overhead. This can be limiting in some ways, but it does afford us the ability to to really focus on each and every part that goes into a kit.

Development and manufacturing has been a lifelong interest. Figuring out new, more efficient ways to produce parts is fun for us, so we thought we would share a bit of it with you.

ptwatercraft.com
Double checking the packing lists

Even though there are 5 different thicknesses of plywood in a PT 11 kit, the 6mm plywood parts (shown below) form most of the hull, foredeck, transom, etc.

There’s no handwork here; all these parts are cut by a very good CNC operator (Turn Point Design). There is however, much effort that goes into buying and grading this plywood. We reject unattractive or warped sheets and pick the best looking sheets for cutting the foredecks, buoyancy tanks, etc.
We are lucky to have Edensaw Woods, a very large plywood importer right here in Port Townsend, yet finding good (and good-looking) plywood has become both more expensive and more difficult. When we find what we want, be buy a lot of it.

The 6mm parts are the first parts to go in the crate. We use a 5 page “map” to show how the layers nest to take up the least space and yet lay flat in the crate.ptwatercraft.comThe main connective bulkheads (12 mm plywood) are also CNC cut with scribed marks for locating doublers, gussets, and trunk. The forward of these two bulkheads has a notch for the hull gasket, which unfortunately needs to be on the opposite face as the scribed marks, so CNC cutting the notch is not easily done. We very carefully cut the notches with a jig and router as shown below. ptwatercraft.com

ptwatercraft.com
hand routering the gasket notch in the PT 11 main bulkhead.

The large gussets, visible in most PT 11 photos, are what really tie the front and back halves of the boat together (and help us sleep at night).
There are 8 of them per boat (complete set in foreground of photo below) and they are made from 25mm (1”) thick plywood. Being so large (and thick) makes them both very effective at taking the loads and also relatively easy to install in the building process.
For the first couple of years of selling kits for this boat, we asked the builder do the handwork on these parts which, without the right tools could be difficult and potentially dangerous.

The upper gussets (right hand cluster in the foreground below) are heavily beveled on the outboard edges to match the angle of the hull. We do this with a large 1 hp tilt-table disk sander hooked up to a large vacuum.

The appropriate edges are then rounded on the router table, which is far safer and easier than the builder rounding them with a router by hand.

ptwatercraft.comThere are only 3 different gusset profiles when we start the handwork part, but when we finish beveling and rounding edges, there are 6 different parts. In other words, it’s critical to bevel and round the right edges and pack the right parts.

ptwatercraft.com
Ashlyn is shown here at the router table removing the tabs left from the CNC machining.

The machined gunwales (also made from 25mm plywood) don’t require handwork, (besides checking the joints and packing), but they do a very effective job. ptwatercraft.com
Not only are these gunwales easy to join and install, but they lock the upper edge of the hull into its designed shape without having to laminate the gunwales and without needing much framing to support the upper hull panels (see photo).

The outer faces of the gunwales are “capped” with unidirectional glass to make them very strong for their weight before gluing on the bumper.
Making gunwales from plywood was not an inexpensive route for us to follow (we are the only kit company currently doing this) but the result has been worth it.

ptwatercraft.com
PT11 gunwale kits

The lumber kit unfortunately ends up hidden under the foredeck (mostly) in a finished boat. Unfortunate, because we use high grade Sitka spruce that no one but the builder gets to see.
We use Sitka spruce to keep the parts light and strong.
The foredeck stringers (the biggest of these parts) let us keep the foredeck thin and light, yet stiff and strong enough to be walked on.ptwatercraft.comptwatercraft.comJoining the foredeck to the hull are machined 15mm plywood glue cleats. These are machined to the curve of the foredeck edge to make them easy to install and pre-beveled to fit the angle between hull & deck.

ptwatercraft.com

Our trunk logs (the spacers that separate the daggerboard trunk walls) are cut on the table saw from pre-fiberglassed stock.
Why do we pre-glass?, because if the builder were to glass these pieces it would be difficult to keep the edges square when trimming the glass. Square trunk logs help make square trunks, which helps the dagger board fit into the trunk, etc.ptwatercraft.com ptwatercraft.comMaking our own mast sockets is necessary because the masts that we use are an odd outside diameter and the mast must fit into the socket without a lot of wiggle room.
We found a steel tube the right diameter (after much searching) and use this as a mandril to make tubes long enough for 5 sockets to be cut from.

How we actually make these tubes is more than we want to show, but how we get the tubes off the mandril is interesting: The mandril is covered with adhesive-backed Teflon film (small photo),ptwatercraft.com so after the tube has been laminated and post-cured (with heat), the tube is pulled off the mandril with a come-along.
We used to do this between the shop truck and a tree (it takes a lot of pulling), but now have found that we can put clamps over the ends of a 2” thick plank and pull from those as shown.ptwatercraft.comptwatercraft.comThis photo shows the mast step assembly placed on the mast step bulkhead. These parts are easy to install (if one follows the manual) and easy to install accurately as there are scribed centerline marks on all the parts.
All bulkheads have tongues (visible in this photo) that fit into slots machined into the hull panels.ptwatercraft.comHow we make the alignment clips is also more than we want to show, but they are really a lot of work to make. We almost cry when it’s time to make more of them.
They are molded from many layers of carbon in a long blank and then cut into the shapes shown.ptwatercraft.comThe alignment clips are part of the joining system. They automatically (when pushing down on the forward hull-half), align and hold the two halves so that the threaded pins can find their sockets. ptwatercraft.cmptwatercraft.com

The alignment clips seat over small strips of filled epoxy (photo on left) that are glued to the bulkhead edges and then shaped level with the foredeck, where the clips are attached. ptwatercraft.com


 At the heart of the PT 11 is the connective hardware.  This hardware has evolved considerably since our early prototypes.
Designed by Russell Brown and Paul Zeuche, this hardware (4 sets per boat) is very strong, easy to use, and maintenance-free.

Paul Zeuche machines these parts from 316 stainless steel and does so with a lot of care and pride.
We assemble these parts with the knobs and the custom beveled cap nuts and check tolerances, etc.

ptwatercraft.comThe knobs (star knobs, we call them), are machined from G-10 fiberglass plate.
This is a very dense and strong (similar to aluminum) epoxy and glass material that machines well and doesn’t corrode.

Unfortunately, G-10 is no longer available in black, but since the builder has to sand and coat the knobs anyway, they can just as easily be painted instead, even with enamel paint in a rattle can.

These are cut by the CNC machine, but we chamfer the edges on the router table and tap (thread) the holes.

ptwatercraft.comptwatercraft.comAlso made from G-10 plate are the wear strips that are used at the upper and lower ends of the dagger board trunk.
Our method is a very effective and easy way to seal and toughen these damage-prone edges.

The towing hole is a piece of G-10 tubing that is bonded into the cutwater area of the stem.
A towing point should be strong enough to yank hard on the boat when it is full of water and this one is.

.

.

.

ptwatercraft.comThe PT 11 is covered in fiberglass cloth on every exterior surface (including the inside).
Glassing inside and out gives the boat a very long potential life span and it’s not hard to do.

The method we use is to pre- fiberglass and sand all inside surfaces with light cloth before assembling the hull, while the parts are laid flat on the table.

The outside of the hull is glassed with heavier cloth after assembly, and the bottom of the hull is glassed with even heavier cloth yet.
This takes a lot of cloth and three weights of cloth...And there’s peel ply for the chine taping.

The fiberglass types and weights used on the PT 11 are carefully chosen to make the boat as light and strong as possible.ptwatercraft.com

Unidirectional fiberglass (additional to the 3 types mentioned) is used on the outside faces of the gunwales to dramatically stiffen and strengthen them.

ptwatercraft.com

We carefully roll the cloth onto tubes on our 24’ long cutting table.

.


The parts you have seen in this article are base kit parts. Several parts included in the kit are not shown here.  See the kit contents photos.
In 2016, some of the parts that have previously been options will be included in the base kit.

The PT 11 (and Spear) foils are not the usual dinghy fare. Good foils are just as important as good sails if you want performance, especially upwind. Again, we went for something that we would want ourselves.
Sailing adventures on our multiple PT 11 prototypes while cruising have provided some of the highlights of our trips. Having a dinghy that really performs, especially upwind, makes it possible to explore farther and it is definitely more fun.
The accurate foil shape (NACA 0012 section) and high aspect ratio are what makes these CNC machined foils perform so well.

Machining them from plywood (instead of making them from fiberglass in a mold) is more affordable and there’s not a huge amount of labor involved in going from the kit to finished foils. The result can be really beautiful and tough foils that are lighter than most molded dinghy foils.ptwatercraft.comptwatercraft.com

Unfortunately, the Okoume plywood industry has recently moved to using thicker veneers in thick plywood panels, so instead of the foils being made from 9 ply (12mm), they are now made from 7 plies.
The foils are machined in halves (photo below) and bonded together with vacuum pressure so there are actually 14 plies in a foil that is almost 1” thick.
Machining foils from plywood is the ultimate way to find defects hidden within the layers. All of our foils have some visual defects or slight waves in the veneer lines, but sometimes a whole batch of foils will become “paint grade” foils sold at a discount.
From one 4’x8’ sheet of plywood we can machine 12 foil halves, which sounds like a lot, but that makes only 6 foils, enough for 3 boats.

Vacuum bagging the halves together is a laborious process, mostly because the parts have to be held straight when being joined, but we have a new method to try, which could be better.

The machined surfaces of the foils are very accurate and fair, but we sand out the tooling marks after the halves are bonded together. We sand just until the tooling marks start to disappear, and then sand the edges and round the upper (rectangular) parts on the router table.ptwatercraft.comThe design of the foils parts is something we are proud of. The kick-up rudder is simple yet can be locked down or up and can be folded back to fit in a foils case.
The gudgeons are modified (by us) to be the right width for our rudder case and there are scribed marks machined into the case walls to show gudgeon location.
The tiller and hiking stick are Sapele mahogany. The tiller is tapered on three sides in a router jig and the holes drilled in drill press jigs, leaving just the edge rounding to the builder.ptwatercraft.comptwatercraft.comptwatercraft.com


The rigs are an entirely different kind of work for us. The wonderfully lightweight two-piece carbon masts come to us through the windsurfing industry, but we do a large modification to the bottom ends of them to make them strong enough to be socket-stepped.
The boom tubes are made for us by ICE  and they are so lightweight that adding the Harken and Ronstan hardware to the booms just about doubles their weight.

We build the rigs complete. They are ready to use when they leave the shop.

Having grown up dinghy sailing (from a cruising boat mostly), I knew that for our rigs to be successful, they had to extremely easy to use. Carbon fiber spars make it possible for us to build a 13 pound rig. That’s 13 pounds for the mast, boom, sail, running rigging, and the bag that it all fits into.
Set-up and break-down of this rig is fast and easy enough to make a “quick sail” something that one actually does, instead of just thinking about doing it.ptwatercraft.comLike everything else we do, we try to build a lot of rigs at one time. Shown here are 10 rigs worth of spars. The upper mast sections (far right of photo) are the only part that isn’t much work.
The fatter sections are the lower ends of the masts, where all the hidden reinforcement happens.
On the left are 10 booms just started, with only the gooseneck fittings attached.ptwatercraft.comThis kind of work can be stressful, as mistakes would be very costly (the tubes are expensive), but also quite rewarding. The process is refined with every batch we do.ptwatercraft.comThe gooseneck fittings are built this way for two reasons: # 1 is that assembly is so fast. Just plug the boom onto the mast and snap on the tack hook instead of fiddling around with fitting a gooseneck pin into the end of the boom. # 2 is that no hardware is bolted to the mast, which would weaken it. This gooseneck is strong and is very nice to the mast.
The gooseneck fittings are made of molded (vacuum bagged) carbon fiber in long blanks and then cut into strips on a table saw. All very easy until the corner and edge rounding, coating, and drilling, and of course mounting to the booms.ptwatercraft.comptwatercraft.comAll the hardware for sailing and all the running rigging is carried on the boom.
Sheet, vang, and outhaul all live on the boom.
The quick disconnect vang set-up is shown here.ptwatercraft.comptwatercraft.comThe dagger board trunk caps are machined for us from 3/16” G-10 plate. They are machined with a gasket notch and now are machined with a recess for the mahogany stiffener. The recess makes it easy to bond the stiffener in place and also makes the cap significantly lighter.

A good trunk cap is a luxury if you like dry pants and a necessity for towing, and is now included in the base kit.

We sand and chamfer the edges of the caps and riser blocks and we make the stiffeners.ptwatercraft.comptwatercraft.comThe daggerboard trunk cap kit uses many of the same parts that the hatch kit uses, except that the cap uses riser blocks to lift the turn dogs to the level of the cap and custom washers to lift them just a bit more. One of the two washers provides a tie point for the lanyard (see both photos below).ptwatercraft.comptwatercraft.comThe hatch kit will be included in the base kit in 2016 because everyone purchasing the PT 11 has opted for the hatch kit.
The hatch opening and turn dog fastener locations are now machined into the foredeck and we now pre-round the edges of the coaming opening and lid stiffener.ptwatercraft.comThe hatch is flush, which is necessary because it is sat on when rowing with two. It is also airtight (the gasket sits inside a machined gasket notch). How airtight? Removing the lid takes a good pull if the boat has cooled as the vacuum pulls the lid down tight.ptwatercraft.comWe machine a lot of small mahogany parts such as foot braces, back seat cleats, stiffeners, and oarlock riser blocks. We have gotten pretty good at producing parts that are basically ready to install and finish.ptwatercraft.comFoot braces are almost as important as oars when it comes to rowing.
We have experimented with many different types of foot braces and keep coming back to these glued-on Sapele mahogany braces. They are easy to install (with the included template), lightweight, hard enough to hold a finish well, and made from a species that would hold up well even without finish.
The back seat cleats are also shown in photos above and below.ptwatercraft.comptwatercraft.com


The photo below shows three of the finishing steps used on all the cleats, stiffeners, and foot braces.
The piece on the right has had its ends cut to length and angle on the table saw. The piece in the middle has had its sawn faces sanded and sharp corners rounded on a table sander. The finished piece has had its edges rounded with a sharp round over bit in a router table.

All the stock for these parts is run through a sharp thickness planer after cutting to make all four edges smooth before cutting the individual parts.ptwatercraft.com

ptwatercraft.com

To say that we make a lot of these parts is not an exaggeration.
Shown are foot braces and back seat cleats for only five boats.

.

.

.

.

The oarlock riser blocks are not strictly necessary, but they give the sockets more support and give arguably better ergonomics, especially if you like to sit on a cushion when rowing.
A block of wood with holes drilled in it would work fine, but we machine them to the shape of the socket.
Making these parts is laborious and makes sense only if a lot of them are made at one time.
CNC machining them is possible, but would be expensive (5 axis machine) and the parts would still need finish sanding.ptwatercraft.comptwatercraft.com

.

.

.

ptwatercraft.com.

The drill press is used with a fence to drill both large and small holes on center.

The sockets are installed with the screw size that will be used for final installation and marked around as shown.

After cutting the strips into individual parts, the shapes are roughly machined very quickly on a large tilt-table sander. They are then finished on a smaller tilt-table sander with fine sandpaper as shown below.ptwatercraft.comptwatercraft.comThe back seat (also visible in photos above) is made from very tight grain Red Cedar which seems to be an ideal material for a removable seat. It’s very light, looks good, and doesn’t ding up the inside of the boat. We pick through piles of expensive wood to find the nicest pieces, plane them to thickness, and cut them with a template.ptwatercraft.comThe construction manual is what ties all the parts together.ptwatercraft.com

The PT 11 manual has been the largest single effort of this boat. It seems to be paying off as we get very few “tech” calls or calls from builders in trouble.

The only embarrassing thing about the manual is that it is so thick (306 pages) and some find that intimidating.
The reason it’s so thick is that we try to show more with photos than with words and there are more than 700 photos in this book, showing every step of the building process.
The PT 11 is not a simple boat and while the manual needs to be carefully followed, total amateurs have built very nice 11’s and had a good time doing so.

The manual has undergone multiple re-writings (even very recently), which usually involves building a new boat to use as a photo prop for design changes or changes in process or sequence. The result of all this is that the boat is now both better and easier to build.

What do we do with our “spare time”? We make other stuff, such as turn dogs and carbon eye straps. We make these parts for our own boats, but we also make them for our friends at Chesapeake Light Craft, who have managed to sell many thousands of these parts for use on their own kits.

The turn dogs are machined from sheets of Delrin(TM) and we bevel the edges on the router table, which sounds dangerous, but really it’s just mind-numbing (and finger cramping). Small fingers like Ashlyn’s are pretty much a requirement for this job.

ptwatercraft.comptwatercraft.com

..each piece has the upper & lower edges chamfered on a router table...

The carbon eye straps are popular because they look cool, but also because they can be glued to a surface (such as a kayak deck) without fasteners. We make long blanks in a two-part mold (long enough to make 80 eye straps). After trimming and finishing the blank, the eye straps are cut, beveled, and finished by hand. Both the turn dogs and eye straps were just an idea (floated with crude samples) to our friend John Harris at CLC about 5 years ago. These parts now are a small industry and can be seen on boats far and wide (including our boats).ptwatercraft.comWhat’s next for us?
Kit sales in 2015 challenged the production capacity of our shop so the thought of someone else taking over PT Watercraft has crossed our minds more than once. This would allow us to develop other boats and write about  building techniques.
For the present, however, we are happy to keep producing the best kits we possibly can.

RB


This letter came in November and I have the author's permission to post it along with the pictures he sent. It is clear by the pictures, that this boat has gotten some real use. Nothing could please us more. 😉

"The boat went into the water Thanksgiving 2014. Since then I’ve spent a lot of time with it. I have become quite jaded over the years with lots of bluewater miles and lots of hours racing a thistle-not to mention dozens of other boats. However I think I can state unequivocally that this boat is by far the most fun I’ve had on any boat in a very long time.

I have to confess to some off-label uses—on Sunday I was on a lake in Northern Massachusetts and had an adventure in an unexpected snow squall. Gusts 15-20 and horizontal snow. The gusts went away and I managed to keep the boat bottom side down. It took me a long time to regain normal feeling in my toes after I got back to base.

In So Cal (my normal stomping grounds) I can take it lots of places that neither a Thistle or a Canoe (two of my other boats) are comfortable. The Thistle is too much boat for a narrow cove with gusting winds and canoes don’t deal with surf (at my level of skill—though they are fun in whitewater rivers). I bought a small Rocna and use it to anchor and dive off of the boat. Dolphins seem frequently curious about the unusual traffic and check the boat out. You don’t realize how big they really are until you are eye to eye from water level.

In one incautious moment (or of one of several)  on a flat calm day I rowed into a little cove. There was a rock pillar in the center of it, but I didn’t think anything of it. A boat wake from a passing ferry picked the PT11 up and deposited it directly on top of the pillar. I was really worried it was the end of my favorite toy. However when I got back to the dock, there was a slight paint chip aft of the mast area and NO OTHER DAMAGE!  This boat is strong.

In another adventure had a 2+ mile long plane down a lake in New Hampshire in a really big blow. I knew it was a bad idea but I was flying all the way and it was too much fun. I did not succeed in taking the boat upwind. After a couple of capsizes I gave up and left it on the lee beach until the weather changed. I think I would have been OK, but the boat was so slippery inside that I couldn’t get up on the rail between tacks. I simply fell down.

I’ve since put a tasteful patch of non-skid on the floor of the boat, and found that I can feather upwind sitting on the rail, even in a good bit of wind.

Matt Foreman
Newport Beach, CA"

ptwatercraft.comptwatercraft.comptwatercraft.comptwatercraft.com