PT Watercraft designs dinghies that are efficient, functional, modern, and attractive—available as kits you can build yourself. We also carry small boat parts and instructional books.
More PT Watercraft boats are hitting the water! Here are some to spotlight;
Simon and “crew” happy after launching in New Zealand. I quote Simon, “I didn’t really realize how much of a delight to build she’s been until the bumper had been stuck on and I was a little disappointed that there wasn’t anything left to do except go sailing.”
The blog for this build is great. Simon took wonderful photos of his progress. Check it out HERE.
I really like the red on the PT 11! Great choice of color!
Garland has finished his PT Skiff in Virginia! The first one to be built on the East Coast and the first with self bailing installed. Congratulations! Looking very classy!
While taking his time to build the boat, he wrote, ““The other thing that delays me is I enjoy it too much! And it relaxes me. I stand back and admire the quality of the wood, and how things look. Once it takes shape, I’ll admire how the flat panels pull together to make the graceful curves.”Garland says..”we launched Sunday, and carried a real load! Five adults and two dogs. Considering the load, we did well. I was prepared for the boat to be tender, and she was, but not bad.”
Not everyone has a camera handy, even in the age of fancy phones. I still want to congratulate James in Olympia on his launching of his PT 11 this year. I am looking forward to pictures! See his blog with some construction photos HERE. Awesome glosscoat!
Wouldn’t it be fun to have a fleet of dinghies and skiffs at the Port Townsend Wooden Boat Festival in 2014??!! My thanks to everyone for doing such lovely work on their boats. These kits are very detail oriented and our growing family of builders appears to be putting heart and soul into their projects and I must say, it makes us feel really good! Thank you! 😉 PTW
Russell and all of our design consultants have a lot of experience with wood and epoxy boat building and a lot of thought and science went into making sure our boats are designed to be both light and strong. No boat is indestructible of course, but please consider carefully any modifications and feel free to consult us if you have concerns based on your planned use of the boat. We may not have a full time tech line but we do try to be available for customer concerns.
There are lots of ways to personalize your boat but please do not attempt to alter the structure. Also, a well built Pt 11 is a valuable boat and modifications could negatively affect resale value.
Boat building is a creative process. With our kits, it may be said the Russell has thought of ‘everything’ and thus, the margin for builder inventiveness is limited. I beg to differ and I have great faith in each person’s ability to creatively personalize their boats! It is also our hope that the building experience in itself serves the creative spirit well and the end result is a boat that makes the builder proud and happy. It is difficult to make guarantees, and especially so if any part of the design and/or the described building method, is omitted or modified.
In reference to some questions we have received ; Flotation vs Storage; about the PT 11: The three compartments, one in the bow and the two in the stern, are completely sealed flotation and have the same value as foam flotation in this type of boat. If access ports to flotation compartments are installed, equal foam flotation would then be required to replace the sealed air. This would be a lot of work and totally pointless. Trying to use designated flotation compartments as storage can be dangerous if the boat flips or floods. On the PT 11 & Spear, there is a large storage aft of the mast step with ample space and the PT Skiff has 3 separate storage areas. We had to calculate flotation for the PT11, the non nesting PT SPEAR, and the PT SKIFF in order to satisfy the USCG safety guidelines. It is the builder’s responsibility to abide by those rules, and, it is just plain smart.
Re-enforcements; Any additional wood or glass than what is prescribed in the manual, serves to add weight and will not necessarily make the boat any stronger than designed. Our boats are already designed with heavier glass on the bottom and solid fiberglass caps on the skegs for added toughness. If it is expected that the dinghy will be typically dragged over rough landings rather than carried, one could beef up the fiberglass on the bottom further, but it will add weight.
The transom, as designed, is strong. The rudder is a kick up rudder so there should be no chance of ripping off the transom of the boat with this rudder. If you plan to use a small outboard, (max 2HP) you would use bearing strips on the outside and clamp pads on the inside. Builder resources; Our PT 11 family is growing. This is very exciting for us as we are a small company of just Russell and myself. Even more exciting is that our customers have been building beautiful boats! This year, 2013, we established a registry of sorts (see the map) as an owner/builder resource and aim to create an interactive community. (see our Builder Center page) The questions, comments, shared experiences of each builder are all welcome material that I will look forward to adding to the blog for others to learn from and enjoy. Our heartfelt thanks to our customers, followers, and friends who share their opinions and enthusiasm about our products. We would not be here without you.
When it was suggested by our local sail maker (NW SAILS & CANVAS) that we should come up with a distinctive insignia for the PT 11, I had to do some research. I looked at hundreds of existing insignias for sails. Some were really fancy, others were on the verge of pathetically bad, and others were very simple and yet, very effective. My goal was to create one that fit into the latter category. I had some pretty bad ideas along the way.. The Pacific Swift silhouette was a step in the right direction. From here I personalized it with the signature puzzle joint from our local CNC shop,(Turn Point Design) used in all of our kits in place of the traditional scarf joint. I showed it around to my ‘honorary advisers’ (as I generally do with most of my ideas) and I got positive feedback from lots of people. It stuck and.. is on all of our sails and much of our promotional materials. Below is the final insignia design for Port Townsend Watercraft’s sailing dinghies. 🙂 PTW
PT Watercraft’s PT11 sail insignia is a Pacific Swift silhouette
Having a bailer in a dinghy is a very important thing. Dinghy sailing in gusty wind can get wet, especially if the captain is not paying attention and dips the rail. Russell came up with a handy bailer idea. This oblong fabric softener bottle offers both a wide mouth scoop and a low profile that fits neatly below the seat tongue. Stashed inside for minor spray is a sponge. This green sponge was a waste of pennies. It does little more than spread spray water. A good absorbent sponge like this PVA sponge or 3M C41 7456-T is a much better choice. I personally like these pop-up sponges but they do not hold up well if left outside, which is kind of the point environmentally.. 😉 This bailer installation does not interfere with nesting. There is room to spare. We used carbon glue on eyestraps and a bungee cord to keep the bailer stored out of the way but within quick reach.
Experiment 2012 to create a kit for oars: High density foam and carbon fiber blades. Unfortunately, these kits would end up being very expensive as they require a lot of time and effort on the part of Russell. With all that he has to keep up with, this kit would not make sense for us. We have decided to leave oars to oar makers but thought you might find these pictures interesting. Please see our oars links page for oar resources. Do you know of oars that you really like? please let me know so I can add a link to the links list! Thank you.
1
2
3
4
5
6
7; finished oars. solid epoxy edges. Douglas fir shafts.
Would you like to make your own oar blades and small hardware? Russell has published an e-book /book about working with epoxy. More detailed topics are on the agenda for future publication. Have you seen our e-books/books page?
Our first PT Skiff builder, Jan, who built the PT Skiff, “PIKA”, continues to create beautiful boats. “PIKA” was by far, not the first small boat he had built, but I will venture to say that it was a turning point for him.
Jan on PIKA in Lake Chelan. Photo courtesy of Jan and FamilyPT Skiff, PIKA, and family touring Puget SoundRussell and Jan talking boats…
Exploring and camp cruising in ‘PIKA” with his family led Jan to dream of a bigger, fuel efficient motor boat. When he could not find quite the design he wanted, he noted what he liked about the many possibilities and after absorbing Russell’s confidence in him, combined them into an original design. Jan’s experience and detail oriented, methodical mind made him a good candidate for this. The result is “SYHOJA”, a 22ft cedar strip planked and carbon sheathed, retro and yet very modern motor boat. With her modified “V” hull shape “SYHOJA” runs on a 60HP E-tech outboard, quietly and efficiently. We caught just a little of “SYHOJA” on video at the Port Townsend Wooden Boat Festival 2013.
See the end of this post for Jan’s description of the project and the boat specs and be sure to note the 16knots with 2.2gal/hr fuel consumption!
SYHOJA, at the PT Wooden Boat FestivalHeading back to Seattle from Port Townsend on SYHOJA
Jan is now looking into a ‘tender’ for “SYHOJA” and he favors the PT 11 as both tender and toy. He recently came to PT from Seattle to fit a PT11 on board. The two positions tried were both a pretty neat fit. A third idea was to make a stand for holding the nested boat on edge. The idea here is that even small boats often need a tender and a good nesting dinghy is a great option. With small boat camp cruising getting ever more popular, we are seeing an evolution in home built, “pocket” cruisers. The mind set is leaning ever more towards fuel efficiency, minimal cost, and minimum waste. Further, people want to spend less effort on transporting and storing their boats, and are having more fun with less. Having a good rowing/sailing dinghy as part of the package, really adds to the fun.
Fitting the PT11 abeam on SYHOJAFitting the PT11 fore and aft on SYHOJA
“PIKA” and “SYHOJA” have been family projects for Jan & Holi and their daughter, Sydney. I find it inspiring to see how they have enjoyed it all and each is personally invested in ownership of the whole process of dreaming, choosing, creating and using their family boats. I have no doubt that the next project will be as beautifully executed and thoroughly enjoyed as their previous endeavors. Russell and I really like the idea of getting more individuals & families involved in back yard boat building and away from today’s addiction to electronics.
“SYHOJA” is a one off design and therefore, plans are not available. Now that “SYHOJA” is the family boat, “PIKA” is actively for sale.
Designer notes & SPECS from Jan: “The concept for SYHOJA was for a fuel efficient planing cabin cruiser for a couple + teenage daughter (if she wanted to come along) for day trips and up to week long cruising in the PNW. While we do not need to travel at excessive speeds in our beautiful cruising ground, we have found that 14-16 kn is a nice cruising speed to cover the sometimes larger distances between anchorages, and having some speed in reserve allows a small boat to make use of a weather window or even “make a run for home”. While small by many standards, 22 ft was the absolute longest hull I could build in my 2 car garage, and even this required a temporary addition to provide the necessary space. However, we are content with few amenities and are comfortable operating a small boat in the reasonably sheltered waters of the PNW. For the brisker days we have a full cockpit enclosure, which also provides our “living room” while at anchor.
For our inaugural family cruise we spent 8 wonderful days this July along the Sunshine Coast of BC and Princess Louisa Inlet. SYHOJA exceeded all of our expectations. ”
LOA: 22 ft, including stern scoops which serve as hull extensions and swim platforms
BOA: 8’2″ which includes generous bow flare
BWL: 7’2″
Displacement fully loaded: 2,700 lbs
Displacement light ship: 1,475 lbs
Engine: 60 hp E-Tec
Fuel 29 gal
Fuel consumption @ 16 kn: 2.2 gal/hr
Range @ 16 kn 210-220 miles
Cruising speed: 16 kn
Max speed: 26 kn
We made it through another great festival! The festival weekend is a long one for us. It seems like we never really stop talking for 3 days. But our local wooden boat festival is so much fun and the people who visit us are truly wonderful. It is great to see our customers, old friends, and make new friends as we all talk about something we are passionate about; boats. This year the Nesting Dinghy and the Non-Nesting dinghy were both well received by our audience. Our apologies to those who wanted to see the PT Skiff this year. We did not have one to show and had we had our thinking caps on straight, we might have arranged it.
I did not get many pictures this year either. I will include a few here and a video link that came to my attention this morning. Someone had a really cool drone filming the festival from above. Check it out. http://www.youtube.com/watch?v=JBETdyNi0y8
Thank you to all and we hope to see everyone next year. Mark it on your planner!
Mornin’ Skip! Skip Allen’s “Wild Flower 2” in the foreground.Builder of the PT Skiff, PIKA in his new, family built, original design, motorboat, Syhoja. Powered with a 60HP E-TechThe ferry looking like a horned sea monster in the fog.Across the docks.A classic PT Wooden Boat Festival scene..Oh those reflections…Morning RowersSteam and Sail in the fogRussell and Dana doing the nesting dinghy demo. We should have kept count of how many times we did this. Good thing it is so easy to do!
The water is cold here. The idea of jumping into it takes some courage so this video has been put off for way too long. Russell actually did about 8 capsizes while I happily recorded them….or so I thought. In sunlight I could not see if I was recording or not and guess what… I had some nice video of my feet, and Russell getting ready to capsize.. I had to ask him to do it all again and by this time he was pretty chilled with teeth chattering and all. Well, he persevered and I got in there afterwards so that he would not be the only one to freeze, and because I had never done it before! It was much easier than I thought it would be. Lucky me had a wet suit but the initial shock of the cold water was not wasted on me even through the wetsuit. So the footage we got was limited but hopefully fun and informative. If for some reason you cannot view it, please let me know. I did use some music that may cause it to block. If that happens, I will have to change the tunes.. PTW 😉
I want to share this video produced by Off Center Harbor last year. We are gearing up to present the PT 11 and the PT Spear in a booth along side WEST SYSTEM Epoxy, so be sure to bring your epoxy questions! The PT Skiff might make an appearance as well. This is a really fun event and we hope to see you there. (PTW) (Click the link below to see the video)
Advance your epoxy skills and waste less, sand less, and achieve beautiful results. Russell’s many years of experience have taught him more than a few valuable techniques. This full color 40 page e-book covers the basics of gluing, filleting, glassing, and coating. You can check it out Here. We also have an affiliate program set up if you would like to carry this handy book on your website.
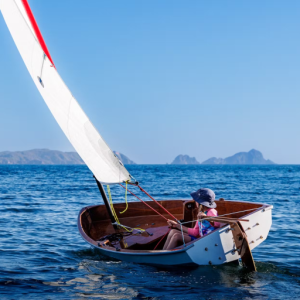


 Garland says..”we launched Sunday, and carried a real load! Five adults and two dogs. Considering the load, we did well. I was prepared for the boat to be tender, and she was, but not bad.”

 The Pacific Swift silhouette was a step in the right direction. From here I personalized it with the signature puzzle joint from our local CNC shop,(