Users of the PT 11 and PT SPEAR have generously shared their solutions for lifting and hanging their boats on the mother ship. Since I get the question from time to time, it seems best to post these ideas in printable format to inspire or guide others.
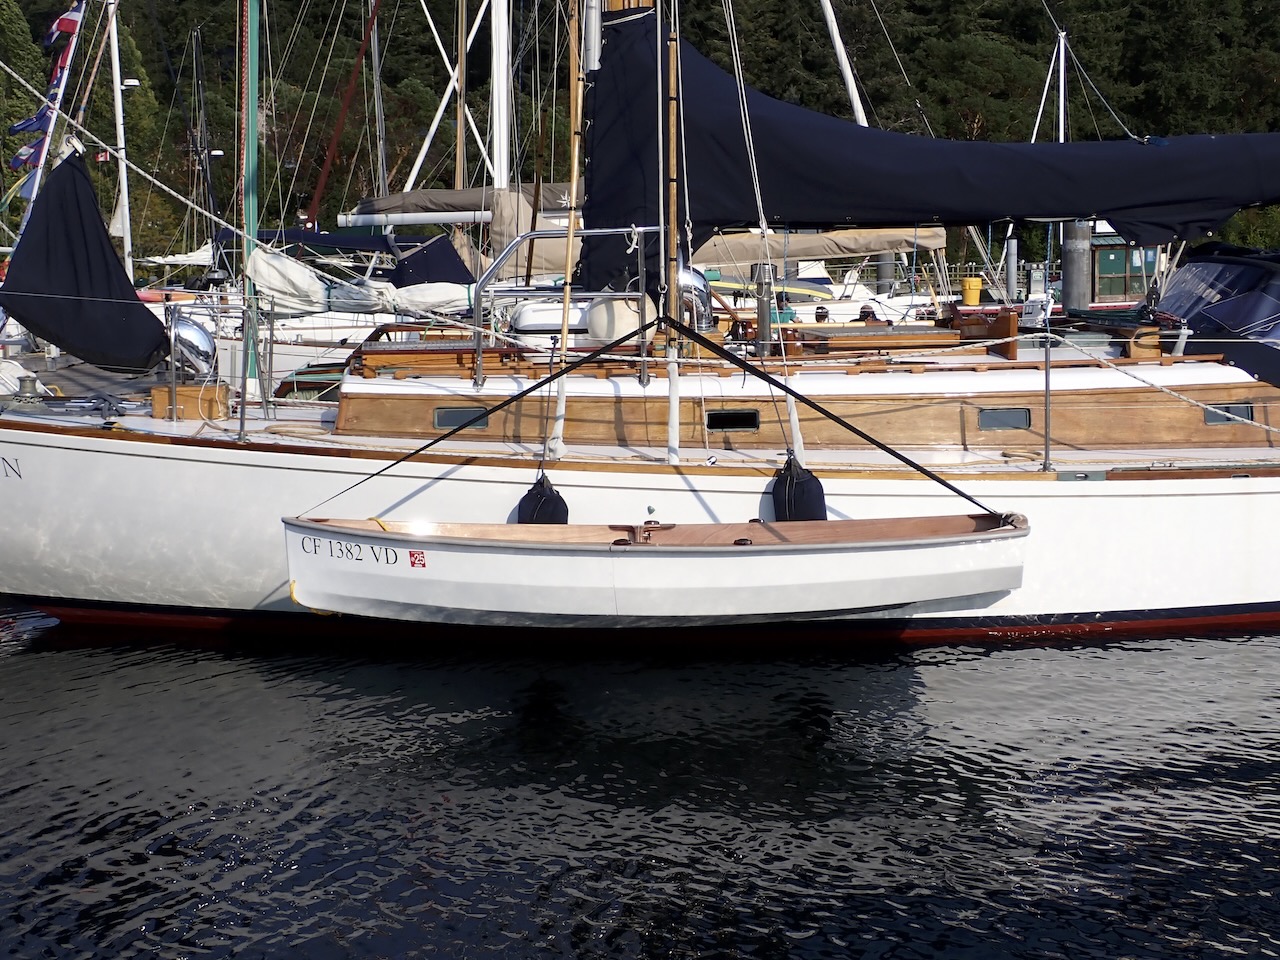
A PT 11 nesting dinghy gets lifted and hung along the mothership's gunwale when at anchor or in port described in this printable PDF.. PT11-BEAN's-Lifting Bridle idea
PT 11 Nesting Dinghy, "Bean" visiting Deer Harbor, WA
As new photos arrive I will update this page. If you have set your PT 11 or PT SPEAR up for davits or created a sling or halter you are happy with, please send us some pictures! ptwatercraft@gmail.com works best for photos. Use "PT 11 photos" in the subject line.
People are amazing. Our customers remind us just how amazing they are every time they build a PT 11 and go adventuring in it. I want to start sharing more of those stories starting with a recent update from Professor Fisher.
Terry designed and built a tear drop camper that includes a special hatch on the forward face to accommodate the PT 11.
My plan is to use the boat for sailing on lakes and rowing on rivers. Why not simply carry the boat on top of the car? Partly to reduce air resistance and thus to increase mileage. (The trailer is designed to sit in the slipstream of my car.). And partly for security. (The trailer locks; thus I don't worry that the boat will be stolen when my dog and I go on hikes.)
Now that his PT 11 is almost finished, his next camping trip will include the dinghy.
The most gratifying part of our experience with Port Townsend Watercraft is that it is the 'gift that keeps on giving' when customers write to us with their stories, their joy, and comments like this::
Many thanks for designing such a remarkable craft — and enabling me to build one.
Chesapeake Light Craft has developed canvas covers for the PT 11 nested and assembled. For years we have offered only a pattern for builders to make their own or hire someone to stitch the canvas but we think these custom made covers, made in the USA by Chesapeake Light Craft team members, are a great development. Photo captions lead to detailed information on each style of cover.Suitable for the PT Spear and the assembled PT 11 nesting dinghy
This rugged custom cover will protect your PT Eleven when it is nested, hull up.
This custom-fit khaki cover is made specifically to fit over the nested hull of the PT Eleven, providing a “glove-like” fit that is well suited for use during storage or when traveling. The padded reinforcements at key stress points provide extra durability for many years of trouble-free performance.
This product is made from TopNotch® 9, a 100% solution-dyed 7.6oz marine grade polyester with a fluorocarbon finish, creating a fabric that is breathable, reversible and water repellent. The solution-dyed polyester fabric won't fade and provides superior strength compared to other solution-dyed fabrics. Excellent protection against cold-cracking also. The fabric is breathable to help allow interior moisture to escape.
This cover features:
Khaki color.
Heavy duty 1/4″ draw rope encased in the hem for easy installation and snug fit.
Vinyl reinforcements* sewn in at stress points (*when applicable).
Loops sewn into the four corners for tie-down.
Join seams are folded four-ply with no raw edges. Double-stitching and weather-resistant anti-wick thread are used throughout construction to add strength and durability. Double reinforced tie-down loops are sewn into the hem.
Note, this product is made to order and may take a couple weeks to produce.
EPOXY Lessons series preview on Off Center Harbor (membership recommended to view in full. Builders of the PT 11 or Spear: Contact us for exclusive access)
SCAMP Hatch instructions Plywood SCAMP hatch kits are not available from PT Watercraft. These instructions may provide a loose basis for making your own.
We are ever grateful and appreciative of the care PT 11 builders put into their projects and then to receive photos and updates on progress & adventures is such a huge bonus. Here are some of the images received in the second half of 2024 as well as a reference to a Lattitude 38 article recently published.
See UPDATES at the bottom of this article. (June 2025)
Some emails cause our hearts to skip a few beats.
Checking in from our cross-country road trip. We stopped by a lake in Colorado a couple of days ago to take the PT11 out for a sail and noticed something very alarming... The back seat buoyancy tanks have bowed - like the air in the tanks expanded. They have returned to the normal shape again, but the fiberglass strips on the tank joints probably couldn't handle the pressure and have cracked - see pictures attached.
This boat was built at sea level in NYC and the tanks were expanded at roughly 10,000ft. The good news is that they did not explode nor do they appear structurally compromised, thanks to wood/epoxy as a construction method.
Most of our clients have used their boats near where they built them but others have taken their boats from sea level proximity to higher altitude lakes. (These two videos are thanks to Randy and Kim Kerr)
Randy replied to my inquiry about his lake trips: "We've never really taken our PT11 higher than 4000' and didn't notice any bulging in the buoyancy tanks personally. I could imaging customers that span 10K feet in altitude difference could easily see bulging or compressing."
basic air pressure illustration
Because Russell and I initially imagined our boat builders using their PT 11 dinghies primarily for ocean cruising, the influence of high altitude on the air buoyancy tanks simply did not come up but once in 15 years. That customer installed a relief valve but we never heard exactly what type or how well it worked. We imagined that as a one-off but we are also under the constraints of the USCG rules that prohibit access ports or any compromise of a sealed air tank if it is to be counted as buoyancy. Hence we moved on.
Times are changing however, and it appears that more PT 11s are on road trips and out lake sailing so, it seems prudent to address the air pressure question for anyone planning altitude differentials of more than 4-5000ft with their PT 11 or SPEAR dinghies.
There is an argument for drilling a 1/4" hole on the vertical face of each of the three air buoyancy tanks and filling them with thickened epoxy. (This keeps moisture from reaching raw wood.) If you then notice any expansion at altitude, you have a safe spot to drill a very tiny hole to relieve pressure. The hole could then be taped over until the boat was back at its normal altitude when the new hole could be filled. You would have to choose a time and place with a stable temperature to fill these holes. In an emergency, go ahead and drill tiny holes to keep damage from occurring. Just know that refilling those holes in a way that keeps the wood dry will be important.
One builder currently working on his PT 11 is planning to use it almost exclusively on mountain lakes and had already researched the pressure valve question before I reached out to ask about it. Have you heard of Gortex Dots? He has generously shared his in depth research and conclusions in this PDF article. An Idea for the Vented Volume Dilemma
The standard rule should still be noted for air buoyancy tanks: no access ports or compromise of the seal unless you plan to fill the voids with flotation foam. These dedicated air tanks (forward of the mast step and the aft seat boxes) are not intended as storage and using them as such could present a serious safety risk if you flood the boat. If you truly need to modify the design to fit your intended use, how you manage that is your responsibility, so be informed, do your own research, and think 'safety first'.
June 2025 UPDATES
A PT 11 builder came up with an elegant solution to the venting option but it a manual vent, meaning, you must manually open the vent (a screw installed into the back seat glue cleats and the mast step) if there seems to be pressure building up and close it once pressure is relieved. PT 11 screw pressure valve info1.(1 page PDF)
The second update refers to a system that FYNE BOAT KITS in the UK uses for most of their kits. They point out that not only elevation but temperature extremes can cause issues with air buoyancy tanks. Gore-Tex-Vent-Installation
FYNE BOAT KITS in the UK has been producing Chesapeake Light Craft kits for over a decade. They have wanted to produce the PT 11 for equally as long but we had not figured out how to make that work.
With the collaboration of Chesapeake Light Craft, and a stipulation that almost all parts be produced on the Eastern side of the Atlantic to avoid hefty shipping costs and import duties, progress towards this goal has been made. Fyne Boat Kits has spent valuable time and energy over the last 2 years to source and procure what they need to make an authentic PT 11 kit.
It sounds like they have reached the point where they can start production of the PT 11 Nesting Dinghy kit by the end of 2024. This is a huge accomplishment and we tip our hats to owner, Phil Smith, whose dedication and persistence are truly admirable.
Click this image to reach FYNE BOAT KITS PT 11 page.
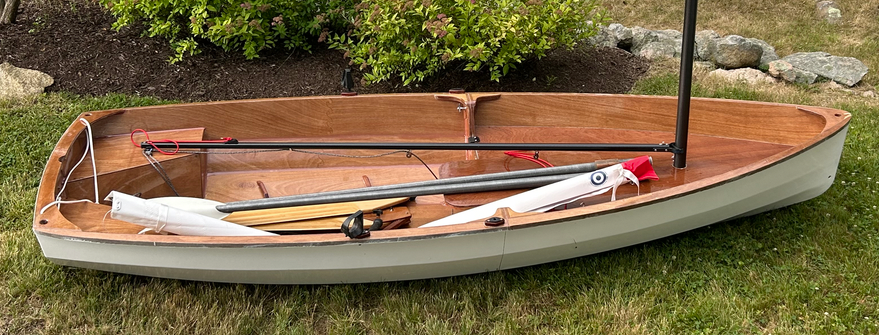
As of today, June 3rd 2024, this PT 11 nesting dinghy is listed for sale on Facebook Marketplace. These do not come up for sale very often. This boat is nicely built, lightly used, includes sailing options and oars. For someone who can pick it up in Washington State. Click the image to visit the full listing, see more pictures and contact the owner.
In the building manual for the PT 11 it says: "The PT 11 sailing rig is designed to be light and easy to use, not to be bullet proof." In developing this rig, weight and ease of use were the biggest priorities. "Hiking (sitting on the rail and leaning out) is okay for one person to do but not two. Sailing with two and having one person hiking and the other sitting inside is okay too, just not two sitting on the rail."
The PT 11 sailing rig arrives ready to use with all of its running rigging. One small item is up to you and that is the traveler line. This is the line needed to clip your main sheet to.
You can tie a line with a little slack, using the existing holes on the transom inwale to clip your main sheet onto that. This self steering blog post shows this method.
The traveler can be be made shorter as shown below by drilling holes about 7" from the centerline (14" apart). We drilled 5/16" holes and then applied a few coats of epoxy to the walls of the holes to seal the plywood.
The traveler line can be around 3/16 diameter and be held with stopper knots underneath the inwale.
A short PT 11 travelerThis image shows the tiller/hiking stick in the self-steering position. This is good for brief periods and works best when going upwind and only works when the boat is heeled.
When sailing, if you feel resistance on the tiller, check to see if the rudder is completely down or if you have caught kelp or other debris. Keeping the threads in the knob clean and greased is important. The threads in the knob are brass and the pin is stainless steel so it will corrode. A bit of maintenance will insure the knob does its job and keeps the rudder down.
For post-2021 kits, use the forward daggerboard cap turndog to hold down the daggerboard by closing it over the hold down pin.Pre-2021 daggerboards are thicker and shaped differently at the top. A loop of line at the right length becomes a hold down when captured by the aft turndog.
The Tack clips onto the boom as shown. (This image shows an older style gooseneck.)
The outhaul (asymmetric) snap hook clips into the clew and the outhaul line should be snugged through the v-cleat on the boom:
PT 11 Outhaul configuration during a regatta. Schooner Sir Isaac in the background.
The vang clips into the eye strap on the mast.
The vang controls the twist of the sail. Controlling twist is important for getting the most power out of the sail, but don't overdo it! Some twist is good but the boom isn't un-breakable.
When adventuring or in fluky winds, we carry our oars with the oarlocks in the forward sockets and the handles tucked under the bow as shown above.
If you are new to dinghy sailing, avoid this use of a slip knot on the main sheet. Unsuccessfully yanking the slip knot free in a puff is a recipe for capsize.
If you capsize when sailing, after righting the boat, make sure the mast is fully seated in the socket before taking off again.
If you are new to dinghy sailing, it is better to start in protected waters or when there is an onshore breeze, preferably steady but not strong.
Keep your weight forward for speed, but move aft in stronger breezes and downwind sailing.
If the water is cold in your area like it is on Puget Sound, wear a wetsuit or drysuit in case you end up in the water. Hypothermia is no joke. It is always advisable to wear a life-jacket/PFD.
Learn to stall, or "park" by pointing into the wind and letting the sheet go. When the wind picks up more than you feel ready for, or you have taken water over the rail and you are feeling a little out of control, this is a good way to take stock: bail, check your rudder and daggerboard for kelp, sort out lines, and take a swig from your thermos before heading off again. The sail will flap and make noise but that is not a problem. When you are ready, reign in your sheet, and continue or head for safety.


 Suitable for the PT Spear and the assembled PT 11 nesting dinghy


